Chicken tikka masala recipe


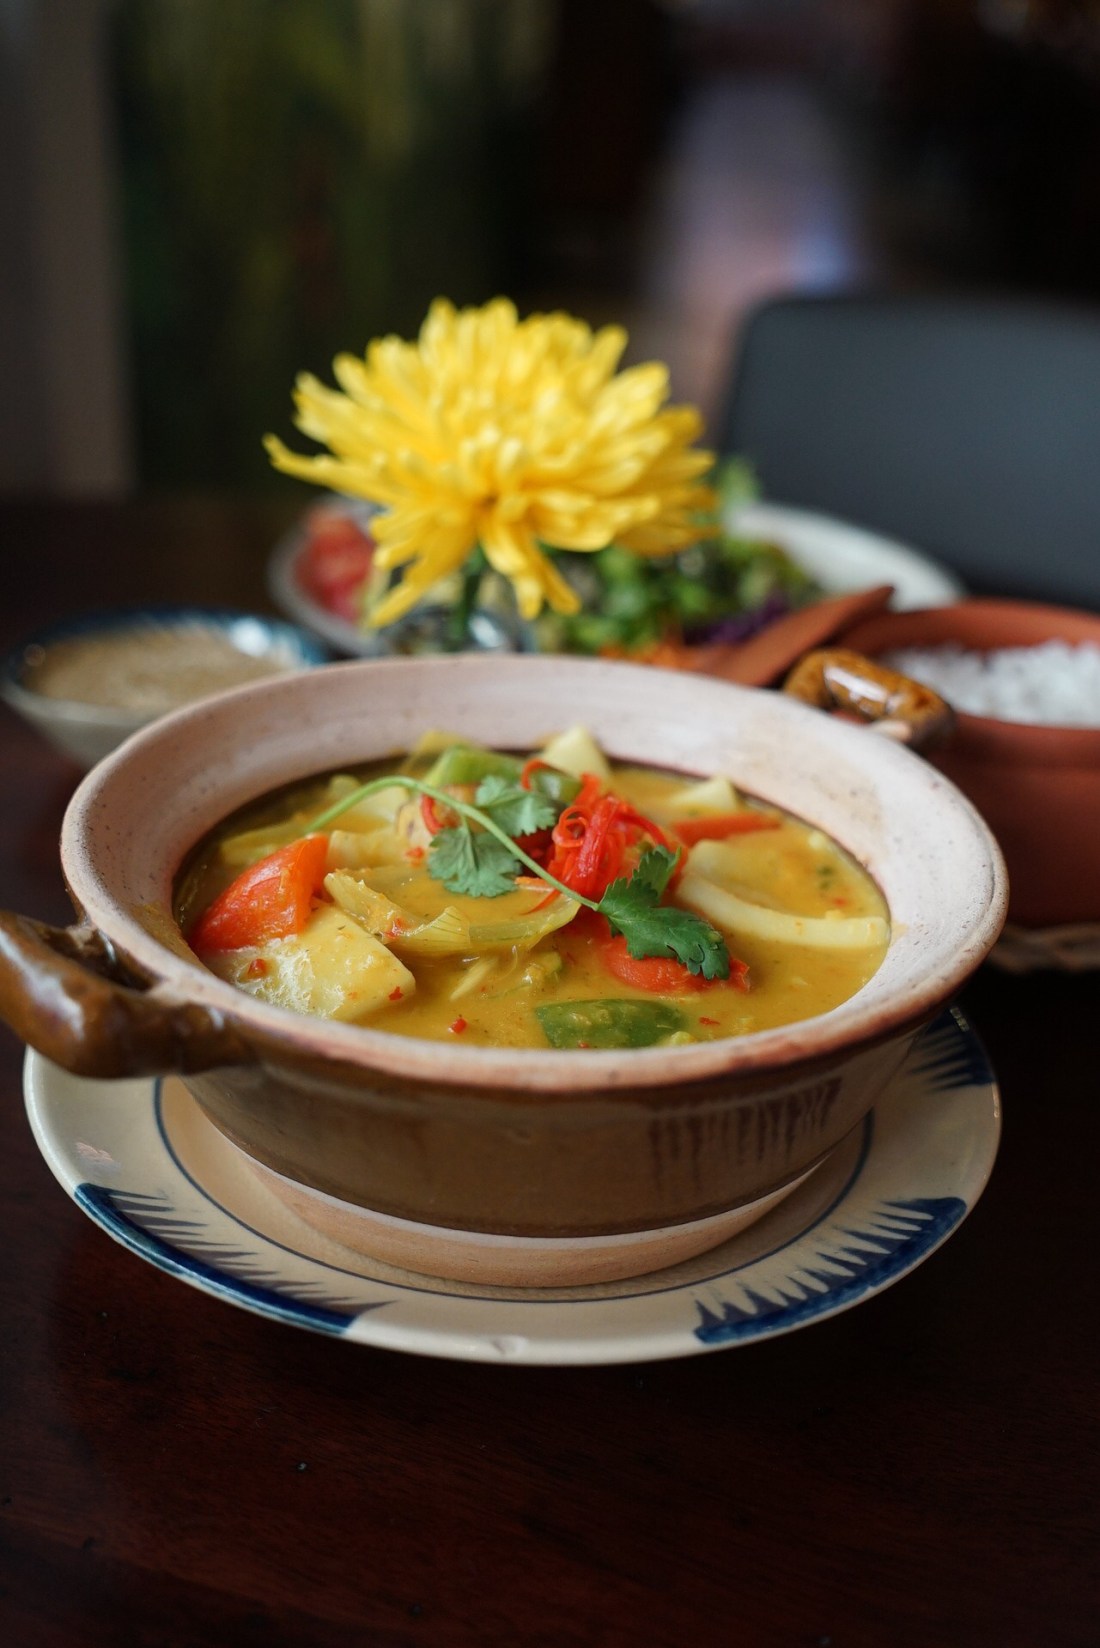
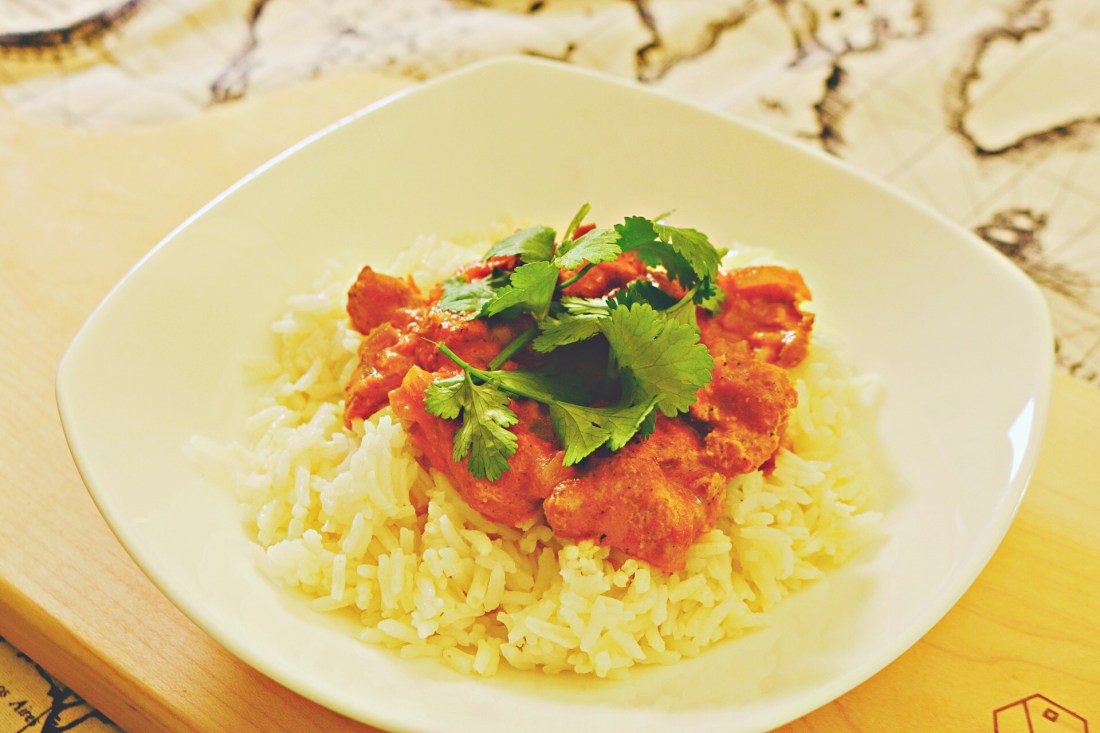
The dish of a thousand recipes and probably most well know as being an ‘English’ curry.

Over the years I’ve seen and cooked so many variations of this. This is the recipe that I’m currently using.

I’ll do a post soon on how to butcher a whole chicken (saves a lot of cash!) but you can use any kind of chicken meat you like, alternatively the sauce (which is made separately) can just be a base for a vegetable curry.

Ingredients (serves 4-6)

For the sauce

  • 2 large onions, or 3-4 medium
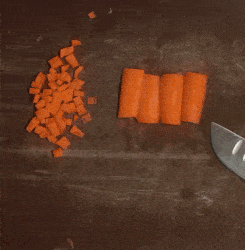
  • 2 red peppers
  • 2 tins of chopped tomatoes
  • 2-4 tbsp garlic paste
  • 2-4 tbsp ginger paste
  • 2 tbsp tomato paste
  • 2-3 tbsp cumin seeds
  • 5-10g dried curry leaves
  • 1 tbsp paprika (not smoked)
  • 2-3 tbsp garam masala
  • 2-5tbsp double cream
  • Salt and pepper
  • Chilli powder (optional)

For the chicken

  • 1 whole chicken, cut into parts and thickly diced, or 500-900g of thickly diced chicken meat
  • 250-300g natural yoghurt
  • 1 tbsp garlic paste
  • 1 tbsp ginger paste
  • 2-4 tbsp mint sauce (shop bought or homemade)

Equipment

  • Mixing bowl
  • Knife
  • Chopping board
  • Immersion blender/ food processor
  • Roasting tray or oven dish
  • Saucepan
  • Wooden spoon
  • Cling film
  • Tin foil
  • Slotted spoon

Prep and cooking (optional 1.5-2+ hours)

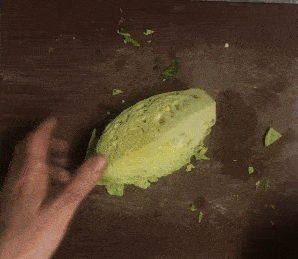
  1. First to marinade the chicken, put the largely diced meat into a mixing bowl with the yoghurt, garlic, ginger, salt, pepper and mint sauce. Mix well, cover and put in the fridge (preferably overnight).
  2. Finely dice the onion. Heat some oil on a medium heat in a pan, when warm add the onion, cumin seeds and curry leaves. Cook for 3-5 minutes stirring occasionally until the onion is soft.
  3. Slice the red pepper, doesn’t have to be neat but not too thick, add to the pan and cook for another 3-5 minutes.
  4. Add the garlic and ginger paste and cook for another 2-4 minutes.
  5. Mix the dry spices with a little water to make a paste, then mix with the tomato paste, add to the pan and cook for another 3-5 minutes.
  6. Add the tinned tomatoes, reduce the heat and simmer for 15-20 minutes.
  7. Remove from the heat to cool. Heat the oven to 180°c (fan) and put the chicken in a roasting tray or oven dish and cover with tin foil, cook for 30-40 minutes until the chicken is cooked.
  8. Remove the chicken from the oven. Now blend the sauce with your immersion blender/food processor until smooth and return to a low heat.
  9. Remove the chicken from the baking dish with a slotted spoon into the sauce. Pour any remaining liquid in the baking tray into the sauce, cover with a lid and cook for 20+ minutes.
  10. Tikka break and have some curry.

Chicken tikka, tell me what’s wrong..

Another chicken tikka recipe to add the the masses.

It seems there’s a ton of claims as to where it originated, mainly either India, or the UK but it seems pretty conclusive whoever came up with it was of Indian decent.

The masala refers to the sauce, chicken tikka refers to the marinating and roasting of the chicken.

Supposedly here in England it’s one of our nations favourite dishes!

More recipes soon, feel free to message me with any recipe requests.

Join 1,121 other subscribers

Prep guide; how to cut cauliflower florets


Broccolis ghostly cousin, cauliflower.

Both from the same species, apparently it’s a kind of wild cabbage. (Brassica oleracea)

Cutting them up is easy enough, it’s just knowing the best point of attack, over 100s/1000s of cauliflowers this seems to be the fastest and most efficient method I’ve come up with.

First remove the leaves

Put the cauliflower on a chopping board root factor jug down and from the top use your hands to get underneath the leaves, work to the bottom, squeeze the leaves together at the root and pull, they can be quite too thick so try giving the cauliflower a twist if the don’t come loose.

remove the leaves

Cut around the root

I’ve not done the best job with the camera angle here but it should make sense. Take a knife and insert into one edge of the root, then cut round in a circular motion whilst moving the knife up and down, this should result florets with the top still in tact.

cut around the root

Trim the top

Cut the remaining florets off from the top.

trim the top

Tidy up

So the cauliflower all cook evenly you want the florets to be similar sizes, so take the larger florets and cut them in half.

similar size=even cooking

“I keep randomly shouting out ‘Broccoli’ and ‘Cauliflower'”

The doctor said it might be florets.

Make sure you’ve got a nice sharp knife for this, the toughest part is piercing and cutting around the root but it doesn’t take long to get the hang of, once mastered this method can prep a whole cauliflower in about 30 seconds.

More prep guides coming soon, if you have a request for a particular prep guide give me a message on Facebook.

Join 1,121 other subscribers

Prep guide; How to slice Savoy cabbage


Lettuce pray

The holy cabbage, maybe not so holy but more leafy.

The savoy is a lovely, leafy winter vegetable named after the Savoy region in France, though apparently it originated in England and/or The Netherlands.

When cooked (which is generally needs) it holds its texture much better than regular white or red cabbage, which are better to eat raw (I.e. coleslaw, savoy can still be used for coleslaw).

It keeps in the fridge for a good few weeks, not quite as long as the normal red/white cabbage.

Try to keep it dry when storing, any moisture will make the cabbage deteriorate quicker.

It pairs up well with so many flavours, so let’s crack on with how to slice these leafy beasts up, all in all when you get the hang of it it should take about 3-5 minutes to slice a whole Savoy cabbage.

Remove the loose leaves

These are the outer leaves that are a darker green than the inner cabbage. You want to peel back until you have a tight head of leaves.

remove the loose outer leaves

Cut the stems from the middle of the outer leaves

Take the outer leaves you have just removed and 1 by 1, cut out and remove the centre stem of the leaves. You don’t have to do this but it’s perfectly edible.

Remove the centre stem from the outer leaves

Slice the outer leaves

Pile these on top of each other and with a sharp knife slice/shred and put to one side.

slice the savoy

Trim the root

Return to the head of cabbage and put it on its side, cut the extended bit of root off.

trim the root

Cut into quarters

Place the cabbage top down so the trimmer root is now face no upwards. Cut the cabbage directly in half, then cut each half in half, so each quarter has a quarter of the root at the bottom.

cut into quarters

Remove the root

Now, at about a 45° angle, cut the root out of each quarter so you’re left with 4 wedges of Savoy cabbage.

Remove those roots

Finish up, choppy chop chop

Now, 1 by 1 take each wedge and slice as thick or as thin as you wish. Add to a pot of boiling water for about 10 minutes for simple cooking, I’ve got some great recipes involving a nice bit of savoy, will get round to uploading eventually!

choppy chop cabbage

Join 1,121 other subscribers

Pastry creme recipe (Creme patissiere, creme pat etc)


Not to be confused with creme anglaise, which is just pouring custard, Creme patissiere (or as we call it pastry cream) is a wonderful thick, set custard.

If you know how to make custard then you won’t have much trouble here, but it’s not that hard so on to the recipe.

Ingredients (serves 3-4)

  • 3 egg yolks (about 50-60g)
  • 45-50g caster sugar
  • 250ml of whole milk or cream (why not double cream 🙄)
  • 15g plain flour
  • 20-25g cornflour
  • Flavouring (optional) vanilla is a must in my opinion, even better if you can get some fresh pods.
  • Butter, at room temperature(optional, if you want it even creamier)
  • 100ml whipping/double cream (if you want it even lighter)

Equipment

  • Mixing bowl
  • Whisk and/or electric whisk
  • Saucepan
  • Measuring jug
  • Sieve (optional)
  • cling flim
  • (plastic) Container big enough to hold it and fit in the fridge (measuring jug?)

Prep and cooking (5-10+ minutes)

  1. First put the milk/cream in a saucepan on a medium heat with the flavouring (if using). Keep an eye on it, the most common mistake here is letting the milk boil over so don’t put the heat too high. If you have to set a timer for every minute or two to remind yourself then why not.
  2. Put the egg yolks in a bowl with the sugar and whisk well for a minute or two, the should be a pale golden colour, slightly thick and nice and foamy.
  3. Sift in the flour and cornflour if using a sieve and mix well with the egg mix.
  4. Now the milk should be nearing boiling, if not either wait or turn the heat up, just before it comes to the boil take it off the heat and pour it in a measuring jug.
  5. Now pour the hot milk on to the egg mix while whisking, I would advise using a hand whisk here as an electric one can get custard bloody everywhere if you’re not careful.
  6. Pour it all back into the saucepan and return to a medium heat while constantly whisking, it should go nice and thick after a few minutes.
  7. Pour into a container and cover with clingfilm immediately, this stops it drying out, creating a skin.
  8. When it’s cooled down put in the fridge.

Optional steps

  1. If using butter then monte in a few cubes, 50-100g depending on your taste. To monte means whisking the butter in while still warm/hot so it melts in whilst whisking, this creates a wonderful creaminess.
  2. If using double/whipping cream the whip it, or make a chantilly cream (just remember the extra sugar will add to the sweetness) and fold in to the pastry cream when it’s cold. Folding in is easier with a spatula (I find) and is gently mixing the two together, keeping all the air that’s been whisked into the cream rather than bashing it out.
  3. Eat 2 litres of the stuff.. yeah that didn’t happen

It should be put into custardy

Only because it so delicious, this stuff originated in France, as you’d probably expect, some time around the 16th century I believe.

It’s most commonly used as a filling for cakes, pastries, pies or tarts and is like the crack cocaine of custard.

Maybe? I bloody love then stuff it goes well with nearly anything sweet, pancakes for example, it’s even nice on toast 😂

Looking at price, if you only use the basic milk, egg and sugar (which is still delicious!) it can be a low as about 13p a serving, or about 50p for the above amount.

If you go the whole hog with cream, butter and fresh vanilla pods, whilst you’ll be floating in creamy buttery sugar heaven for a while its going to come at more of a cost, £1.39 a serving or £5.56 for the above recipe!

That said the main cost here is the vanilla pod (about £3) so subbing this for some extract or even flavouring can cut the cost of a deluxe pastry cream to about 50p a serving, so still not too bad for a bit of luxury.

Some more prep guides and recipes coming soon!

Join 1,121 other subscribers

Chantilly cream/sweet cream recipe


Something that you hear paired with fancy French desert names and alike, chantilly cream can be whipped up in a grand total of about 3 minutes!

This recipe is a another request from the Facebook page, I’ll also be doing one for a silky creme patisserie soon after 👌🏻

To the recipe!

Ingredients

  • Whipping cream or double cream, I prefer double
  • Caster sugar
  • Flavouring (optional) vanilla is the most commonly used

Equipment

  • Measuring jug
  • Mixing bowl
  • Hand whisk or electric whisk, or food processor with cream whipping attachment

Cooking and prep (3-10 minutes)

  1. Measure out the desired amount of cream, it will generally double in size when whipped. Pout on mixing bowl/food processor, I usually leave it in the measuring jug and whisk with an electric hand whisk.
  2. Add sugar, I usually use about 10-15% of the amount of cream (or 1 tbsp per 100ml of cream) the more you use the sweeter the cream will be but also it will make it heavier rather than nice and light, as chantilly cream should be.
  3. Add the desired amount of flavouring, try not to overdo it.
  4. Whisk until the cream just holds its shape in peaks and is smooth, silky and glossy. If you over-whip it it will got claggy and if you overdo it a bit more it will split. As it gets thicker slow down the whisking or stop every so often to check.
  5. Voila! Pipe it, spread it, spoon it into your mouth, whatever!

How does Reese eat her cream?

Witherspoon.

So it’s literally whipped cream, with a bit of sugar and a fancy name.

Costing this recipe the price is mainly in the cream which I believe is about £4 a litre.

Though it should double in size the weight will pretty much be the same apart from the addition of the sugar and flavour as the only thing you’re adding is air (by whisking) and last I checked it doesn’t weight much.

Any problems with the execution don’t hesitate to get in touch.

Join 1,121 other subscribers

Chinese curry sauce recipe


Can ya smeeellll, what the wok, is cookin’

Always a distinctive flavour, but I always hate how they put peas in it.

It’s Chinese curry sauce, of course!

This recipe is a request from @mattcudmore on the Facebook page, hope it works for you!

The main flavour of this sauce actually comes from pre mixed curry powder, and in the traditional Asian fashion the sauce is thickened with corn flour rather than butter and flour like a roux.

This recipe is for the sauce only, to turn it into a veg/chicken/beef etc curry just cook the desired meat/veg in a pan then add the sauce and cook through.

Ingredients (serves 2-4)

  • 1 medium onion
  • Garlic paste and ginger paste (about 2-3 tsp of each)
  • 3-4 tbsp of curry powder; I find mild curry powder from Asda works well, failing that most madras curry powders have the right kind of flavour
  • 1 tsp ground turmeric (optional, for colour)
  • Chilli powder (optional, if you want some heat)
  • 1 tsp Chinese 5 spice
  • Cornflour
  • 1-2 tsp light soy sauce
  • 400-500ml chicken stock (stock cubes and water if you don’t have any actual stock)
  • Salt and pepper
  • Sugar (1-2 tsp)
  • Cooking oil

Equipment

  • Chopping board
  • Knife
  • Wok or saucepan
  • Measuring jug
  • Immersion blender (hand blender) or food processor

Prep and cooking (20-25 minutes)

  1. Heat some oil in a pan on a medium-low heat and finely dice the onion.
  2. When the pan has warmed up add the onion and cook for about 5 minutes until soft, stirring occasionally.
  3. Add the garlic paste and ginger paste and cook out for a minute or two while stirring.
  4. Mix the dry spices and sugar with a little bit of water to make a paste and add the the pan, cook out the spices for another minute or two while stirring.
  5. Add the soy sauce and stock and whack the heat up full, when it comes to a boil reduce the heat to low and leave it to simmer for 10-15 minutes stirring every so often to make sure nothing sticks (and burns) to the bottom of the pan.
  6. Get the immersion blender and whizz it all up until smooth, or is using a food processor blend and return to the pan.
  7. Mix some cornflour (about 50g?) with water or chicken stock if you have any left with your fingers to make sure there are no lumps.
  8. Heat the sauce the pan to a medium high heat, add a little of the cornflour slurry at a time until you reach the desired consistency.
  9. Add salt and pepper to taste
  10. Enjoy!

Wok this way…

Though curry isn’t typical of Chinese food it’s still apparently quite a popular dish in southern parts of China, where they add curry powder to some dishes.

As you’d expect, curry powder is a largely western thing making an appearance somewhere around the 18th century, the Asian version tends to have either cinnamon or star anise as additional ingredients (which is why we add a little 5 spice)

On to costing, this sauce rolls in at £1.58, which is about 40p per serving.

A 500g jar or premade sauce is 80p at Tesco so a bit cheaper, but it’s about 150g less than the recipe above and fresh is always more enjoyable.

As someone mentioned in a post the powdered Chinese curry sauce is a good alternative, I’ve used it before and it generally works alright but it’s a bit pricey, about £2.75 for 405g or 0.68p/100g which works out at £4.42 for the amount the above recipe would make you.

So you can see while it’s convenient, it comes at a cost of an extra £2.84, which is enough for a whole chicken.

More recipes soon!

Join 1,121 other subscribers

Dumplings recipe


I could probably eat them all day given the chance.

DUMPLINGS!

Yes, we all love a good dumpling, or at least we should (I think?)

This recipe is a request from @helenknowles on the Facebook page, hope you can get it to work!

Ingredients (makes about 8)

  • 150g self raising flour
  • 75g beef/veg suet (I recommend beef)
  • 1 tsp baking powder (optional but fluffs them up a bit more)
  • Either; a stew/casserole or chicken/beef stock and some gravy granules to thicken (I like to use 1 chicken and 1 beef stock cube together)
  • Salt & pepper
  • Water
  • (optional) fresh or dried herb(s) of your choice

Equipment

  • Mixing bowl
  • Scales
  • A saucepan, or if putting in a stew make sure the dish is big enough to hold them
  • Knife and chopping board if using fresh herbs
  • Tablespoon
  • Sieve (optional)

Prep and cooking (25-35 minutes)

  1. Weigh out 150g of flour with the baking powder and sieve into a mixing bowl.
  2. Add 75g of suet, salt and pepper (I usually use a fair amount) and any herbs if using and mix around with a spoon.
  3. Add 1 tbsp of water and mix well, keep doing this until you have a firm dough, it doesn’t need a lot of water, usually only 3-5 tbsp so don’t overdo it or you have to start adding flour to balance it out and the whole thing goes out of proportion.
  4. Cut the dough in 6-8 pieces and roll them into balls, they might look a bit small but the absorb a lot of liquid and grow.
  5. If you have a stew in the oven, add the dumplings 20-30 minutes before you plan to serve.
  6. If you don’t have a stew, get some stock on to boil, when it’s boiling add some gravy granules to thicken the liquid, then add the dumplings, put a lid on the pan and reduce the heat to low and cook for 20-30 minutes. We add the gravy granules as it help the dumplings hold their shape, but if cooking in a saucepan be sure to keep an eye on them.
  7. Eat and try not to become a dumpling addict

All of that, and dim-sum

No it was just a headline, no dim-sum here, but they are a kind of dumpling and I’ll get a recipe up for them soon.

Costwise these little balls of joy cost between 7-15p each depending if you use herbs, and which herbs, making 8 cost somewhere between 56p-£1.20.

Compared with the packet mix which costs about 80p and says it makes 8, so it might cost an extra 20-40p depending what you put in them, but you can’t beat homemade!

Give it some cheese

A variation I like to do it cut some cubes of cheddar or any other cheese and place them in the centre of the dumpling before cooking, though it can be fairly thick to get it to stay in there while it’s cooking!

More recipes to come

Join 1,121 other subscribers

Mughali Murgh Korma (Moghali braised chicken/Chicken Korma) recipe


I always used to think a korma was a poor excuse for a curry due to the lack of heat.

This recipe is a second request from @rachaelireland on the Facebook page.

That was until my (current) head chef shew me a recipe and i can’t deny, it’s bloody delicious, If you like coconut this is a dish for you!

The recipe i have is to make about 20 portions so i’ve cut it down best i can and hopefully it shouldn’t affect the flavour of the dish.

Ingredients (serves 2)

For the sauce

  • 4 cloves
  • 1 medium/small cinnamon stick
  • 3 black peppercorns
  • 5 green cardamom pods
  • 2 tablespoons of desiccated coconut
  • 1-2 tsp garlic paste
  • 2 tbsp almond powder
  • 1-2 tsp ginger paste
  • 1tsp ground turmeric
  • 2 tsp cumin seeds
  • 2 pints of natural yoghurt
  • Salt & pepper
  • 1 large onion

For the chicken

  • 2 chicken breasts
  • 1-2 eggs
  • 1-2 tsp garlic paste
  • 1-2 tsp ginger paste
  • 1-2 tsp garam masala

Equipment

  • Knife
  • Chopping board
  • Frying pan
  • Medium/large saucepan
  • Measuring jug
  • Fork, or whisk

Prep (10-15 minutes)

  1. Start by cutting the chicken however you like, i prefer to dice it into fairly large cubes, usually about an inch in size. Beat the egg in a measuring jug with the other ingredients ‘for the chicken’, when fully mixed add the chicken to the measuring jug and mix again to coat the chicken.
  2. Finely dice the onion.
  3. Warm the frying pan up on a medium-high heat (with no oil). When it’s hot add the coconut to roast it, make sure you keep it moving constantly so it doesn’t burn, you’re looking for a nice brown colouring but not black, it should take a minute or two.
  4. Now turn the heat down to medium and add a little oil or butter, fry the chicken off until cooked through and remove from the pan onto a plate/bowl.

Cooking (20-30 minutes)

  1. Now we can get onto making the sauce, heat some oil in a saucepan on a lowish heat and add the whole spices (cinnamon stick, cloves, peppercorns, cardamoms & cumin seeds) and cook until lightly coloured.
  2. Add the onion and garlic, turn the heat up a little and cook for another 3-5 minutes while stirring.
  3. Add the remaining ingredients except for the yoghurt (coconut, ginger paste, turmeric and almond powder) and cook for another 3-5 minutes.
  4. Take the pan off the heat and let it cool down a little. Get a desert spoon and take 1 tbsp of yoghurt and mix into the saucepan, keep doing this until all the yoghurt is mixed into the sauce. We do this because if you add all the yoghurt at once into the hot pan it will split, your sauce will look horrible, and won’t have a smooth creamy texture.
  5. Return the pan to a medium-low heat and add the cooked chicken, cook for 10+ minutes, serve and be merry.

“Eating too much curry can put you in a spice induced korma”

A Korma is a dish that actually originated in India, as opposed to something like a chicken tikka.

The English name ‘Korma’ come from the Urdu for qormā, which means “braise” referring to how its traditionally cooked.

If you’re not a huge fan of a korma, try this recipe, it changed my mind!

More recipes soon

Join 1,121 other subscribers

Julienne slice (French cut)

A Julienne slice is essentially match sticks, but it’s a handy cut to know.


It comes in handy for a number of uses including chips and dicing,

While cutting chips is the same principle, a julienne slice tends to be much thinner but I’ve just done a fairly rough cut in the examples.

Trim the edges

Something you should never ask a cockney Gardner to do, unless you want to come back to no hedges, first we need to trim the edges so we have flat surfaces to work with.

Depending on the size of the carrot, cut it in half and the down 1 of the long sides cut about 5-10mm in, so you end up with a flat edge along one side. Then turn the carrot flat side down and repeat with the other 3 sides, so you’re left with a rectangle of carrot.

1.cut a manageable size then trim the edges

Slice into sticks

Now for the julienne slice, you can make them as thin as you like, but 2 slices on the top and 2 on the side is usually a good place to start.

Put the carrot flat on the chopping board and make 2 cuts lengthwise, then turn these 90° and stack them up again and make 2 more lengthway cuts. (In the example I only made 1 slice on the second cuts because it’s a small carrot)

3.lengthway slices to make sticks,
or a julienne slice

What about the leftovers?

With the 4 slices the remain from the edge of the carrot you can either add them to a stock/soup, use them for a carrot purée/mash or cut them into more julienne slices for cooking, eating or dicing.

use it all up!

How to dice a carrot

To finish up, dicing. I find this always looks like a lot of manual work has been done but it’s really not that hard.

Diced carrot cooks a lot quicker as it’s smaller in size so can be handy if you’re in a rush, though you should never rush good food!


To start with cut the carrot julienne into sticks, then just bunch them together and slice to get a dice, the finer the julienne the smaller the dice will be.

slice and dice

So there you have it.

Hopefully this guide will speed up your carrot prep!

Keep an eye out for more prep guides and recipes coming soon.