How to Butterfly a Chicken Breast

Following up on how to butcher a whole chicken (and save £££) when you butterfly a chicken breast it will cook twice as fast because of the larger surface area and it’s not as thick.

It’s a good skill to know if you ever want to stuff a chicken breast and it generally looks nicer on a plate.

It’s pretty simple and gets a lot easier with practise.

Where to make the incision

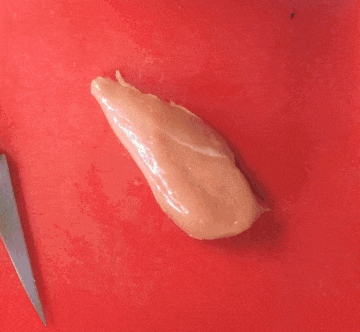
Firstly where to actually cut the breast, the incision will be made on the outside of the breast, if you’re unsure which is the outer side look at the underside of the breast, where in inner fillet is (or was if you’ve removed it) is the inner side, so the opposite side to that one.
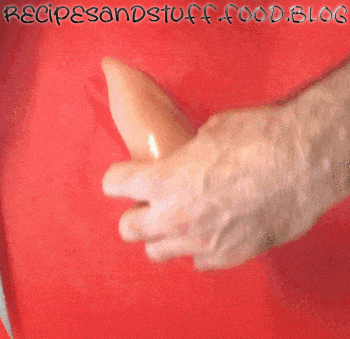
Making the Cut

Slice into the side of the breast about 3/5’s of the way in, then open the breast up and slice down the centre to open it out fully.

Stuff, cook, marinade etc

As you can see this gives a lot more surface area so marinades get more absorption, it’s also good for stuffing as it creates a pocket.

More recipes and cooking tips soon!

Liquid glucose recipe

Liquid glucose is pretty much what it says it is, liquid sugar.

It’s used mainly for confectionary, adding liquid glucose to something that already has glucose (sugar) will (or should) stop the sugar from crystallising.

I recently put up a recipe for fudge which calls for liquid glucose, buying it from a shop can be surprisingly expensive, about £2 for 140g whereas making it cuts the cost down to £1 for about 500-700g.

Ingredients (makes about 600g)

  • 500g sugar, granulated has a lower chance of crystallising but I’ve always used granulated
  • 200ml water
  • 5g cream of tartar
  • 2-4g citric acid, or lemon juice

Equipment

  • Saucepan
  • Something to put the glucose in, I use glass jars
  • Wooden spoon

Prep and cooking (10+ minutes)

  1. Put all the ingredients in a pan on a low heat and stir gently until everything has dissolved.
  2. Leave the heat low and cook for anywhere between 5-35 minutes, I like to use as low a heat as possible. It should thicken up when it’s ready. Remember to stir occasionally.
  3. Transfer to jars or whatever you’re using to store it in.
  4. Use when needed.

More recipes soon!

Prep guide; how to get perfect rice every time

It depends on how you define perfect, but when I say it I mean rice that is fluffy and doesn’t stick together or go all claggy.

The solution is shockingly simple, you just need to steam it through after cooking.

This requires no extra or special equipment, other than a bit of tinfoil (enough to cover the pan)

Let’s get to it!

What you need

  • Rice
  • Saucepan
  • Water
  • Tinfoil

How to get perfect rice every time

As you probably know all types of rice cook differently.

When it comes to the amount of water to use a ratio of 1:2.5 is usually a good starting point, so for every 1g of rice use 2.5x more water, e.g. for 100g rice use 250ml of water. For 237g of rice use 593ml of water etc.

Nearly all rice has a recommended cooking time on the packet, which is a handy guideline.

Bring the rice to the boil in 2.5x the amount of water, as it starts to boil turn the heat down low, put a lid on the pan (that fits) and simmer for the ‘recommended cooking time’ on the packet minus 1 or 2 minutes.

Before you turn the rice down to simmer make sure you stir the bottom with a wooden spoon to make sure nothing sticks and burns to the pan.

Once cooked simply turn the heat off and leave the pan there for 30 minutes with the lid still on.

I prefer to remove the lid 1-2 minutes before it’s cooked and wrap some tinfoil tightly round the top.

Leaving the rice covered and on the gradually lowering heat steams it through, when you uncover it 95% of the time you should have perfectly cooked rice 👌

And that’s it!

Nice and easy.

How to crack an egg with one hand

A somewhat unnecessary skill, that said if you’ve got 200 eggs to crack and you can do 2 at a time (1 in each hand) it’s definitely speeds things up.

How to hold the egg

First how to hold it, here’s a few pictures with and without the egg. you want to grip the bottom half of the egg with your 3rd finger and the top half with you thumb, index and middle finger.

Cracking the egg

up with thumb, down with last 2 fingers

Before actually cracking the egg its good to get the hang on the hand motion you need to do.

First practise pulling inward with your 3rd and little finger whilst (trying) to keep the rest of your hand stationary.

Then at the same time move your thumb upwards. When doing this with the egg the thumb pulls the top of the egg open whilst the last 2 fingers pull the bottom half open.

Now to put it into action, hold the egg and make a crack halfway through it, pull it open with your fingers and throw away the shell.

crack the egg!

Any problems give me a message, but keep in mind it takes a little bit of practise, i probably use anywhere from 10-100 eggs a day(!)

Good luck!