I only discovered these things a while ago and they’re great!
With the use of a microwave these mug cakes take a grand total of about 4-5 minutes to make.
To the recipe!
Ingredients
1 egg
50g butter
30g caster sugar
50g self raising flour
4-8 tbsp golden syrup
Equipment
A mug
Small mixing bowl
Scales
Wooden spoon
Microwave
Prep and cooking (5 minutes)
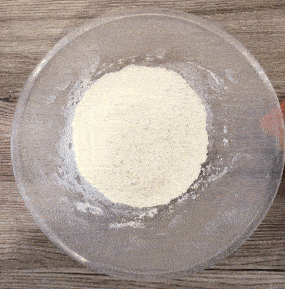
Weigh the butter and sugar in a mixing bowl and beat with a wooden spoon until pale and creamy.
Add the egg and beat well until combined with the butter and sugar.
Sift the flour (if you have a sieve) and mix well until you have a nice cake batter, add 2-4tbsp of golden syrup and mix well. If it’s really (too) thick add a little milk.
Rub a little butter or oil around the inside of the mug the put another 2-4 tbsp of golden syrup in the bottom of the mug.
Fill the mug with the cake batter, it should be somewhere around 1/3 full.
This part depends on your microwave because let’s face it, they’re all different. I find it usually takes about a minute and a half on full power (850w) but you’ll have to experiment.
When it’s done go round the edges with a knife or pallet knife and turn it out onto a plate.
Enjoy!
Costing
61p per cake
As you can see the most costly part is the butter, if you substitute this for a plant/oil based spread it can cut the cost to as little as 41p per cake.
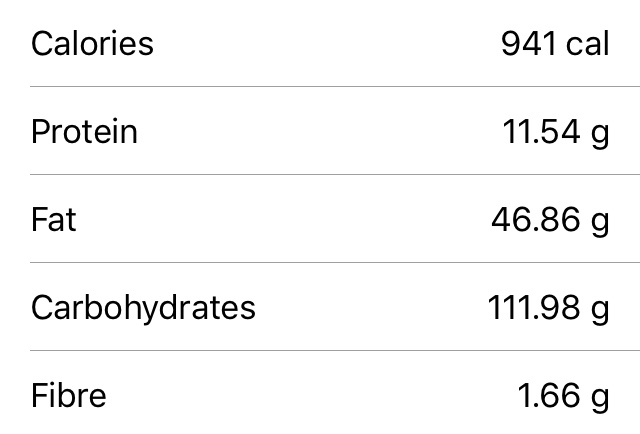
Nutrition
Nutritional values per cake, as you can see it packs quite a calorific punch🤛.
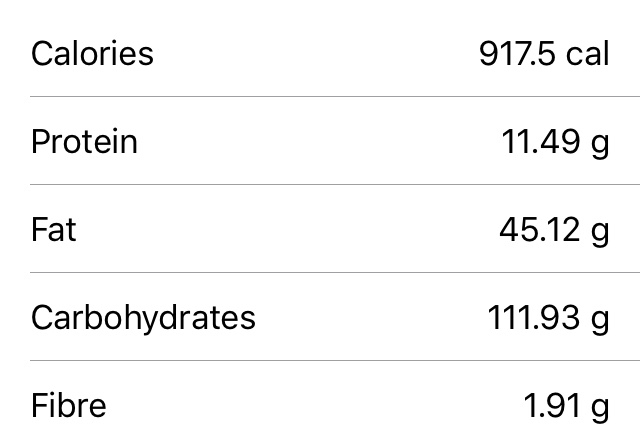
Here the nutrition info per cake if you’re using a plant/oil spread instead of butter, not much budge though it’s about 20kcal less than butter, the biggest difference is the amount of fat but that only just over a gram.
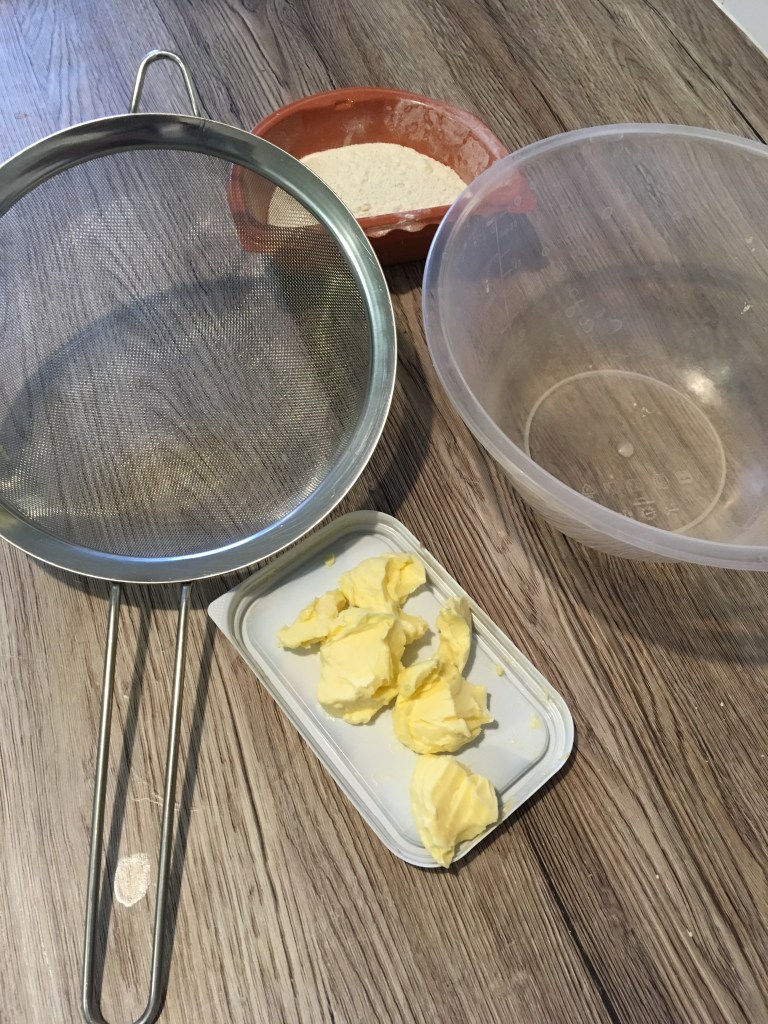
When a recipe calls for you to ‘rub in’ the flour and butter, it’s a simple task but if you don’t know how to do it then this short guide should help.
What you need
Mixing Bowl
Sieve
Flour
Butter
In this example i’m using 100g of flour and 50g of butter (half fat to flour) which will result in a crumble mix with no flavour/sweetness, but its just for explanation purposes.
What to do
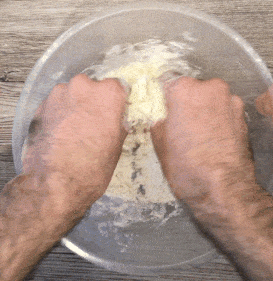
First, the actual motion of rubbing in, i make a circular motion with my thumb into the other 3 fingers like this
rubbing in hand movement
You don’t have to sift the flour, but i like to as it removes any lumps.
Sift flour
Add the butter and coat it with the flour.
coat the butter with flour
Now start to pinch and rub the butter, like with the motion we learnt at the start.
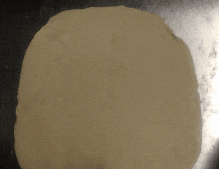
As it all comes together start to rub it against your hands, it should be a pale golden/yellow colour and looks a bit like breadcrumbs.
Honestly, I’m not sure, but from what I’ve heard it comes from an English chap who coined it with the name when given a task to do under pressure (scroll to the bottom for the story)
Recipe!
Ingredients (makes 6 pastries, or 1 huge one)
1 (or more) sheet of pre rolled puff pastry
Frangipane, enough to fill the pastry, 250-300g should be plenty
Jam, whatever you like best
Desiccated coconut
Icing sugar to make enough chocolate icing to cover the top of the pastry(s) (200-400g)
Eggwash or some milk
Equipment
Knife
Baking tray
Baking paper
Desert spoon
Mixing bowl
Sieve
Pastry brush
Prep and cooking (30-60 minutes)
Start by heating the oven to about 180°c fan.
Unroll the sheet of pastry and cut it in half along the long edge.
Now you want to cut each half into 6, (with each half separately) cut the half in half vertically and then into thirds horizontally. This should leave you with 12 equal square/rectangles of puff pastry.
line a baking tray with baking paper and put 6 pieces of pastry on it, these are the bases for your London cheesecakes.
In the middle of each put about 1 tbsp of jam and flatten it a little, you want to leave 0.5-1 inch bare around the edges.
Put some frangipane on top of the jam and spread out a little to cover it.
Brush a small amount of egg wash/milk around the edges of put the top on each ‘cheesecake’. Push down lightly and try to make sure no filling comes out.
Bake in the oven for 20-30 minutes until golden and risen.
When they’re ready take out of the oven to cook and make the icing by sifting the sugar into a mixing bowl. Add 1-2 tbsp of water and mix, add more water accordingly but only a tiny bit at a time as it’s easy to over do. Mix until thick but plyable.
When the pastry is cool cover each one with icing and sprinkle desiccated coconut oven the top.
Eat one, or two, or..ten?
Where did it come from?
I first heard about this a coworker mentioned a cockney cheesecake, some kind of pastry with coconut.
After looking into it turns out he meant a London cheesecake, and after some research it seems there’s mixed opinions on why it’s given that name, a lot of people seem to think it’s because the coconut represents cheese curds.
The most amusing story I found, and is the one I always go with, is that on a trip to America an English person was asked by an American friend to show him what a cheesecake is as he’d heard how great they are.
No knowing how to make it, the Englishman went through the cupboards and put together something with what he could find, the end product was given to the American as a ‘London cheesecake’.
Either vanilla flavouring, essence, extract or 1 fresh pod (scrape out the inside)
Some flour and icing sugar for dusting
Some butter for greasing
Equipment
Rolling pin
Tart case, about 10 inches
Baking beans/rice
Tin foil or baking paper
Desert spoon
Mixing bowl
Whisk
Saucepan
Bowl or container that fits in fridge.
Prep and cooking (60-120 minutes)
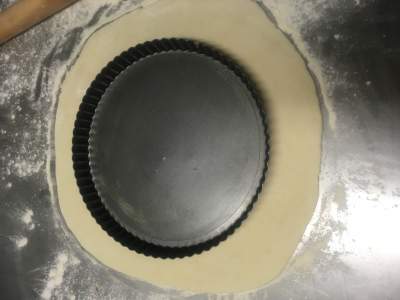
3. Use the rolling pin to pick up the pastry
First heat the oven to about 160°c fan (gas 4).
While it warms up roll the pastry out, use flour on the work surface to stop it sticking, roll it into a disc about 1-2 inches bigger than the case. Use the rolling pin to pick it up and place it in the case.
Blind bake for 15-20 minutes until it’s a pale golden colour. Then remove the baking beans/paper and put in the oven for another 5-10 minutes until cooked
While the pastry is baking make the custard by heating the milk and vanilla in a pan, make sure it doesn’t boil over but you need to get it heated to just before boiling point.
Whilst the milk is warming, whisk the egg yolks, cornflour and sugar until thick and creamy.
Pour the hot milk over the egg mixture a little at a time while whisking, then return it all to the pan on a low heat until you’re left with a nice thick custard.
Put it in a clean bowl/container and dust the top with icing sugar (this stops it getting a skin on the top of it). Chill for 30 minutes or until cold all the way through.
When the tart case is ready (don’t forget it’s in the oven) already the jam to cover the bottom of the pastry case and put to one side.
Whisk the double cream until whipped and then mix into the custard with the coconut with a whisk/wooden spoon.
Cover the layer of jam on the pastry case with fresh raspberries.
Fill the case with the devilish cream custard and top with more fresh raspberries.
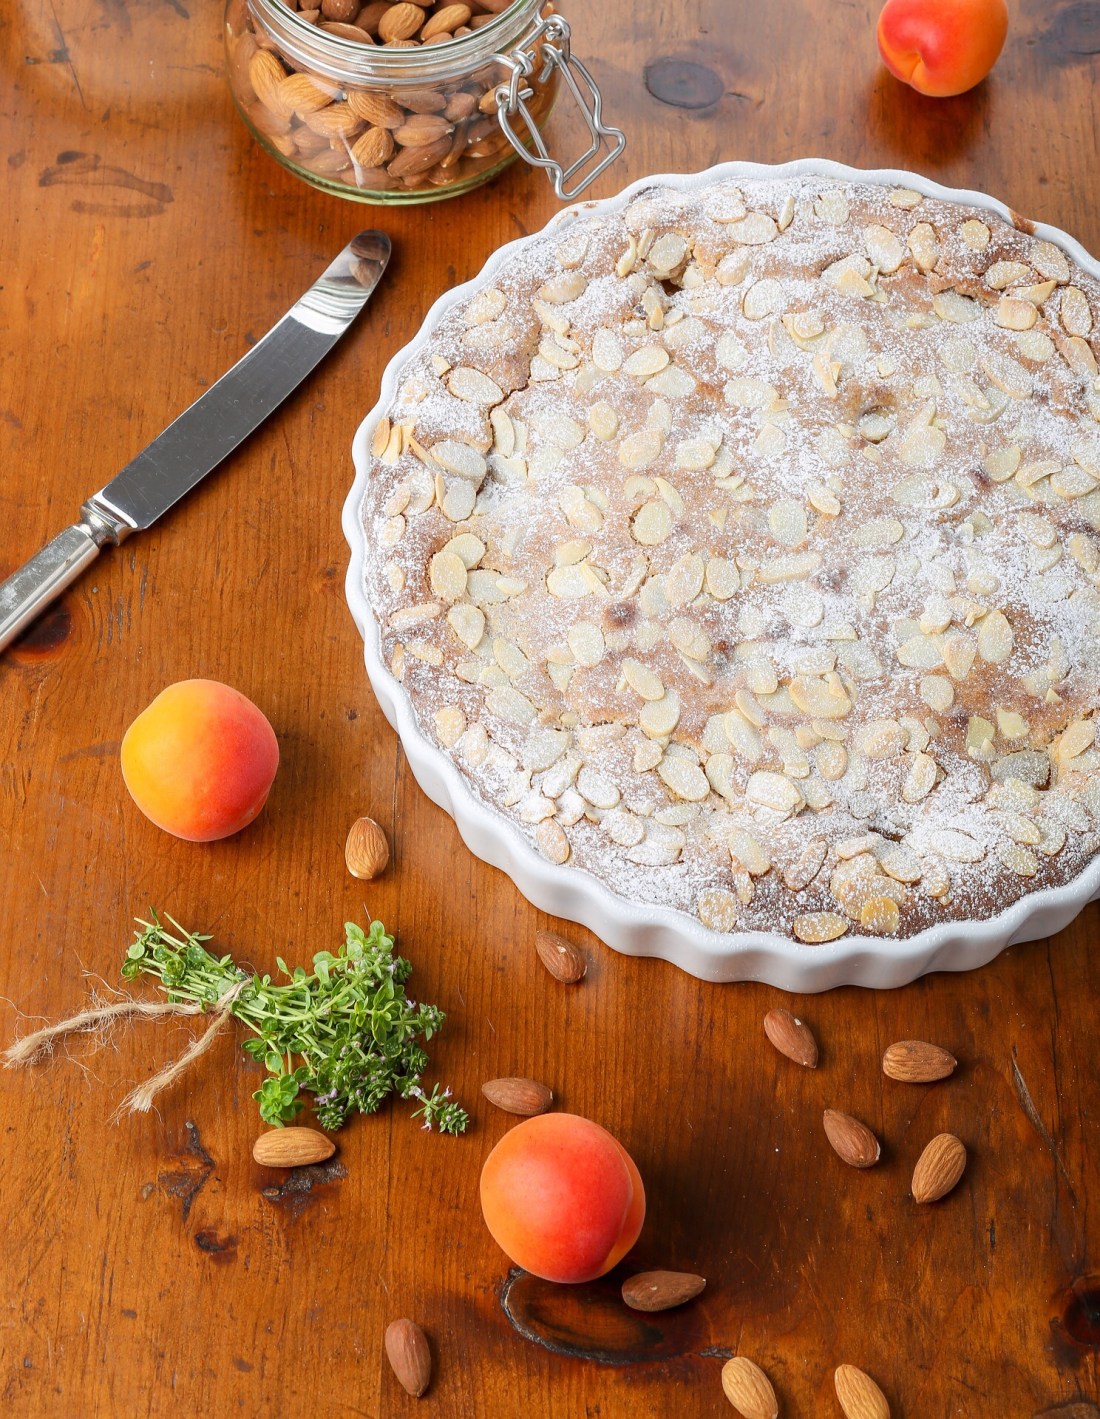
A funny name which translates to something like almond paste.
This stuff is delicious, it’s like a pastry creme version marzipan, the recipe uses almonds which is what gives it that marzipany taste.
Here’s the recipe;
Ingredients (makes about 1kg)
1 block of butter (250g)
Either vanilla flavour, essence, extract or a fresh pod
200g caster sugar
6 medium eggs, or 5 large
250g ground almonds
Equipment
Mixing bowl
Whisk, an electric one will make your life a lot easier, you can get one for a fiver in most supermarkets
Microwave if you need to soften butter
Spatula
Prep (5-10 minutes)
The whole things a lot quicker and easier if you get the butter nice and soft (warm) first. A microwave is ideal for this but don’t turn it into liquid, it should still hold its shape but if you put your finger in it it’ll go right through. If you don’t have a microwave just put it somewhere warm (airing cupboard) for 39 minutes first.
Now you need to cream (mix) the butter, sugar and vanilla so put it all in a mixing bowl and whisk away until its light, smooth and sugary vanilla heaven.
Crack one of the eggs into the bowl and whisk for another minute or so until the egg is fully incorporated to the mix.
Repeat step 3 until you have no eggs left. Now put the whisk away.
Sprinkle enough ground almonds to fully cover the top of the mixture in the bowl and fold it in with a spatula. When it’s mixed do the same until the ground almonds are all gone.
That’s it!
What happens if you eat lots of almonds?
You will run out of almonds.
Frangipane, or frangipani, is like an almond (marzipan flavoured) pastry cream that you can use to pipe in or on to things or just as a pie/tart filling, you can pretty much turn it into a cake by adding some flour.
Enjoy! I’ll be following this up with a recipe you can use frangipani in.
Lemon tart (should) go down well pretty much anywhere, anytime.
This is a request from @michaelsmeatham on the Facebook page, so on to the recipe.
Ingredients (makes 1 large tart, 16 portions, or 8 large)
500g shortcrust pastry
8-10 eggs
5-8 lemons (8 is pretty intense)
250-350g caster sugar depending on your sweet tooth
200-300ml double cream
Flour to roll pastry
Equipmemt
Rolling pin
A quiche/tart dish, around 23-28cm
Tin foil
Baking beans, or rice etc. (Dry and weighty)
Mixing bowl
Whisk
Prep and cooking (45-90 minutes)
If you haven’t already, masker some shortcrust pastry.
Heat oven to about 160°c fan (gas 4)
Roll it out to about 1-1.3cm thickness, put in pastry case and blind bake for 15-20 minutes, I’ll upload a guide on blind baking on my next day off.
While the case is in the oven get the filling ready by putting the eggs, sugar and cream in a mixing bowl and mix well, you can add a few extra egg yolks if you want it to make it a bit richer.
Now zest the lemons into the mix, how many is up to you, when zesting try not to get the piff (white part under the skin and before the fruit) as it makes it more bitter, we want sweetness.
Juice the desired amount of lemon juice, add and mix well. Lemon juice really adds sharpness, so you want enough to counteract the sugar but not incapacitate your mouth. At the end of it it’s all down to personal taste.
When the case is ready turn the oven down to 140-150°c fan (gas 3). Pour the mixture in and bake for about 49 minutes, I set a timer every 10 minutes to check to adjust heat/turn it round if needed.
Voila! Ideally you want to chill it before eating, but some things can’t be helped.
You saucy tart
Maybe not so saucy, or at least until you cook it, but a joy to eat nonetheless.
You can cut the recipe in half for a smaller tart, or you could use a cupcake/muffin tray to make mini tarts.
Having a look at the supermarkets, the price seems to range from about £2.50-£4, that’s for a regular (8 slice) tart, about 400-450g which is close enough to half the size of the above recipe.
Costing the recipe (I used tesco online for prices) the above recipe will set you back about £4.25 or about 26p a serving, giving you twice as much for the same (similar) price, and its homemade(!)
Call it what you want, apple crumble always reminds me of Sunday’s when I was a kid, for me it’s with a big dollop of ice cream but custards always good.
Quick and easy (and delicious). This can be knocked up in about 30-40 minutes.
I will post a recipe with fresh apples soon, but I’ll be honest it tastes just as good with tinned apples.
Ingredients (serves 6-8)
2 tins of sliced apples (about 600g, drained)
500g self raising flour
250g butter
250g sugar (I usually use half caster, half demerara
Equipment
Mixing bowl
Knife
Oven dish big enough to hold everything.
Prep and cooking (30-40 minutes)
Heat the oven to about 170°c (fan)
Make the crumble, put the sugar and flour it a bowl. Cut the butter into cubes and add to the bowl, rub it all together with your fingertips until it looks like crumble, it should take 3-5 minutes.
Empty the apples into the dish.
Lightly cover with all the crumble (don’t push it down as it will all push together and cook as a big lump instead of crumble.
Cook for 30-40 minutesnuntil golden brown
Enjoy!
Tooty frooty; an apple that plays the trumpet.
Fiendishly simple, and just as tasty.
Apple crumble has been a classic since around world war 2, where rations meant it more economical than pies, to cut costs even more sometimes half the flour would be replaced with oats, which can add a nice texture.
Although it’s common to be sweet, crumble can also be savoury, such as a fish or vegetable crumble.
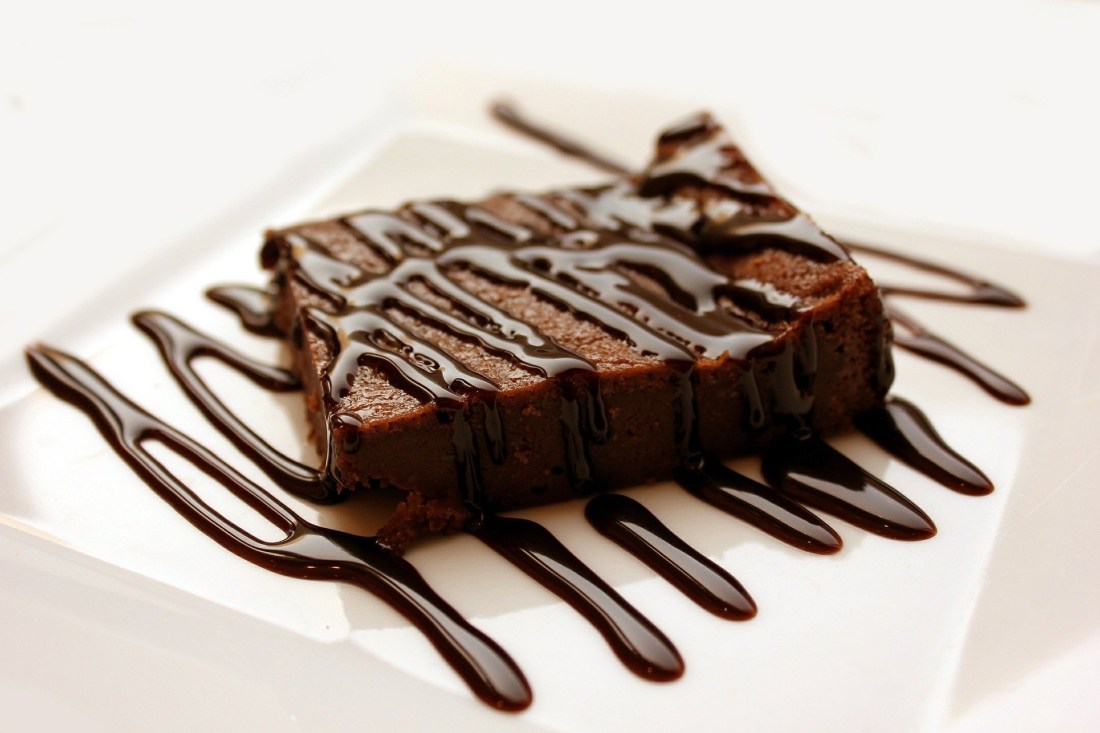
Basic; in terms of your bog standard, no thrills brownie, but no stranger to extreme richness and rotting teeth.
Chocolate brownies!
Everyone still seems somewhat undecided if it sounds racist 🤔 but we don’t care about that!
Chocolate, and, butter! With loads of sugar! What’s not to like.
Ingredients (makes 15 brownies)
400g butter
400g caster sugar
250-300g milk chocolate
50-100g milk chocolate chips
4 eggs
200g plain flour
1-2 tsp baking powder
Oil or butter to grease dish
Equipment
2 mixing bowls
A hand whisk, electric is much easier
A sieve
A spatula
Microwave, or a saucepan and metal bowl to make a bain marie
I usually use a large Pyrex dish, which measures about 15cm x 30cm
Prep and cooking (40-60 minutes)
Start but putting the chocolate and butter in a mixing bowl, if using a microwave use a plastic bowl and heat on full for 20-30 seconds, remove and stir and keep doing this until everything has melted, you want to try and heat it as little as possible and dissolve as much as possible by stirring. If using a saucepan and metal bowl then half fill the pan with water and bring to the boil, reduce the heat to low and put the bowl on top so the steam melts the chocolate and butter.
Put the chocolatey butter liquid into the fridge.
Turn the oven on to 160°c (fan).
Crack the eggs into a clean mixing bowl and add the sugar. Whisk well on full speed for a minute or two until thick and foamy, it should be a pale golden colour. If using a manual whisk this should take 3-5 minutes.
Take the chocolate mix out of the fridge and pour into the egg mix, use a spatula to empty the bowl.
Mix well with a whisk.
Sieve the flour and baking powder into the mix and fold in with the spatula. Folding in means gently mixing without knocking any air out.
Grease the baking dish and fill with brownie mix.
Sprinkle chocolate chips on the top and put in the oven for 20-25 minutes, it’ll be ready when you can put a skewer in the centre and it comes out clean.
Eat lots of brownies.
Earn some brownie points
Originating in America, the little bites are true devils food. Butter. Sugar. Chocolate. Nice 😈
Once cool these can be cut into squares and individually wrapped in clingfilm to go the freezer.
When you fancy one just pop it in a bowl and cover it with the clingfilm and microwave on full for 1-2 minutes.
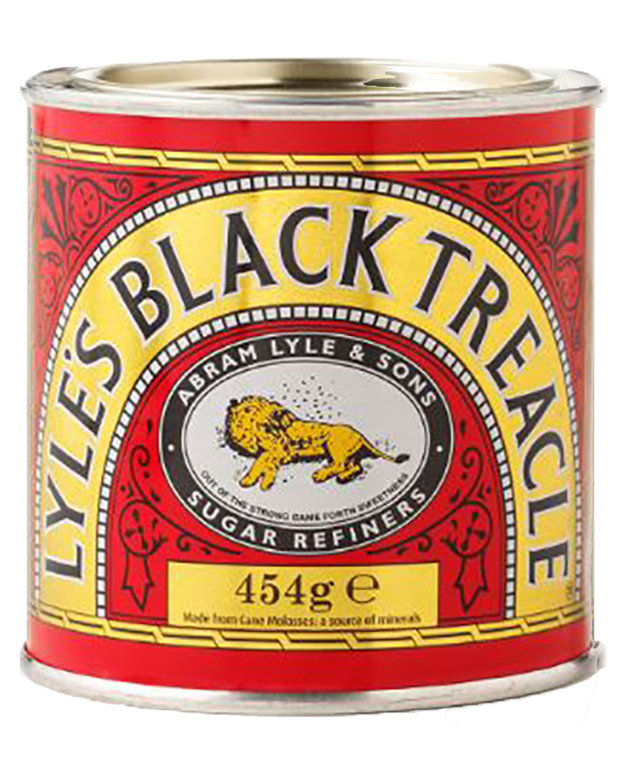
A classic from way back in the 19th century; the treacle tart. Bought back to light through none other than Harry Potter, starring as his favourite treat at Hogwarts in the series of books.
Originating in England, this sweet treat was created by a lady called Mary Jewry, and contrary to common misconception despite being called a treacle tart it doesn’t actually contain any treacle at all, it’s golden syrup.
So enough chat, let’s get on with this treacle tart recipe!
Ingredients (makes 1 treacle tart)
400-500g breadcrumbs
800g golden syrup
500g shortcrust pastry
1 lemon (optional)
2 tsp ginger powder (optional)
1 egg yolk (optional)
Equipment
1 tart dish/quiche dish
Mixing bowl
Rolling pin
Food processor
A microwave comes in handy but not essential, as is a pallet knife
Baking beans or rice
Baking paper
Prep (20-25 minutes)
1.Roll a disc of pastry
This recipe requires blind baking the pastry first, so start by heating the oven to about 160°c (fan), then roll out the shortcrust pastry into a big disc, about 2 inches bigger than your tart/quiche dish.
Grease the dish with either butter or oil and be sure to spread it around the whole dish. Using oil is more cost effective, but butter will give the pastry a (slightly) richer taste.
Pick the pastry up with the rolling pin and place in the dish. Straighten around the edges on the inside of the dish with your fingertips to tidy it up, there should still be a fair bit of overhand coming over the edges.
3.Pick the pastry up with the rolling pin
Trim the overhanging edges with scissors, be sure to still leave a bit, as shortcrust shrinks when it cooks, but not so much that it touches the worktop .
Gently prick the base of the pastry with a fork, it doesn’t need to go all the way through the pastry just thin enough for steam to pass through.
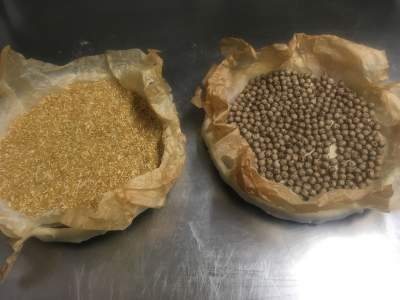
Cover with baking paper then fill with the baking beans/rice and cook in the oven for 15-20 minutes, or until the overhang starts to colour.
Cover with baking paper, then fill with rice(left) or baking beans (right)
Remove the baking paper and rice/baking beans and you have your blind baked pastry case, ready to fill!(and eat)
If you want to ensure a crisp bottom, put a baking tray in the oven for 10 minutes, then put the dish on the baking tray.
Cooking (40-60 minutes)
Now we have our case we can get a move on, put the golden syrup in a large mixing bowl and warm in the microwave until runny (if you have a microwave, you could make a Bain Marie with a saucepan if not or you could just wrestle with cold syrup)
Juice the lemon into the syrup with the ginger powder and mix.
Add the breadcrumbs and mix well until smooth.
If using, add the egg yolk and mix well.
Fill the pastry case with the bready syrupy goodness and smooth the top with a pallet knife. If you have any leftover pastry you could use it to decorate the top with a lattice or something but it’s only aesthetics.
Bake in the oven for 30-40 minutes, check every ten minutes.
Engulfed yourself in the sweet delight that is Harry Potters favourite desert.
Not this tarts first time on the big screen
So it appears it’s been in films before Harry Potter, the child catcher from Chitty Chitty Bang Bang used it to lure the kids, treacle tart loves the spotlight, slag.
I don’t know about you but I wouldn’t want to waste this luring kids(!)(I would just like to make it clear I have no intention to lure kids, I already have 1 and another on the way)
This is definitely a desert for those of you (like myself) with a sweeter tooth.
This delightful slice of heaven is best served warm or hot, with some kind of cream or custard (I recommend clotted cream or ice cream).
Traditionally the recipe contains no egg so it’s completely optional, if you made a vegan pastry then this could quite easily be made into a vegan desert.
More modern recipes also include the addition of cream, or using almonds instead of breadcrumbs, but why mess with the classic treacle tart!