Hollandaise sauce recipe

It’s breakfast time!

Perfect with eggs or great on fish, hollandaise sauce sounds like it should be complicated but it’s really not.

This simple sauce has 4 ingredients that are easy to obtain and it’s a lot cheaper than buying it pre made.

Here’s 2 easy ways to make it, let’s get to it!

Ingredients: serves 2

  • 2 egg yolks
  • 50-100g butter
  • 1 tsp white wine vinegar
  • Salt
  • (Optional) lemon juice
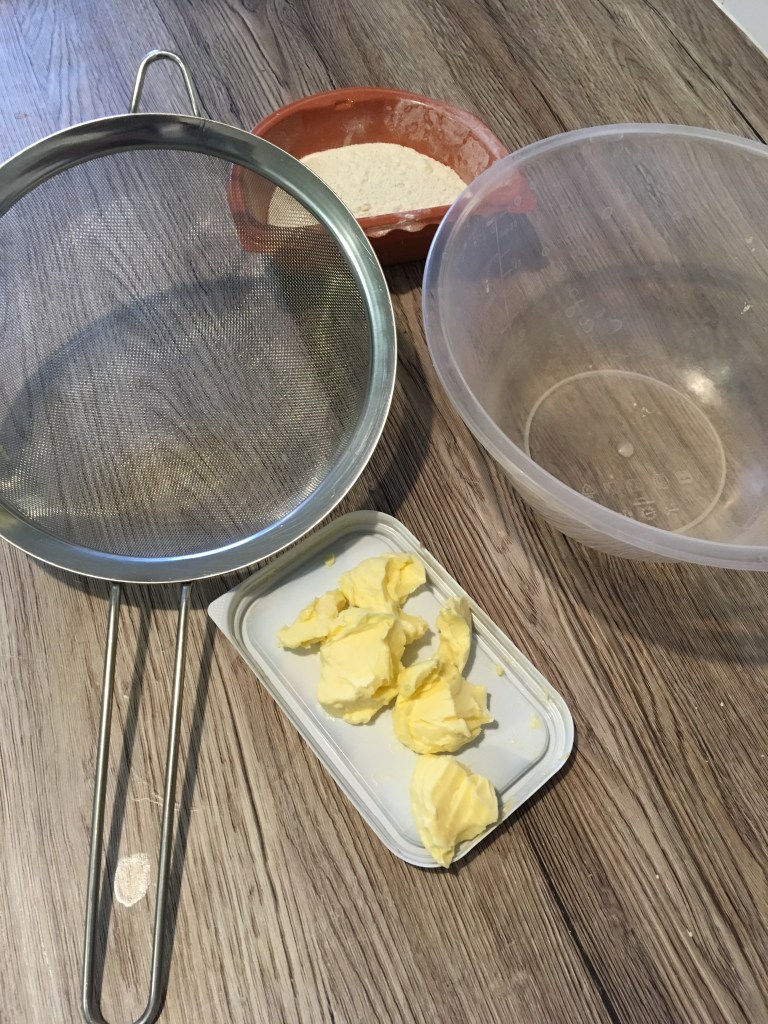
Equipment

  • Saucepan, 2 depending which method you use
  • Metal or glass bowl big enough to sit on top of saucepan
  • Whisk
  • Knife

Prep and cooking: 5-10 minutes

  1. Put a small amount of water in the saucepan (about 1/5 full) and heat it up until steaming then turn the heat down low.
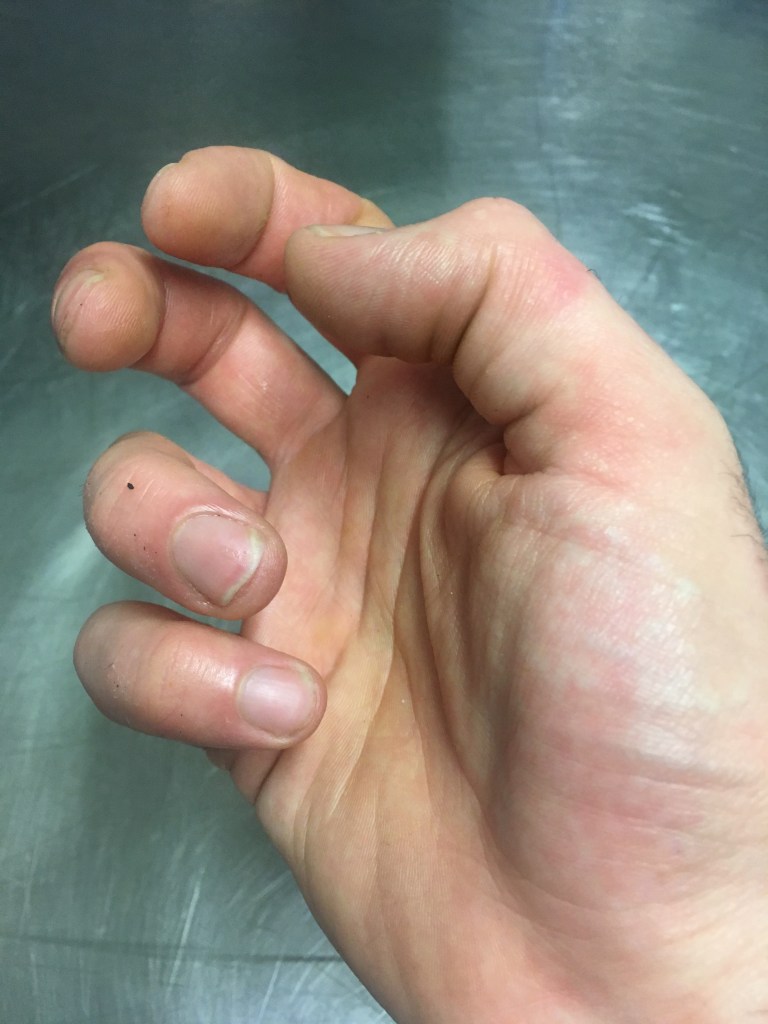
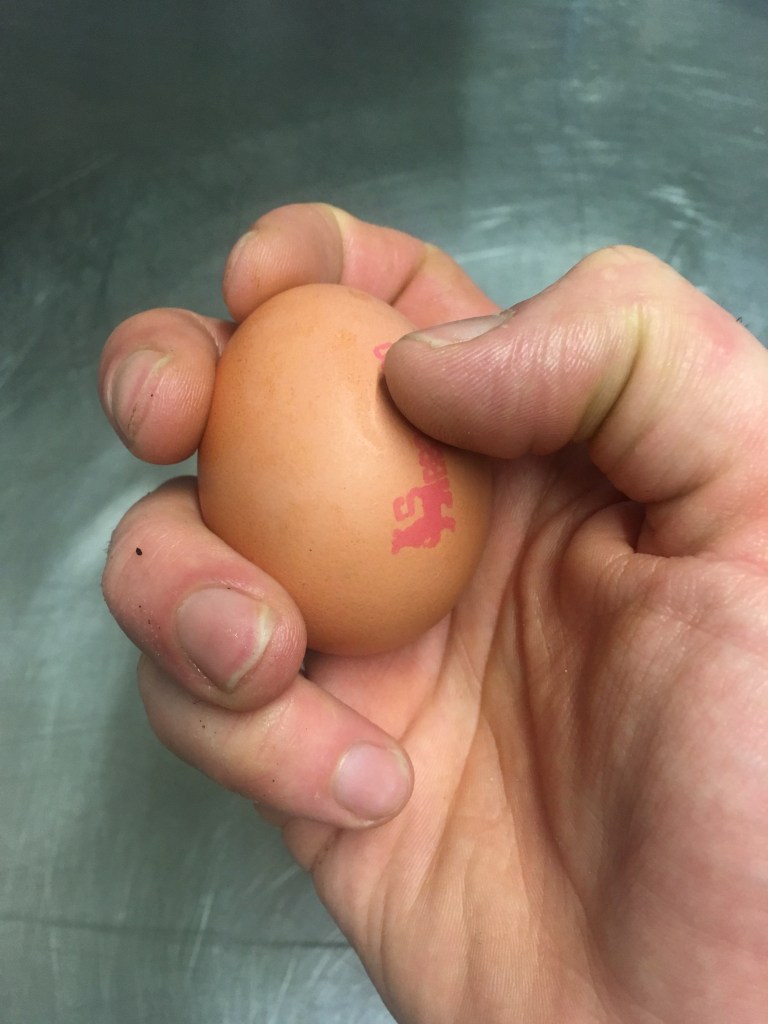
  2. Separate the egg yolks by cracking the egg in your hand over a bowl (clean hands!) and let the white run through the gaps in your fingers. Put the yolk(s) in the bowl with the white wine vinegar, salt and about 10ml of water and whisk well for a minute or two.
  3. Put the bowl on top of the saucepan and keep whisking until the yolks start to go pale.
  4. Cut the butter into cubes and add 1 at a time, whisk until its fully incorporated before adding any more butter. Keep adding butter until you have the desired consistency, it will thicken as you add and whisk butter in.
  5. Drink. I mean eat.

Method 2

  1. Follow steps 1-3 above.
  2. Melt the butter in a separate pan. Skim the foam off the top as it heats up and let the milk solids separate to the bottom (white bits). Decant into a jug leaving the mills solids in the pan.
  3. While the butter is still hot pour it into the eggs a little at a time whisking well before adding more until the desired consistency is met.

If the sauce becomes too thick just add a little cold water and whisk in.

I would say the second method makes the sauce noticeably nicer, but not so much that there’s anything wrong with the first method which is slightly quicker.

Costing

Looking on tesco.com a 150g pack of hollandaise costs £1.20.

The above best recipe makes about 136g if you use 100g of butter (egg yolks weigh about 18g) and costs around 87p, a saving of about 30%.

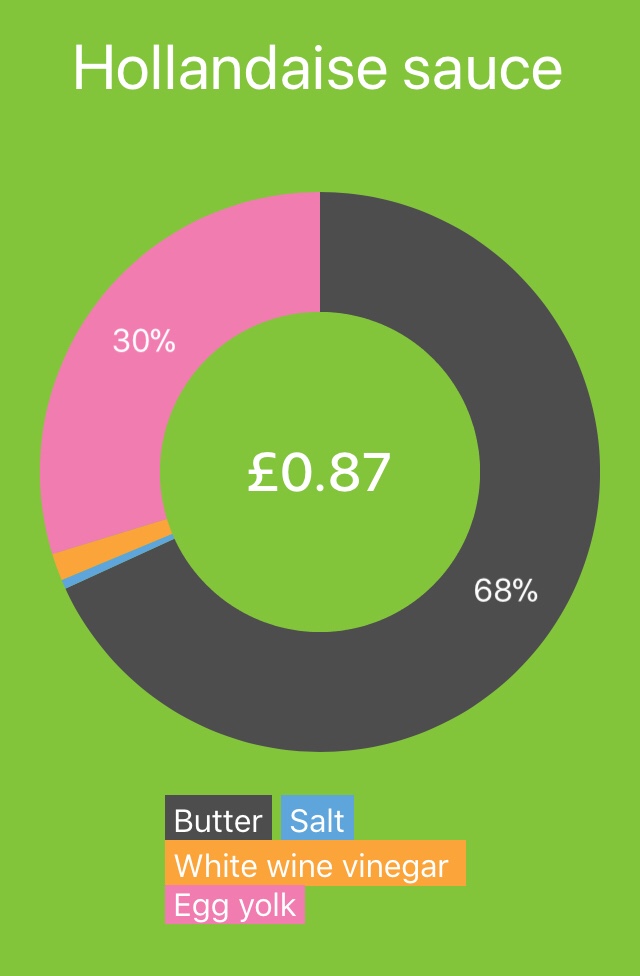
As you can see the butter is where most of the expense comes in, and you can’t cut out too much as the sauce is pretty much just butter and eggs.
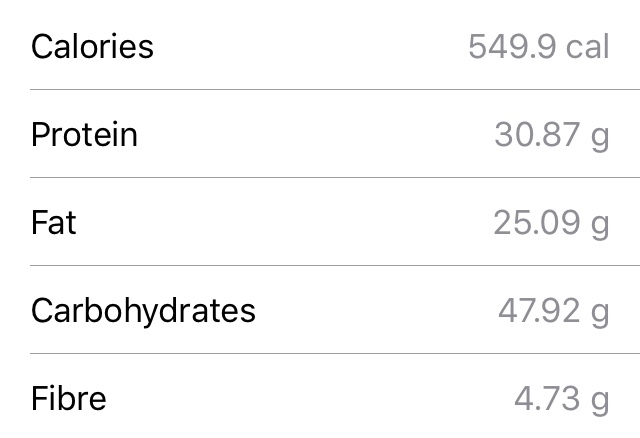
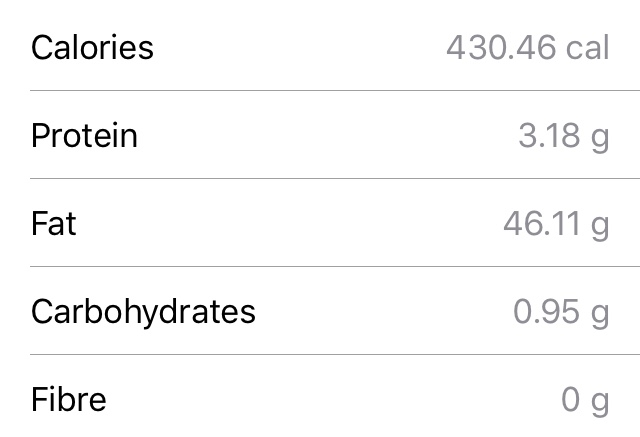
Nutrition

Sorry! But it’s not looking good here 😂 that’s what you get for eating butter and egg yolks (!)

More recipes soon!

Liquid glucose recipe

Liquid glucose is pretty much what it says it is, liquid sugar.

It’s used mainly for confectionary, adding liquid glucose to something that already has glucose (sugar) will (or should) stop the sugar from crystallising.

I recently put up a recipe for fudge which calls for liquid glucose, buying it from a shop can be surprisingly expensive, about £2 for 140g whereas making it cuts the cost down to £1 for about 500-700g.

Ingredients (makes about 600g)

  • 500g sugar, granulated has a lower chance of crystallising but I’ve always used granulated
  • 200ml water
  • 5g cream of tartar
  • 2-4g citric acid, or lemon juice

Equipment

  • Saucepan
  • Something to put the glucose in, I use glass jars
  • Wooden spoon

Prep and cooking (10+ minutes)

  1. Put all the ingredients in a pan on a low heat and stir gently until everything has dissolved.
  2. Leave the heat low and cook for anywhere between 5-35 minutes, I like to use as low a heat as possible. It should thicken up when it’s ready. Remember to stir occasionally.
  3. Transfer to jars or whatever you’re using to store it in.
  4. Use when needed.

More recipes soon!

Cold Wrap fillings

Following up from how to make your own tortilla wraps, here’s some good things to put in them!

I’ll get round to doing some hot fillings when I get the time but here’s 10 cold ones to be getting on with.

Beef and horseradish

Spread the horseradish over the whole wrap, layer sliced beef on top and roll up, nice and hot.

Dairy lea and ham

I’m a sucker for this 😂 I make it for my daughter, like above just spread the dairy lea over the open wrap and layer the ham on top, then roll up and cut in half/in to bites etc.

Chocolate spread

Quick and easy, better on pancakes but nice if you want a quick sweet treat, just spread it over the wrap and fold/roll up. Nosh.

Smoked salmon and cream cheese

Spread cream cheese over the open wrap and layer smoked salmon over the top. You can roll this up and cut it into 1cm pieces to use as canopes or as little snack bites.

Ham and mustard

Another classic combination, spread the mustard over the wrap and put the ham over the top. Fold/roll and enjoy.

Mango chutney and cheddar

I love this, spread the mango chutney over the open wrap and the grate cheese over the top. Fold/roll it up as you would and munch. Pop it in the microwave for 20 seconds if you want melted cheese, the wrap might go a bit floppy though.

Coleslaw

As simple as it sounds, fill, wrap, eat, repeat.

Mozzarella and beef tomato.

Slice a beef tomato and ball of mozzarella as finely as you can lay the tomato over the open wrap, dash a little balsamic over the tomato and sprinkle with salt, the put the mozzarella on top. Roll up and eat.

Cheese basil and tomato.

Get some fresh basil and your favourite cheese. Slice the tomato as fine as you can. Spread some pesto over the open wrap and grate some cheese over the top. Put in whole leave of basil or chop it up and sprinkle over the top. Top with the tomato and fold/roll up.

Tartare sauce and tuna

Spread the tartare over the open wrap, open and drain the tuna and sprinkle over the top. Fold/roll up and enjoy.

Vanilla fudge recipe

Fudge! Who doesn’t love fudge, soft, sweet and, well, fudgey.

It’s pretty tricky to get it right, so a sugar thermometer/digital thermometer will really help here.

To the recipe!

Ingredients: makes about 1kg of fudge (£3-6)

  • 450g caster sugar
  • 450g double cream
  • 100g butter
  • 20g glucose syrup, about a tablespoon
  • 1 tbsp of vanilla extract, essence or vanilla bean paste, paste tastes better but is more expensive.
  • 1 tbsp salt

Equipment

  • Cake/baking tin, preferably square or rectangle and fairly large (18-23cm)
  • Saucepan
  • Wooden spoon
  • Sugar thermometer or digital thermometer
  • Pallet knife
  • (Optional) baking paper

Prep and cooking (45-60+ minutes)

  1. If you’re using baking paper, line the tin with it.
  2. Put the cream, butter, sugar and liquid glucose in a saucepan with the thermometer in on a low heat until the butter has melted and the sugar is dissolved, stir occasionally and gently. Make sure the saucepan is big enough to hold it all but small enormous go for the thermometer to get a proper reading.
  3. Turn the heat up, you need it to reach the soft ball stage, which is 116°c, be careful using full heat as you don’t want to burn anything to the bottom of the pan, try to use more gradual heat stirring occasionally and gently.
  4. Take the pan off the heat and keep an eye on it until it reaches 110°c, this should take 5-10 minutes.
  5. Add the vanilla and salt and mix in.
  6. Now for the hard work, if you’ve got a standing mixer with a beater attachment it will do the work for you here, if not it’s time to grab the wooden spoon and mix the fudge quite vigorously. You need to keep the thermometer in whilst doing this so try not to knock it out. Mix continuously until it reaches 60°c.
  7. Take the thermometer out at 60 and keep on mixing for 5-10 minutes.
  8. The mixing is what gives it its fudgey texture, by now it should be thick and look like fudge, if not it either needs more mixing or it hasn’t been mixed enough through the process.
  9. Pour it in the tin and smooth it out. Cover and leave for 12 hours. Don’t put it in the fridge! It will ruin the texture.
  10. Eat lots of fudge!

Costing

This should cost you some where in the region of £3.50, but can be nearly double depending on the quality of vanilla you use, most supermarket extracts are ok.

Again it depends how big/small you cut the cubes but it works out at about 9p each, I usually get 35-40 cubes.

Nutrition

As you’d imagine fudge is pretty dangerous stuff! But all the good stuff is.

Here’s the values based on a 28g serving

More recipes soon!

Prep guide; how to get perfect rice every time

It depends on how you define perfect, but when I say it I mean rice that is fluffy and doesn’t stick together or go all claggy.

The solution is shockingly simple, you just need to steam it through after cooking.

This requires no extra or special equipment, other than a bit of tinfoil (enough to cover the pan)

Let’s get to it!

What you need

  • Rice
  • Saucepan
  • Water
  • Tinfoil

How to get perfect rice every time

As you probably know all types of rice cook differently.

When it comes to the amount of water to use a ratio of 1:2.5 is usually a good starting point, so for every 1g of rice use 2.5x more water, e.g. for 100g rice use 250ml of water. For 237g of rice use 593ml of water etc.

Nearly all rice has a recommended cooking time on the packet, which is a handy guideline.

Bring the rice to the boil in 2.5x the amount of water, as it starts to boil turn the heat down low, put a lid on the pan (that fits) and simmer for the ‘recommended cooking time’ on the packet minus 1 or 2 minutes.

Before you turn the rice down to simmer make sure you stir the bottom with a wooden spoon to make sure nothing sticks and burns to the pan.

Once cooked simply turn the heat off and leave the pan there for 30 minutes with the lid still on.

I prefer to remove the lid 1-2 minutes before it’s cooked and wrap some tinfoil tightly round the top.

Leaving the rice covered and on the gradually lowering heat steams it through, when you uncover it 95% of the time you should have perfectly cooked rice 👌

And that’s it!

Nice and easy.

Dirty Cajun rice recipe

Dirty rice come in many (delicious) forms. Cajun is a pretty classic combination so here’s something I’ve put together.

To the recipe!

Ingredients: £2.79 – serves 2 (£1.40) or 3 (£0.93) (per serving)

  • 200g basmati rice
  • 1 chicken stock cube
  • 1 beef stock cube
  • 500ml water
  • 100-200g diced cooking bacon
  • 1 ball of mozzarella, diced
  • 1 red pepper, diced
  • 1 large onion, finely diced
  • 1 tbsp garlic paste
  • 1 tbsp ketchup
  • 2-3 tbsp Cajun spice
  • You shouldn’t need any salt here as Cajun spice has a shitload already
  • Oil, for frying.

Equipmemt

  • Saucepan
  • Knife
  • Chopping board
  • Tinfoil
  • Frying pan
  • Wooden spoon
  • Plate

Prep and cooking (40-50 minutes)

  1. First cook the rice but be sure to put 1 tbsp of Cajun spice, 1 beef and 1 chicken stock cube in the water when cooking, leave it covered until needed.
  2. Heat some oil in a pan on a fairly high heat until it’s nice and hot. Cook the bacon until the fat is rendered down and nicely crisp. Remove from the pan and keep to onne side.
  3. Add the onion to the pan, you want to get it nicely browned so the flavour develops, turn the heat up but don’t let it burn though. It’s a fairly fine line between nicely browned and burnt.
  4. Add the red pepper and cook for another 2-3 minutes, be sure to keep everything moving.
  5. Now add the garlic paste and ketchup cook for another 3-5 minutes while stirring.
  6. Remove to the heat and turn your attention to the rice. Remove the kids and fluff with a fork, and 1-2 tbsp of Cajun spice and mix well.
  7. All that’s left to do is mix the two together! Dirty.

Dirty rice all round

Costing

Cutting the cost

Looking at cost there are a few bits you can cut to save a bit, you can’t really change the amount of rice as it’s the bulk of the dish, unless you’re just cooking for 1.

Using half the amount of Cajun spice will save about 30p and you can just add some extra salt, the flavour won’t be quite as strong but still good.

The red pepper can be optional, removing it takes off another 45p, as is the mozzarella which saves an additional 45p.

This can cut the cost down to £1.59, or about 80p a serving.

All the prices used are from tesco.com on the date of this post.

Nutrition (based on 1 serving, half the above amount or )

Nutrition information

As you can see it’s fairly heavy on the carbs and a nice whack of calories, just about enough for a mealtime.

More recipes soon, keep on sending in your requests!

Mascarpone lemon cheesecake

This cheesecake uses mascarpone instead of regular cream cheese, which gives it a much creamier texture.

I like to do it with lemon because regular cream cheese has a slight sharpness/tang to it whereas marscarpone is a lot more mild.

Here’s the recipe!

Ingredients (makes 1 cheesecake)

For the base

  • 1 pack of digestive biscuits
  • 100-200g butter
  • 1-2tbsp brown sugar (preferably light)

For the filling

  • 200-300g marscarpone
  • 200-300g double cream
  • 50g caster sugar
  • 100-200g icing sugar
  • 2-3 lemons

Equipment

  • Food processor, or ziplock bag and a rolling pin
  • Zester or fine grater
  • Knife, or lemon juicer
  • Mixing bowl
  • Whisk, an electric one helps
  • Microwave or saucepan
  • Tart/cake dish
  • Wooden spoon
  • Spatula
  • Pallet knife

Prep and cooking (45+minutes)

  1. First make the base by smashing the biscuits, this is where a food processor helps, if you don’t have one just put the biscuits in a ziplock bag, wrap it in a tea towel and smash it with a rolling pin until it’s fine with little or no lumps.
  2. Melt the butter in the microwave/saucepan and mix with the biscuit until it holds its shape, using more butter will help it hold better but too much will make the base go soggy so don’t over do it.
  3. Grease the tart dish with butter and place the crumb in, fill the base and push down with a wooden spoon/hands.
  4. Put in the fridge for 10-20 minutes to chill.
  5. Whilst it’s chilling make the filling by beating the mascarpone with the icing sugar until smooth. Zest the lemons and mix well into the cheese. Juice the lemons and add a little at a time, mixing well in between adding more juice, until you have the desired flavour.
  6. Whisk the cream with the caster sugar to soft peaks and fold it into the cheese with a spatula.
  7. Spoon the mixture on to the biscuit base and smooth over with a pallet knife.
  8. Chill for at least 30 minutes, preferably a few hours.
  9. Either cut into portions, or just eat it like a huge biscuit.

More recipes soon!

Sloppy joes recipe

Myrecipes.com

A staple of America, sloppy joes are basically chilli burgers without the chilli, I guess you could call it a deconstructed burger in a way.

And yes, you read it right it’s uses a lot of ketchup!

Here’s the recipe

Ingredients (makes about 8)

  • 400-500g minced beef
  • 8 burger buns
  • 1 green or red pepper
  • 1 medium/large onion
  • 1-2 tsp garlic paste
  • 400g ketchup (try not to use ketchup that’s really cheap as it’s usually far too sweet)
  • 1-2 tbsp American mustard
  • 1-2 tbsp Worcestershire sauce
  • 1-2 tbsp brown sugar
  • 1-2 tbsp gravy granules
  • Salt and pepper
  • Oil, for cooking

Equipment

  • Frying pan
  • Knife
  • Chopping board

Prep and cooking (15-25 minutes)

  1. Start by dicing the onion and dicing the pepper.
  2. Heat some oil in a pan to a medium heat in a pan, when it’s hot add the onion and pepper and cook for about 5 minutes until soft.
  3. Add the beef and garlic paste, cook for another 5 minutes or so until the mince has browned.
  4. Add the ketchup, mustard, Worcestershire sauce and sugar, stir well and cook for 10-15 minutes on a low heat until the sauce has thickened, add the granules, stir in and cook for another minute or two.
  5. In a clean frying pan(if you have one) heat it to a medium-high heat and toast the insides of the bun.
  6. Serve and slop out with joe.

Untidy Joseph

A sloppy joe is an American invention, it’s got quite a scary amount of ketchup in (and I love ketchup) but they are incredibly moreish.

More recipes soon.

How to crack an egg with one hand

A somewhat unnecessary skill, that said if you’ve got 200 eggs to crack and you can do 2 at a time (1 in each hand) it’s definitely speeds things up.

How to hold the egg

First how to hold it, here’s a few pictures with and without the egg. you want to grip the bottom half of the egg with your 3rd finger and the top half with you thumb, index and middle finger.

Cracking the egg

up with thumb, down with last 2 fingers

Before actually cracking the egg its good to get the hang on the hand motion you need to do.

First practise pulling inward with your 3rd and little finger whilst (trying) to keep the rest of your hand stationary.

Then at the same time move your thumb upwards. When doing this with the egg the thumb pulls the top of the egg open whilst the last 2 fingers pull the bottom half open.

Now to put it into action, hold the egg and make a crack halfway through it, pull it open with your fingers and throw away the shell.

crack the egg!

Any problems give me a message, but keep in mind it takes a little bit of practise, i probably use anywhere from 10-100 eggs a day(!)

Good luck!

How to rub in flour and butter

When a recipe calls for you to ‘rub in’ the flour and butter, it’s a simple task but if you don’t know how to do it then this short guide should help.

What you need

  • Mixing Bowl
  • Sieve
  • Flour
  • Butter

In this example i’m using 100g of flour and 50g of butter (half fat to flour) which will result in a crumble mix with no flavour/sweetness, but its just for explanation purposes.

What to do

First, the actual motion of rubbing in, i make a circular motion with my thumb into the other 3 fingers like this

rubbing in hand movement

You don’t have to sift the flour, but i like to as it removes any lumps.

Sift flour

Add the butter and coat it with the flour.

coat the butter with flour

Now start to pinch and rub the butter, like with the motion we learnt at the start.

As it all comes together start to rub it against your hands, it should be a pale golden/yellow colour and looks a bit like breadcrumbs.

And thats how we rub in flour and butter!