Banoffee pie recipe

An English classic, toffee and banana, invented in East Sussex in the 70s when the chefs eventually reworked an American dish of a coffee toffee pie.

Here’s my recipe for banoffee pie;

Ingredients (makes 1 pie, enough for 8-12)

For the filling

  • 100g soft brown/light muscovado sugar
  • 1 tin of sweet condensed milk (about 380g)
  • 100g butter
  • 2 tsp vanilla extract/essence

For the topping

  • Bananas! As many or as few as you like, I usually use 3 or 4
  • 300ml double cream
  • 50g caster sugar
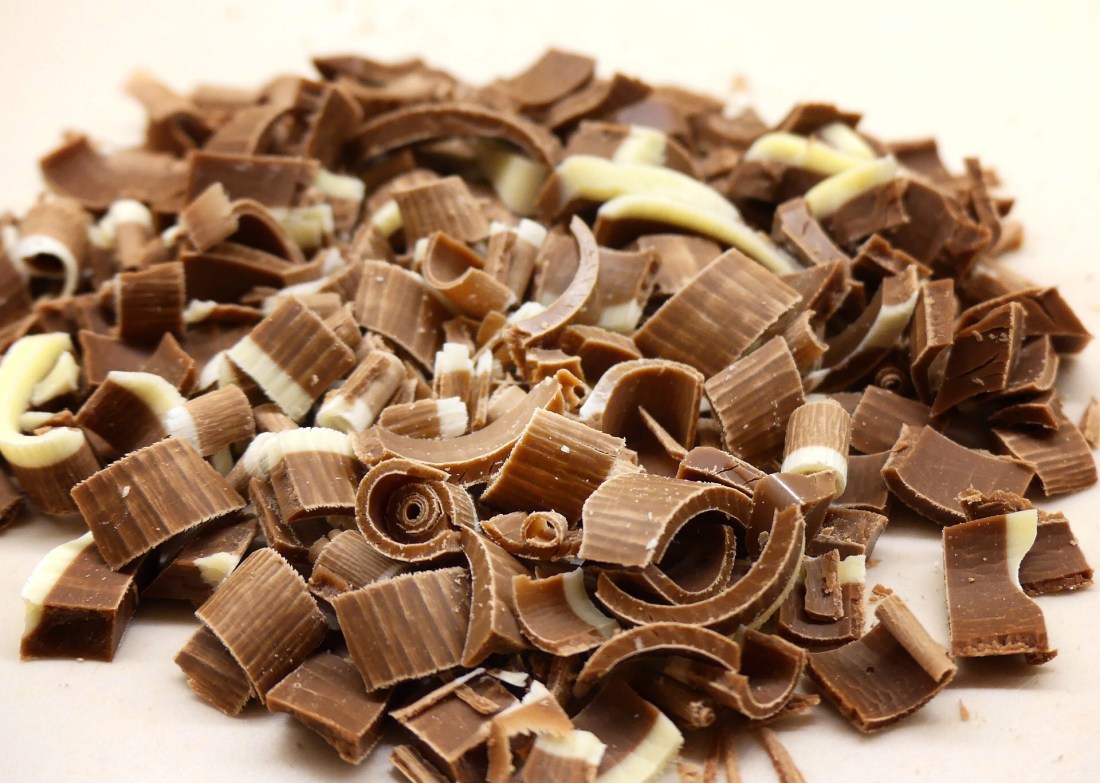
  • 50g white or dark chocolate

For the base

  • 1 pack of digestive biscuits
  • 100-200g butter

Equipmemt

  • Food processor, or rolling pin and a ziplock bag and/or tea towel
  • Mixing bowl
  • Measuring jug
  • Whisk, an electric one helps
  • Wooden spoon
  • Pallet knife
  • Piping bag
  • Tart case/quiche dish (22-24cm)
  • Chopping board
  • Knife
  • Microwave, or saucepan
  • Saucepan
  • Fine grater

Prep and cooking (60+ minutes)

  1. First make the base by smashing the biscuits, this is where a food processor helps, if you don’t have one just put the biscuits in a ziplock bag, wrap it in a tea towel and smash it with a rolling pin until it’s fine with little or no lumps.
  2. Melt the butter in the microwave/saucepan and mix with the biscuit until it holds its shape, using more butter will help it hold better but too much will make the base go soggy so don’t over do it.
  3. Grease the tart dish with butter and place the crumb in, fill the base and push down with a wooden spoon/hands.
  4. Put in the fridge for 10-20 minutes to chill.
  5. Whilst it’s chilling make the filling by heating the butter in a saucepan on a low heat and add the sugar. Stir constantly until the whole mixture is smooth and clean then add the condensed milk.
  6. Turn the heat up full, as it starts to come to the boil turn the heat back down low to simmer for about 5 minutes, make sure you keep stirring it and it should start to turn into a rich deep caramel.
  7. Pour this onto the biscuit base and level it out with a pallet knife. Put it back in the fridge for about 29 minutes until the caramel is cool.
  8. Ideally you need to do this fairly soon to when you intend to serve it as banana discolours quite fast, you can easily keep the base in the fridge for 2-3 days;
  9. Slice the bananas and place on top of the caramel however you wish.
  10. Whisk the double cream until whipped to soft peaks. Spread or pipe over the bananas.
  11. Grate the chocolate on top of the cream, you could make a caramel sauce to go over the top.
  12. Eat the damn thing!

More recipes soon!

London cheesecake recipe

Is it a cheesecake? No.

Is it a cake? No.

Does it have cheese? No.

Is it from London?

Honestly, I’m not sure, but from what I’ve heard it comes from an English chap who coined it with the name when given a task to do under pressure (scroll to the bottom for the story)

Recipe!

Ingredients (makes 6 pastries, or 1 huge one)

  • 1 (or more) sheet of pre rolled puff pastry
  • Frangipane, enough to fill the pastry, 250-300g should be plenty
  • Jam, whatever you like best
  • Desiccated coconut
  • Icing sugar to make enough chocolate icing to cover the top of the pastry(s) (200-400g)
  • Eggwash or some milk

Equipment

  • Knife
  • Baking tray
  • Baking paper
  • Desert spoon
  • Mixing bowl
  • Sieve
  • Pastry brush

Prep and cooking (30-60 minutes)

  1. Start by heating the oven to about 180°c fan.
  2. Unroll the sheet of pastry and cut it in half along the long edge.
  3. Now you want to cut each half into 6, (with each half separately) cut the half in half vertically and then into thirds horizontally. This should leave you with 12 equal square/rectangles of puff pastry.
  4. line a baking tray with baking paper and put 6 pieces of pastry on it, these are the bases for your London cheesecakes.
  5. In the middle of each put about 1 tbsp of jam and flatten it a little, you want to leave 0.5-1 inch bare around the edges.
  6. Put some frangipane on top of the jam and spread out a little to cover it.
  7. Brush a small amount of egg wash/milk around the edges of put the top on each ‘cheesecake’. Push down lightly and try to make sure no filling comes out.
  8. Bake in the oven for 20-30 minutes until golden and risen.
  9. When they’re ready take out of the oven to cook and make the icing by sifting the sugar into a mixing bowl. Add 1-2 tbsp of water and mix, add more water accordingly but only a tiny bit at a time as it’s easy to over do. Mix until thick but plyable.
  10. When the pastry is cool cover each one with icing and sprinkle desiccated coconut oven the top.
  11. Eat one, or two, or..ten?

Where did it come from?

I first heard about this a coworker mentioned a cockney cheesecake, some kind of pastry with coconut.

After looking into it turns out he meant a London cheesecake, and after some research it seems there’s mixed opinions on why it’s given that name, a lot of people seem to think it’s because the coconut represents cheese curds.

The most amusing story I found, and is the one I always go with, is that on a trip to America an English person was asked by an American friend to show him what a cheesecake is as he’d heard how great they are.

No knowing how to make it, the Englishman went through the cupboards and put together something with what he could find, the end product was given to the American as a ‘London cheesecake’.

Or so the story goes.

More recipes soon!

Romesco sauce recipe

This is one of many Spanish recipes I picked up whilst working with a top bloke in a makeshift tapas restaurant for about 3 months, he was my head chef and he’d come to England from Barcelona for work.

Romesco sauce is more of a cold dip, but it goes great with most meat especially steak.

It’s nice and easy to make so let’s get to the recipe!

Ingredients (makes about 400g)

  • 200-250g red peppers, roasted. You can roast your own or use ones in a jar from the shop.
  • 100-150g blanched almonds
  • 2-4 plum tomatoes
  • 1-3 tbsp garlic paste, more garlic will give it more heat I usually chuck quite a lot in
  • Either sherry, cider, white/red wine vinegar or lemon juice (1 or 2 tbsp)
  • 1 tbsp smoked paprika
  • 70-100ml olive oil
  • Handful of fresh basil

Equipment

  • Frying pan
  • Food processor or immersion blender and measuring jug (food processor works best)

Prep and cooking (5-10 minutes)

  1. First you want to lightly toast the almonds so heat the frying pan to a medium-highish heat.
  2. When it’s nice and hot add the almonds and stir/toss them constantly for a few minutes until there’s nicely browned parts on the almonds, remove onto a plate and put to one side.
  3. Drain the red peppers so there’s not too much oil on them and put them in the food processor with the almonds, tomatoes (cut into quarters), garlic, paprika, vinegar and basil. (Everything except the oil).
  4. Blitz until you have a lumpy paste looking concoction.
  5. Leave the food processor running and pour in about 1tbsp of olive oil. After 5-10 seconds (or until the oil is fully mixed in) do this again until you have the consistency you want (the oil will emulsify the whole thing binding it into a sauce/dip)
  6. Add salt and pepper if you think it needs it.
  7. Dip! Or drink?

¿Cuál es la fruta que más se ríe?

La naranja, ja, ja, ja, ja…

Bad jokes aside, romesco is a delicious and easy sauce that can be whipped up in about 5 minutes.

It’s great on a buffet as a dip or you can use it to marinate meat.

Goes well with a bbq 🔥

White or dark chocolate and vanilla mousse recipe

When someone mentions mousse it always sounds fancy, but they’re not all that tricky to make, and plenty of fun to eat.

This recipe is a request for the Facebook page, feel free to message with any recipe requests.

To the recipe!

Ingredients (makes enough for 4, or maybe 1..)

  • 300ml double cream
  • 30-50g caster sugar
  • 3 egg yolks
  • 200g white or dark chocolate
  • Either vanilla flavouring, essence, extract or a fresh pod

Equipment

  • Saucepan
  • Whisk
  • Mixing bowl
  • Measuring jug
  • Ramekins, or something to put the mousse in

Prep and cooking (10-20 minutes)

  1. Put 60ml of cream in a saucepan with the vanilla and warm on a medium heat until it starts to bubble around the edges, don’t let it boil.
  2. Whisk the egg yolk and sugar in a mixing bowl until smooth and creamy, add a tablespoon of the hot cream to the eggs while mixing, do this a few times and then add it back to the saucepan. This is so the egg yolks don’t scramble.
  3. Turn the heat down low and whisk until it thickens a little, enough to coat the back of a spoon. (Don’t let it boil)
  4. Remove from the heat, smash the chocolate up and stir it into the cream mixture until it’s all dissolved and is nice and smooth, you shouldn’t need to return it to the heat for all the chocolate to melt but it will take a few minutes and you need to keep stirring it.
  5. Put this mix to the side to cool and in another bowl whisk the remaining 240ml of cream until whipped to soft peaks.
  6. When the chocolate mix is cool enough simply fold in the whipped cream, refrigerate and enjoy!

At a mousse end

A lot easier than you may have thought!

This can be combined with other deserts to make some great combinations, or just enjoyed on its own or with some berries do a garnish, or something.

More recipes soon!

Manchester tart recipe

No, not a northern woman with loose morals (or loose something), but a delicious desert!

This recipe was a request from the Facebook page (feel free to message any requests) and I’m glad it was bought up because it’s brilliant!

Ingredients (makes 1 tart, 24-26cm)

  • 500g shortcrust pastry
  • 250-300g raspberry jam
  • 200-400g fresh raspberries
  • 100g desiccated coconut
  • 100-150g caster sugar
  • 500ml full fat milk
  • 400ml double cream
  • 60-80g cornflour
  • 5 egg yolks
  • Either vanilla flavouring, essence, extract or 1 fresh pod (scrape out the inside)
  • Some flour and icing sugar for dusting
  • Some butter for greasing

Equipment

  • Rolling pin
  • Tart case, about 10 inches
  • Baking beans/rice
  • Tin foil or baking paper
  • Desert spoon
  • Mixing bowl
  • Whisk
  • Saucepan
  • Bowl or container that fits in fridge.

Prep and cooking (60-120 minutes)

3. Use the rolling pin to pick up the pastry
  1. First heat the oven to about 160°c fan (gas 4).
  2. While it warms up roll the pastry out, use flour on the work surface to stop it sticking, roll it into a disc about 1-2 inches bigger than the case. Use the rolling pin to pick it up and place it in the case.
  3. Blind bake for 15-20 minutes until it’s a pale golden colour. Then remove the baking beans/paper and put in the oven for another 5-10 minutes until cooked
  4. While the pastry is baking make the custard by heating the milk and vanilla in a pan, make sure it doesn’t boil over but you need to get it heated to just before boiling point.
  5. Whilst the milk is warming, whisk the egg yolks, cornflour and sugar until thick and creamy.
  6. Pour the hot milk over the egg mixture a little at a time while whisking, then return it all to the pan on a low heat until you’re left with a nice thick custard.
  7. Put it in a clean bowl/container and dust the top with icing sugar (this stops it getting a skin on the top of it). Chill for 30 minutes or until cold all the way through.
  8. When the tart case is ready (don’t forget it’s in the oven) already the jam to cover the bottom of the pastry case and put to one side.
  9. Whisk the double cream until whipped and then mix into the custard with the coconut with a whisk/wooden spoon.
  10. Cover the layer of jam on the pastry case with fresh raspberries.
  11. Fill the case with the devilish cream custard and top with more fresh raspberries.
  12. EAT!

Serve with custard

Be careful, it’s a dangerous combination..

More recipes soon!

Frangipane recipe

Frangipane! Frangipani!

A funny name which translates to something like almond paste.

This stuff is delicious, it’s like a pastry creme version marzipan, the recipe uses almonds which is what gives it that marzipany taste.

Here’s the recipe;

Ingredients (makes about 1kg)

  • 1 block of butter (250g)
  • Either vanilla flavour, essence, extract or a fresh pod
  • 200g caster sugar
  • 6 medium eggs, or 5 large
  • 250g ground almonds

Equipment

  • Mixing bowl
  • Whisk, an electric one will make your life a lot easier, you can get one for a fiver in most supermarkets
  • Microwave if you need to soften butter
  • Spatula

Prep (5-10 minutes)

  1. The whole things a lot quicker and easier if you get the butter nice and soft (warm) first. A microwave is ideal for this but don’t turn it into liquid, it should still hold its shape but if you put your finger in it it’ll go right through. If you don’t have a microwave just put it somewhere warm (airing cupboard) for 39 minutes first.
  2. Now you need to cream (mix) the butter, sugar and vanilla so put it all in a mixing bowl and whisk away until its light, smooth and sugary vanilla heaven.
  3. Crack one of the eggs into the bowl and whisk for another minute or so until the egg is fully incorporated to the mix.
  4. Repeat step 3 until you have no eggs left. Now put the whisk away.
  5. Sprinkle enough ground almonds to fully cover the top of the mixture in the bowl and fold it in with a spatula. When it’s mixed do the same until the ground almonds are all gone.
  6. That’s it!

What happens if you eat lots of almonds?

You will run out of almonds.

Frangipane, or frangipani, is like an almond (marzipan flavoured) pastry cream that you can use to pipe in or on to things or just as a pie/tart filling, you can pretty much turn it into a cake by adding some flour.

Enjoy! I’ll be following this up with a recipe you can use frangipani in.

Tortilla wraps recipe

Tortilla wraps!

What better thing to roll food up in and munch on.

I’ve had a request for some recipe ideas for things to put in wraps, but first I thought it’d be good to show you how to make your own wraps, it’s not as hard as you might think.

Ingredients (makes about 8 wraps)

  • 400g self raising flour
  • 1-2 tsp salt
  • About 50ml olive oil
  • 300ml warm water

Equipment

  • Mixing bowl
  • Sieve
  • Rolling pin
  • Frying pan
  • Sieve (optional)

Prep and cooking (10-15 minutes)

  1. First sift the flour into a mixing bowl, add the salt.
  2. Add the oil to the warm water, now pour over the flour and mix with your hands until a dough is formed, if it’s too wet put some more flour on your hands.
  3. Knead the dough for 2-3 minutes.
  4. Cut into 8 equal pieces, roll them out into tortillas, I find it easier to do it just before cooking as the start to shrink when you stop rolling.
  5. Heat a little oil to a medium heat in a pan, cook the tortillas for 1-2 minutes on each side until they start to brown.

I wrote a song but it’s more of a wrap

So there it is!

Whilst tortilla wraps are generally cheap enough (about £1 for 8, or around 12p each) making your own is even cheaper! (and more satisfying).

These homemade tortillas come in at a whopping 2p each, maybe 4-5p if you use fancy flour or olive oil, so you can get 6 for the price of 1!

I’ll be putting up some recipes for how to fill these tasty beasts soon so keep an eye out!

TTFN.

Vanilla cheesecake recipe

The cake that’s not a sponge, but more of a big cheesy biscuit.

I’ve got a ton of cheesecake recipes which I will eventually get round to writing up, but for now I thought it best to start with a classic,

Vanilla cheesecake!

To the recipe,

Ingredients (makes 1 cheesecake)

For the base

  • 250-300g digestive biscuits
  • 100-200g butter

For the filling

  • 600g cream cheese
  • 100g icing sugar
  • 300ml double cream
  • Either; vanilla flavouring, essence, extract or a vanilla pod, a pod tastes best

Equipment

  • Cake tin (23-26cm)
  • Either a food processor, or a ziplock bag, tea towel and rolling pin.
  • Mixing bowl
  • Wooden spoon
  • Palette knife
  • Whisk or electric whisk
  • Microwave or saucepan
  • Cling film

Prep (25-30 minutes)

  1. Start by greasing the cake tin with butter.
  2. Either blitz the biscuits in a food processor, or put them in a ziplock bag, wrap it with a tea towel and smash it with a rolling pin until you have fine crumbs, if doing the second method be careful as it can get quite messy.
  3. Melt the butter in a saucepan/microwave and add it to the biscuit. Mix with a wooden spoon, the more butter you use the better the base will set but don’t overdo it or it will go soggy. On the other hand don’t use too little or it won’t bind together.
  4. Pour the biscuit mix into the cake tin and pat down into a base with a wooden spoon or your hands.
  5. Cover with cling film and put on the fridge for 15-20 minutes to set.
  6. Now onto the filling, put the cream cheese in a bowl with the icing sugar and whisk together until smooth.
  7. Add the flavour, (scrape out the inside if using a pod) add to the bowl and mix well.
  8. There’s 2 ways to add the cream, you can either add it straight to the mix and whisk until fully mixed, or you can whip it the fold it into the mix with a spatula. The second give a lighter cheesecake.
  9. Take the base out of the fridge, remove the clingfilm and spoon in the filling, level and smooth with a pallet knife.
  10. Recover with cling film and return to the fridge for 30+ minutes.
  11. Try not to eat it all at once.

Just Brie mine

Not really the right kind of cheese but it might appeal to some.

For all you cheesecake lovers, I’ll be adding more cheesecake recipes over time so keep your peepers peeled.

I’ll also be adding s recipe soon for London cheesecake, which isn’t a cheesecake (or cake) at all, it’s a pastry.

Until next time!

Thai green chicken curry recipe

This is a follow up from the last post (Thai green curry paste)

I love the distinct flavour of a Thai curry, get one up on the takeaways with this fairly simple recipe, let’s get to it!

Ingredients (serves 6-8)

  • 500-800g of diced chicken, white or brown meat is fine
  • 1 tin of coconut milk (about 400g)
  • 1 large onion or 2 medium finely diced
  • 2 limes
  • 200-300g mangetout, or sliced green beans
  • 2-4 tbsp thai fish sauce
  • 1-2 tbsp light soy sauce
  • 2-4 tbsp green Thai curry paste
  • 1-2 tsp sugar
  • 100-200g new potatoes
  • 1-2 chicken stock cubes
  • A good handful of Thai basil, or basil
  • Oil for cooking, I use sunflower or groundnut
  • Salt and pepper

Equipment

  • Knife
  • Chopping board
  • A wok, or frying pan
  • Saucepan
  • Slotted spoon
  • Measuring jug

Prep and cooking (30-40 minutes)

  1. Start by boiling a pan of water with some salt, when it’s at a rolling boil add the beans and cook for about 3 minutes, remove with a slotted spoon and put in a measuring jug, run under a cold tap until the beans are cold and drain the excess water, put to one side.
  2. Slice the potatoes in half/equal sized pieces and cook in the same water as the beans for 7-10 minutes until soft but not overdone. Run under cold water until cold, drain and put to one side.
  3. You can either do this after the first 2 steps or at the same time (just keep track of what you’re doing), heat some oil to a medium high heat in the wok/pan, when it’s nice and hot add the onion and stir/toss constantly for 1-2 minutes until starting to colour.
  4. add the Thai curry paste and cook for another 1-2 minutes while stirring.
  5. As the coconut milk and keep the heat high until it starts to bubble.
  6. Add the sugar, soy, fish sauce, stock cube and diced chicken. Turn the heat down low and simmer with a lid on for about 10 minutes (until the chicken is cooked).
  7. Zest the lime into the pot, add juice if desired (taste first).
  8. Before serving stir in some basil leaves while it’s hot but not on the heat about a minute before serving.
  9. Enjoy some Thai!

Ain’t nobody got Thai for that“

So there you have it, pretty simple and always a joy to eat.

Been busy with work the past few days but got some days off coming up so will hopefully get a few new recipes/guides up soon!

Thai green curry paste recipe

I’ve had a few requests for a Thai green curry, specifically one that uses ingredients that are easily obtainable in the UK.

I would advise making your own Thai curry paste as it packs more of a flavour punch, it’s cheaper than that from the shop and it’s more fun doing it yourself.

I thought I’d start with a Thai curry paste recipe, as a good curry paste (should) make a good curry!

To the recipe!

Ingredients (makes about 500ml)

  • 2-3 medium onions
  • 10-15 green chillis
  • Ginger paste (2-3 tbsp)
  • Garlic paste (2-3 tbsp)
  • 1-2 lemons
  • 2-4 limes
  • 2 tbsp coriander seeds
  • 1 tbsp ground cumin
  • 50ml Thai fish sauce
  • 20ml light soy sauce
  • 30-50g fresh coriander
  • 100ml olive oil

Equipment

  • A food processor, or,
  • A mixing bowl/measuring jug and an immersion blender

Prep (5 minutes)

  1. Zest and juice the lemons and lime into bowl.
  2. Dice the onion and add to bowl.
  3. Slice chillis, remove seeds if you don’t want it so hot and add to bowl.
  4. Lightly crush the coriander seed, add to the bowl with the rest of the ingredients.
  5. Blitz until smooth and keep in the fridge for upto 3-4 weeks.

Lemon squeezy

Nice and easy.

You can vary the amounts of ingredients depending on personal taste.

I’ll be doing a Thai green chicken curry recipe next so keep an eye out for it.

Looking at costing, the above recipe works out about £1.45 cheaper if you were to buy the same quantity from a supermarket, not too shabby!