Chantilly cream/sweet cream recipe


Something that you hear paired with fancy French desert names and alike, chantilly cream can be whipped up in a grand total of about 3 minutes!

This recipe is a another request from the Facebook page, I’ll also be doing one for a silky creme patisserie soon after 👌🏻

To the recipe!

Ingredients

  • Whipping cream or double cream, I prefer double
  • Caster sugar
  • Flavouring (optional) vanilla is the most commonly used

Equipment

  • Measuring jug
  • Mixing bowl
  • Hand whisk or electric whisk, or food processor with cream whipping attachment

Cooking and prep (3-10 minutes)

  1. Measure out the desired amount of cream, it will generally double in size when whipped. Pout on mixing bowl/food processor, I usually leave it in the measuring jug and whisk with an electric hand whisk.
  2. Add sugar, I usually use about 10-15% of the amount of cream (or 1 tbsp per 100ml of cream) the more you use the sweeter the cream will be but also it will make it heavier rather than nice and light, as chantilly cream should be.
  3. Add the desired amount of flavouring, try not to overdo it.
  4. Whisk until the cream just holds its shape in peaks and is smooth, silky and glossy. If you over-whip it it will got claggy and if you overdo it a bit more it will split. As it gets thicker slow down the whisking or stop every so often to check.
  5. Voila! Pipe it, spread it, spoon it into your mouth, whatever!

How does Reese eat her cream?

Witherspoon.

So it’s literally whipped cream, with a bit of sugar and a fancy name.

Costing this recipe the price is mainly in the cream which I believe is about £4 a litre.

Though it should double in size the weight will pretty much be the same apart from the addition of the sugar and flavour as the only thing you’re adding is air (by whisking) and last I checked it doesn’t weight much.

Any problems with the execution don’t hesitate to get in touch.

Join 1,121 other subscribers

Chinese curry sauce recipe


Can ya smeeellll, what the wok, is cookin’

Always a distinctive flavour, but I always hate how they put peas in it.

It’s Chinese curry sauce, of course!

This recipe is a request from @mattcudmore on the Facebook page, hope it works for you!

The main flavour of this sauce actually comes from pre mixed curry powder, and in the traditional Asian fashion the sauce is thickened with corn flour rather than butter and flour like a roux.

This recipe is for the sauce only, to turn it into a veg/chicken/beef etc curry just cook the desired meat/veg in a pan then add the sauce and cook through.

Ingredients (serves 2-4)

  • 1 medium onion
  • Garlic paste and ginger paste (about 2-3 tsp of each)
  • 3-4 tbsp of curry powder; I find mild curry powder from Asda works well, failing that most madras curry powders have the right kind of flavour
  • 1 tsp ground turmeric (optional, for colour)
  • Chilli powder (optional, if you want some heat)
  • 1 tsp Chinese 5 spice
  • Cornflour
  • 1-2 tsp light soy sauce
  • 400-500ml chicken stock (stock cubes and water if you don’t have any actual stock)
  • Salt and pepper
  • Sugar (1-2 tsp)
  • Cooking oil

Equipment

  • Chopping board
  • Knife
  • Wok or saucepan
  • Measuring jug
  • Immersion blender (hand blender) or food processor

Prep and cooking (20-25 minutes)

  1. Heat some oil in a pan on a medium-low heat and finely dice the onion.
  2. When the pan has warmed up add the onion and cook for about 5 minutes until soft, stirring occasionally.
  3. Add the garlic paste and ginger paste and cook out for a minute or two while stirring.
  4. Mix the dry spices and sugar with a little bit of water to make a paste and add the the pan, cook out the spices for another minute or two while stirring.
  5. Add the soy sauce and stock and whack the heat up full, when it comes to a boil reduce the heat to low and leave it to simmer for 10-15 minutes stirring every so often to make sure nothing sticks (and burns) to the bottom of the pan.
  6. Get the immersion blender and whizz it all up until smooth, or is using a food processor blend and return to the pan.
  7. Mix some cornflour (about 50g?) with water or chicken stock if you have any left with your fingers to make sure there are no lumps.
  8. Heat the sauce the pan to a medium high heat, add a little of the cornflour slurry at a time until you reach the desired consistency.
  9. Add salt and pepper to taste
  10. Enjoy!

Wok this way…

Though curry isn’t typical of Chinese food it’s still apparently quite a popular dish in southern parts of China, where they add curry powder to some dishes.

As you’d expect, curry powder is a largely western thing making an appearance somewhere around the 18th century, the Asian version tends to have either cinnamon or star anise as additional ingredients (which is why we add a little 5 spice)

On to costing, this sauce rolls in at £1.58, which is about 40p per serving.

A 500g jar or premade sauce is 80p at Tesco so a bit cheaper, but it’s about 150g less than the recipe above and fresh is always more enjoyable.

As someone mentioned in a post the powdered Chinese curry sauce is a good alternative, I’ve used it before and it generally works alright but it’s a bit pricey, about £2.75 for 405g or 0.68p/100g which works out at £4.42 for the amount the above recipe would make you.

So you can see while it’s convenient, it comes at a cost of an extra £2.84, which is enough for a whole chicken.

More recipes soon!

Join 1,121 other subscribers

Dumplings recipe


I could probably eat them all day given the chance.

DUMPLINGS!

Yes, we all love a good dumpling, or at least we should (I think?)

This recipe is a request from @helenknowles on the Facebook page, hope you can get it to work!

Ingredients (makes about 8)

  • 150g self raising flour
  • 75g beef/veg suet (I recommend beef)
  • 1 tsp baking powder (optional but fluffs them up a bit more)
  • Either; a stew/casserole or chicken/beef stock and some gravy granules to thicken (I like to use 1 chicken and 1 beef stock cube together)
  • Salt & pepper
  • Water
  • (optional) fresh or dried herb(s) of your choice

Equipment

  • Mixing bowl
  • Scales
  • A saucepan, or if putting in a stew make sure the dish is big enough to hold them
  • Knife and chopping board if using fresh herbs
  • Tablespoon
  • Sieve (optional)

Prep and cooking (25-35 minutes)

  1. Weigh out 150g of flour with the baking powder and sieve into a mixing bowl.
  2. Add 75g of suet, salt and pepper (I usually use a fair amount) and any herbs if using and mix around with a spoon.
  3. Add 1 tbsp of water and mix well, keep doing this until you have a firm dough, it doesn’t need a lot of water, usually only 3-5 tbsp so don’t overdo it or you have to start adding flour to balance it out and the whole thing goes out of proportion.
  4. Cut the dough in 6-8 pieces and roll them into balls, they might look a bit small but the absorb a lot of liquid and grow.
  5. If you have a stew in the oven, add the dumplings 20-30 minutes before you plan to serve.
  6. If you don’t have a stew, get some stock on to boil, when it’s boiling add some gravy granules to thicken the liquid, then add the dumplings, put a lid on the pan and reduce the heat to low and cook for 20-30 minutes. We add the gravy granules as it help the dumplings hold their shape, but if cooking in a saucepan be sure to keep an eye on them.
  7. Eat and try not to become a dumpling addict

All of that, and dim-sum

No it was just a headline, no dim-sum here, but they are a kind of dumpling and I’ll get a recipe up for them soon.

Costwise these little balls of joy cost between 7-15p each depending if you use herbs, and which herbs, making 8 cost somewhere between 56p-£1.20.

Compared with the packet mix which costs about 80p and says it makes 8, so it might cost an extra 20-40p depending what you put in them, but you can’t beat homemade!

Give it some cheese

A variation I like to do it cut some cubes of cheddar or any other cheese and place them in the centre of the dumpling before cooking, though it can be fairly thick to get it to stay in there while it’s cooking!

More recipes to come

Join 1,121 other subscribers

Mughali Murgh Korma (Moghali braised chicken/Chicken Korma) recipe


I always used to think a korma was a poor excuse for a curry due to the lack of heat.

This recipe is a second request from @rachaelireland on the Facebook page.

That was until my (current) head chef shew me a recipe and i can’t deny, it’s bloody delicious, If you like coconut this is a dish for you!

The recipe i have is to make about 20 portions so i’ve cut it down best i can and hopefully it shouldn’t affect the flavour of the dish.

Ingredients (serves 2)

For the sauce

  • 4 cloves
  • 1 medium/small cinnamon stick
  • 3 black peppercorns
  • 5 green cardamom pods
  • 2 tablespoons of desiccated coconut
  • 1-2 tsp garlic paste
  • 2 tbsp almond powder
  • 1-2 tsp ginger paste
  • 1tsp ground turmeric
  • 2 tsp cumin seeds
  • 2 pints of natural yoghurt
  • Salt & pepper
  • 1 large onion

For the chicken

  • 2 chicken breasts
  • 1-2 eggs
  • 1-2 tsp garlic paste
  • 1-2 tsp ginger paste
  • 1-2 tsp garam masala

Equipment

  • Knife
  • Chopping board
  • Frying pan
  • Medium/large saucepan
  • Measuring jug
  • Fork, or whisk

Prep (10-15 minutes)

  1. Start by cutting the chicken however you like, i prefer to dice it into fairly large cubes, usually about an inch in size. Beat the egg in a measuring jug with the other ingredients ‘for the chicken’, when fully mixed add the chicken to the measuring jug and mix again to coat the chicken.
  2. Finely dice the onion.
  3. Warm the frying pan up on a medium-high heat (with no oil). When it’s hot add the coconut to roast it, make sure you keep it moving constantly so it doesn’t burn, you’re looking for a nice brown colouring but not black, it should take a minute or two.
  4. Now turn the heat down to medium and add a little oil or butter, fry the chicken off until cooked through and remove from the pan onto a plate/bowl.

Cooking (20-30 minutes)

  1. Now we can get onto making the sauce, heat some oil in a saucepan on a lowish heat and add the whole spices (cinnamon stick, cloves, peppercorns, cardamoms & cumin seeds) and cook until lightly coloured.
  2. Add the onion and garlic, turn the heat up a little and cook for another 3-5 minutes while stirring.
  3. Add the remaining ingredients except for the yoghurt (coconut, ginger paste, turmeric and almond powder) and cook for another 3-5 minutes.
  4. Take the pan off the heat and let it cool down a little. Get a desert spoon and take 1 tbsp of yoghurt and mix into the saucepan, keep doing this until all the yoghurt is mixed into the sauce. We do this because if you add all the yoghurt at once into the hot pan it will split, your sauce will look horrible, and won’t have a smooth creamy texture.
  5. Return the pan to a medium-low heat and add the cooked chicken, cook for 10+ minutes, serve and be merry.

“Eating too much curry can put you in a spice induced korma”

A Korma is a dish that actually originated in India, as opposed to something like a chicken tikka.

The English name ‘Korma’ come from the Urdu for qormā, which means “braise” referring to how its traditionally cooked.

If you’re not a huge fan of a korma, try this recipe, it changed my mind!

More recipes soon

Join 1,121 other subscribers

Takeaway style chicken chow mein recipe


This recipe is a request from @rachaelireland on the Recipes & Stuff Facebook page (hope it works for you!)

The recipe is an adaptation of one that my partner found online and cooked for me a few times, after getting the recipe from her i made a few slight adjustments to personal taste.

She got the recipe from a YouTube video which claimed it was an authentic takeaway chow mein recipe but i can’t say 100% if it’s how it’s actually done in a chinese takeaway or not, it looked legitimate enough though and either way it’s still delicious!

The trick is plenty of soy sauce, as it contains natural MSG which really opens up the flavour.

Soy sauce!

It only takes about 20 minutes to make so let’s get cooking some chow mein! I’ll get some pictures uploaded the next time i make some (or send your own!)

Ingredients (serves 2-4)

  • 2 blocks of dried noodles
  • 2 chicken breasts, sliced into small strips. You can use more or less if you want and it doesn’t have to be breast meat
  • Chicken stock/stock cube (optional)
  • 1 onion, sliced (i prefer to slice it like this for Asian dishes)
  • Beansprouts (as many or as little as you wish)
  • Light soy sauce
  • Dark soy sauce
  • Worcestershire sauce
  • Garlic paste

Equipment

  • A wok is nice, but a frying pan works fine
  • A small/medium saucepan
  • Knife
  • Chopping board
  • Wooden spoon
  • A pair of scissors
  • A sieve or pasta spoon
  • Ideally this comes out best cooked on a gas hob as it gives the pan a higher heat all around but electric works fine.

Prep and cooking (10-15 minutes)

  1. Start by cooking the chicken, fill the saucepan about 3/4 full with chicken stock or water & stock cube(s) and put it on to boil, as it boils add the chicken then turn the heat down to low. This is where you want the chicken strips to be nice and small so they cook quickly, it should only take about 5 minutes. When it’s ready remove it with a slotted spoon onto a plate and turn the heat but up full.
  2. Put the wok/pan on a high heat.
  3. When the stock is boiling add the noodles, when they come back upto the boil reduce the heat to medium.
  4. While the noodles are cooking wait until the pan/wok starts to smoke, then add a little oil (about 1tbsp), ground nut/peanut oil has a higher smoking point and a nice flavour, but any oil is fine.
  5. Add the onion and toss the pan (if you’ve got the hang of it) and/or stir with a wooden spoon constantly. After about a minute add the bean sprouts and cook for another minute or so still stirring, then add the garlic and cook for another minute (still stirring, it is a type of stir fry!)
  6. Add a dash of Worcestershire sauce (i use about 1 tbsp) and keep cooking and stirring for another minute or so.
  7. The noodles should now be ready, so either transfer them from the saucepan to the wok/pan with a pasta spoon, or drain them and add the the pan. If you are draining them keep 1/2 tbsp of the stock to add to the wok/pan as you add the noodles.
  8. Get your scissors and snip up the noodles in chunks in the pan, make sure to be careful if it’s a non stick pan so not to scratch it. We do this so when we mix the noodles they actually incorporate with the rest of the chow mein, rather than sitting in the middle with everything else around the edge.
  9. Add the chicken, light soy sauce (4-6 tbsp) and dark soy sauce (2-3 tbsp) and get stirring while it cooks away at full heat, when most of the liquid has gone (should be 2-3 minutes) serve and eat! (Don’t burn your mouth)

Quick and easy chicken chow mein recipe (and cheaper than a takeaway)

Hope you enjoy! If it looks dry just add more soy/stock, it shouldn’t need any salt due to the amount of soy sauce, but I still usually put a few flakes of sea salt over the top 🙄

Costing this dish it comes in at about 90p a serving, or £1.80 for a size similar to that you’d get from a takeaway.

According to the internet, chow mein is a Romanized version of the Taishanese word chāu-mèn and it’s enjoyed mainly in Nepal, America, India and sunny old England.

From what I can find Westernised chow mein is nothing like they would have it in China, it seems over there is more of a soft noodle broth, kind of like a wonton soup but with no wontons.

But who cares!

Yum.

Keep an eye out for more recipes, I’ll try and get some more takeaway style ones up soon.

Join 1,121 other subscribers

Dutty Fries (dirty fries) recipe


I’ve decided to do this post as a response to @jasonrichards on my Facebook page. He reminded me how much I love dirty fries 😂 (thankyou!)

This is the standard recipe I use though I’ve got a few variations I’ll post at later dates. I’ll also get some pictures/gifs up when I get round to making some.

It’s got a couple of different elements and they take about an hour to make, so let’s get to it!

Ingredients (makes as many as you can eat)

For the fries

  • Potatoes, as many as you think you can eat
  • Garlic
  • Cumin
  • Smoked paprika
  • Oil, to deep fry (1-2 litres)
  • Salt and pepper

For the onion béchamel

  • 50-100g butter
  • 50-100g plain flour
  • 300-500ml milk
  • 1 medium onion
  • 3-4 cloves
  • 2-3 bay leaves
  • 2 whole peppercorns
  • Salt and pepper
  • Double cream (optional)

For the dutty bit

  • Bacon, sliced or diced, or bacon lardons
  • Doritos (flavour of your preference) or tortilla crisps
  • Grated mozzarella/cheddar mix
  • Jalapeños
  • Greek yoghurt
  • Fresh mint / dried mint
  • White wine vinegar or apple cider vinegar (I prefer apple cider vinegar)
  • Salt and pepper

Equipment

  • Knife
  • Chopping board
  • 2/3 saucepans/cooking pots, or 1 to wash and reuse. 1 to boil potatoes, 1 to deep fry potatoes and 1 to make béchamel.
  • Measuring jug
  • Microwave, or hob
  • Roasting tray/Pyrex dish, a baking tray will work but ideally you want something with raised edges
  • Oven

Prep (20-30 minutes)

First we need to get the béchamel made (5-10 minutes)

  1. You’ll notice the ingredients are fairly rough here, that’s because (as with most cooking) a lot of it is down to personal preference. So the more butter you use the richer your sauce will be, and the more flour you use the thicker the sauce will be. However, if you want to use more flour you need to add more butter accordingly otherwise your béchamel might taste a bit off.
  2. If you’ve got a microwave use a measuring jug here, if you’ve only got a job then use a saucepan instead, put the milk in the jug/pan and slice the onion, add this to the milk with the cloves, peppercorns, bay leaves and a little salt. Microwave on medium to infuse the flavours into the milk, a couple of minutes, just be sure to keep an eye on it so the milk doesn’t boil over.
  3. Melt the butter in a pan, add flour and mix well, if you sieve it first it mixes in easier, you want to get a soft peanut butter consistency, it should just come together like a dough.
  4. Cook on a medium heat for a few minutes while stirring constantly to cook the flour out.
  5. If the milk has cooled down warm it up again, pour through a sieve into a measuring jug to remove the bits.
  6. Turn the heat up to high/full and start to add a little milk at a time (50-100ml) while stirring constantly, be sure to get round all edges at the bottom of the pan.
  7. Keep adding milk until you get a consistency you’re happy with, add more milk if you have to, but it should be nice and thick, a lot more than a normal sauce.
  8. Add salt and pepper to taste.

Next we need to get the fries on the go (15-20 minutes)

  1. If you want to peel the potatoes then peel them but it’s not essential (unless the potatoes are dirty, literally) and cut them into chips to the size of your liking. Put the chips in a pan.
  2. Again I haven’t put precise measurements for ingredients here because again, a lot of cooking is to personal preference but I’ll put what I use as a guideline.
  3. Add cumin (3-4 tbsp) and smoked paprika (1-2 tbsp) to the pan.
  4. Add crushed garlic gloves to the pan, skin still on (you can remove it if you want but it’s all flavour) I usually use a whole bulb of garlic.
  5. Add salt then fill the pan with water so it’s filled about 1cm above the chips.
  6. As you put the potatoes on to boil, fill a pan with the oil and put on a high heat. Put a lid on the potatoes and when they start to boil reduce the heat to medium-high and remove the lid.
  7. You want to try and get them when they’re nice and soft (near mash) but still strong enough to hold their shape, this depends a lot on the size you’ve cut them but 5 minutes is usually enough. They should at least be a paler colour and not look dense.
  8. Remove from the water with a slotted spoon/spider onto kitchen towel to dry. Remove any garlic skins, I like to leave the garlic cloves in but that’s up to you.

Cooking (30-40 minutes)

  1. Heat the oven to about 180°c (fan)
  2. Now we’ve got the dirty fries and béchamel, it’s time to make it dutty 😎 start by heating some oil in a pan and start to fry the bacon.
  3. Slice the jalapeños and add to the bacon, when all cooked cover the chips with the chillis and bacon.
  4. Next crush the Doritos/tortilla chips and sprinkle on top.
  5. Cover the whole thing with the béchamel and grated cheese and cook for 20-30 minutes.
  6. While it’s cooking chop the fresh mint and mix with the yoghurt, vinegar and salt/pepper.
  7. When the fries are ready, top with the yoghurt.
  8. Enjoy some filth on a plate.

Join 1,121 other subscribers

Learn how to make Harry Potters favourite desert; Treacle Tart (with a hint of fresh lemon and ginger)


Get your mince pies on this, treacle tart (that’s cockney for get your eyes on this, sweetheart).

A classic from way back in the 19th century; the treacle tart. Bought back to light through none other than Harry Potter, starring as his favourite treat at Hogwarts in the series of books.

Originating in England, this sweet treat was created by a lady called Mary Jewry, and contrary to common misconception despite being called a treacle tart it doesn’t actually contain any treacle at all, it’s golden syrup.

So enough chat, let’s get on with this treacle tart recipe!

Ingredients (makes 1 treacle tart)

  • 400-500g breadcrumbs
  • 800g golden syrup
  • 500g shortcrust pastry
  • 1 lemon (optional)
  • 2 tsp ginger powder (optional)
  • 1 egg yolk (optional)

Equipment

  • 1 tart dish/quiche dish
  • Mixing bowl
  • Rolling pin
  • Food processor
  • A microwave comes in handy but not essential, as is a pallet knife
  • Baking beans or rice
  • Baking paper

Prep (20-25 minutes)

1.Roll a disc of pastry
  1. This recipe requires blind baking the pastry first, so start by heating the oven to about 160°c (fan), then roll out the shortcrust pastry into a big disc, about 2 inches bigger than your tart/quiche dish.
  2. Grease the dish with either butter or oil and be sure to spread it around the whole dish. Using oil is more cost effective, but butter will give the pastry a (slightly) richer taste.
  3. Pick the pastry up with the rolling pin and place in the dish. Straighten around the edges on the inside of the dish with your fingertips to tidy it up, there should still be a fair bit of overhand coming over the edges.
3.Pick the pastry up with the rolling pin
  • Trim the overhanging edges with scissors, be sure to still leave a bit, as shortcrust shrinks when it cooks, but not so much that it touches the worktop .
  • Gently prick the base of the pastry with a fork, it doesn’t need to go all the way through the pastry just thin enough for steam to pass through.
  • Cover with baking paper then fill with the baking beans/rice and cook in the oven for 15-20 minutes, or until the overhang starts to colour.
Cover with baking paper,
then fill with rice(left)
or baking beans (right)
  • Remove the baking paper and rice/baking beans and you have your blind baked pastry case, ready to fill!(and eat)
  • If you want to ensure a crisp bottom, put a baking tray in the oven for 10 minutes, then put the dish on the baking tray.

Cooking (40-60 minutes)

  1. Now we have our case we can get a move on, put the golden syrup in a large mixing bowl and warm in the microwave until runny (if you have a microwave, you could make a Bain Marie with a saucepan if not or you could just wrestle with cold syrup)
  2. Juice the lemon into the syrup with the ginger powder and mix.
  3. Add the breadcrumbs and mix well until smooth.
  4. If using, add the egg yolk and mix well.
  5. Fill the pastry case with the bready syrupy goodness and smooth the top with a pallet knife. If you have any leftover pastry you could use it to decorate the top with a lattice or something but it’s only aesthetics.
  6. Bake in the oven for 30-40 minutes, check every ten minutes.
  7. Engulfed yourself in the sweet delight that is Harry Potters favourite desert.

Not this tarts first time on the big screen

So it appears it’s been in films before Harry Potter, the child catcher from Chitty Chitty Bang Bang used it to lure the kids, treacle tart loves the spotlight, slag.

I don’t know about you but I wouldn’t want to waste this luring kids(!)(I would just like to make it clear I have no intention to lure kids, I already have 1 and another on the way)

This is definitely a desert for those of you (like myself) with a sweeter tooth.

This delightful slice of heaven is best served warm or hot, with some kind of cream or custard (I recommend clotted cream or ice cream).

Traditionally the recipe contains no egg so it’s completely optional, if you made a vegan pastry then this could quite easily be made into a vegan desert.

More modern recipes also include the addition of cream, or using almonds instead of breadcrumbs, but why mess with the classic treacle tart!

More recipes soon..

Join 1,121 other subscribers

Easy & delicious curry sauce recipe (and it’s vegan)


I was taught this recipe by a chef who worked under professional Indian chefs for some time.

From what he told me it’s a basic, traditional curry sauce. It’s also vegan, unless you choose to use butter.

It’s made with an onion base and is nice and easy, so let’s get to it!

Ingredients (serves 3-4)

  • 1 large onion or 2/3 medium
  • 1 tin chopped tomatoes
  • 1 tbsp garlic paste
  • 1 tbsp ginger paste
  • 1 tbsp tomato paste
  • 1 tbsp ground cumin
  • 1 tbsp ground coriander
  • 1/2 tbsp garam masala
  • 1 tsp chilli power
  • 1/2 tsp ground turmeric
  • 5g curry leaves
  • Salt and pepper

Equipment

  • Saucepan
  • Knife
  • Chopping board
  • Food processor or immersion blender

Prep (5 minutes)

  1. Dice the onion
  2. Mix all the drive spaces in a cup/jug and add a little water at a time a mix until you get a paste. Don’t worry if you add too much water and it’s a bit runny.

Cooking (25+ minutes)

  1. First heat some oil in the pan over a medium heat. Add the onion and curry leaves and cook for about 5 minutes stirring often, until the onions are soft.
  2. Add the garlic paste and ginger paste and cook for another 3-5 minutes.
  3. Add the tomato paste and cook for another 2-3 minutes, keep stirring.
  4. And the curry paste and cook for another five minutes.
  5. Add the tinned tomatoes and mix well, turn the heat down low and cook with a lid on for 10 minutes to an hour, the longer you cook it the more concentrated the sauce will become.
  6. Remove from the heat and blend the sauce in a food processor or with an immersion blender in the pot.
  7. If you’d like the sauce a bit thinner just add some water.
  8. Use as you would use any shop bought curry sauce, keep in the fridge for 3-5 days or freeze for later use. The longer it stays in the fridge the stronger flavour will develop.

A traditional curry sauce

This sauce can be use with any kind of meat, veg or fish or you could just use it as a sandwich filler.

Simply cook the desired meat/veg/fish in a pan then add the sauce and cook through.

The sauce itself is completely vegan unless you choose to use butter or cream to enrich the sauce.

When it comes to cost, this somewhat healthy curry sauce comes in at around 29p per portion!

Not bad for a freshly made sauce!

More recipes to come!

Join 1,121 other subscribers

Garlic & ginger paste recipe


Having either garlic paste or ginger paste speeds up any recipe that calls for them as ingredients.

Another plus is that (I find) garlic paste especially nature’s over time. Though I wouldn’t recommend keeping it the fridge for more than a week or two, the longer it’s out the stronger it gets.

It’s also great for freezing as you can use it from frozen when cooking as it just thaws in the pot/pan, unless you need to for a marinade or to mix in with something.

Ingredients

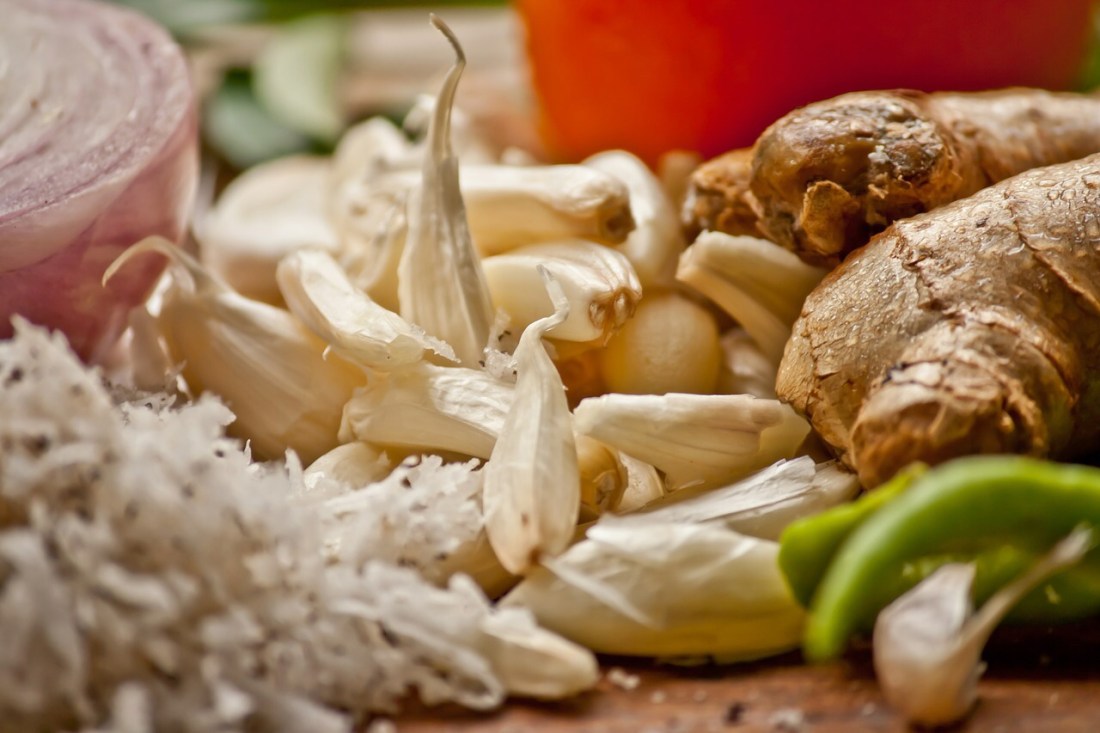
  • Garlic, or ginger, preferably at least 500g
  • Oil, I usually use olive oil.
  • Salt

Equipment

  • A knife
  • Either; a food processor or an immersion blender
  • If using an immersion blender, a measuring jug or tall thin container.

Prep (10-20 minutes)

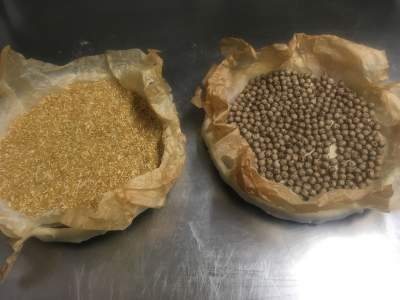
  1. Peel the garlic, or, peel the ginger, or both of making a garlic ginger paste.
  2. Put into food processor / measuring jug with 1-2 tsp of salt.
  3. Blend lightly then scrape down the sides.
  4. Add some oil (don’t overdo it) and blend again.
  5. Repeat until desired consistency is achieved.
  6. Keep in the fridge until it smells/look bad or freeze for up to 3 months.

Save yourself time and some big bucks making your own tasty garlic and ginger paste

It can seem time consuming, standing there peeling half a kilo (or more) of garlic or ginger, but when you get the hang of peeling it’s only really a ten minute job.

Think yourself lucky, I’ve had shifts before literally peeling mountains of garlic all day, that’s 8 hours of my life I’ll never get back 😂 but overall I would say it makes life a lot easier.

Having garlic paste, or ginger paste, to hand when needed is just so much easier than having to break new bulb, pick out 5-6 cloves, peeling and chopping, then deciding you may as well use the whole bloody bulb because there only 2 cloves left.. 😩😩

Also, I know it can be tempting, you’re in the supermarket and you spot tubes of quick and easy garlic (or ginger) above the fresh option, I’ve even done it myself before, and just said fuck it! It’s easier!

But there’s a few reasons I’d choose fresh garlic and ginger over the pre-smooshed alternative;

Cost (money)

The main thing (for me) is the cost, eating well doesn’t need to be expensive!

So let’s have a look, I’m going to use garlic paste for this example but prices with ginger are practically identical. Going by today’s prices (20-02-20) online at tesco.com, the cheapest garlic or ginger paste I can find works out at £0.49p/100g

The most expensive garlic paste I can see however comes in at a massive £0.25/10g! That’s the equivalent of £25/kg

A quick search online tells me that a supermarket garlic cloves weighs on average between 4-7g, so we’ll say 5g and each bulb has about 10-12 cloves, so let’s say 10 cloves of garlic per bulb, making each bulb about 50g.

Now let’s look at the cost of fresh garlic on tesco.com, I can tell you that right now I could buy 1kg of lovely fresh garlic for a whopping £3.20, plus the oil and salt to make the paste that’s about £3.50 plus the electric to blend it say no more than £3.75

Compared to the cheaper pre made option (more on that in a minute) it’s still a saving of £1.15/kg which is pretty good, but compare it to the pricier option and you could be wasting as much as £23.85/kg!

If you’re anything like me and go through a lot of garlic and ginger that builds up to massive amounts of money.

Quality

It goes without saying, but fresh and homemade will beat shop bought every time unless you’ve had something prepared for you, fresh in front of you. (and even then it’s still not as satisfying as doing it yourself)

Making your own garlic or ginger pastes consists of 3 simple ingredients; garlic (or ginger), oil and salt. No more, no less, unless it’s a garlic & ginger paste.

Looking online at the ingredients of pre made garlic and ginger pastes some of them have sugar in (unnecessary), they ALL have some kind of vinegar in and some of them have citric acid it. The most expensive also has potassium sorbate, which I would expect from something that costs more (it’s a completely safe preservative) and it also contains xanthan gum (also completely safe) which I can only assume is to change the texture, which is completely pointless because there’s nothing wrong with the texture to start with.

So these are all food safe ingredients, which is fine, great in fact, and I know that they’re all for preserving qualities (and well done to the people who managed to build a business selling garlic at a ridiculous markup) but it leads onto my next point…

Taste

As I just said all of these pre made pastes contain vinegar, which is good to see a natural preservative, but over time it completely ruins the flavour and all you can taste is sourness!

All the more reason to make it yourself!

Stay tuned for more recipes.

Join 1,121 other subscribers

How to cut an onion; slicing (the other way)


Again, start by taking half of a peeled onion

This time cut the root off but cutting 2-3 cm away from it.

Cut the root out of the onion

Then proceed to slice through the onion as such; horizontally as opposed to vertically. You’ll notice i’m resting the blade on my finger tip rather than my knuckles, this is only through cutting so many onions but i would advise to still rest the blade on your knuckles.

Cut in half for smaller strands of onion

This results in strand of onion that are straighter than when you cut it lengthwise. If you want shorter strands just cut the onion in half once lengthways before slicing into strips.

Small, straight(ish) strands of onion. Nice in a salad

I personally prefer this method of slicing as the onion cooks quicker because it’s in smaller pieces, I also prefer to cut it quite finely this way when putting raw onion in a salad/sandwich as I find it looks a bit nicer and it’s a lot more pleasant than chewing on a chunky lengthways slice of onion, to each their own though.