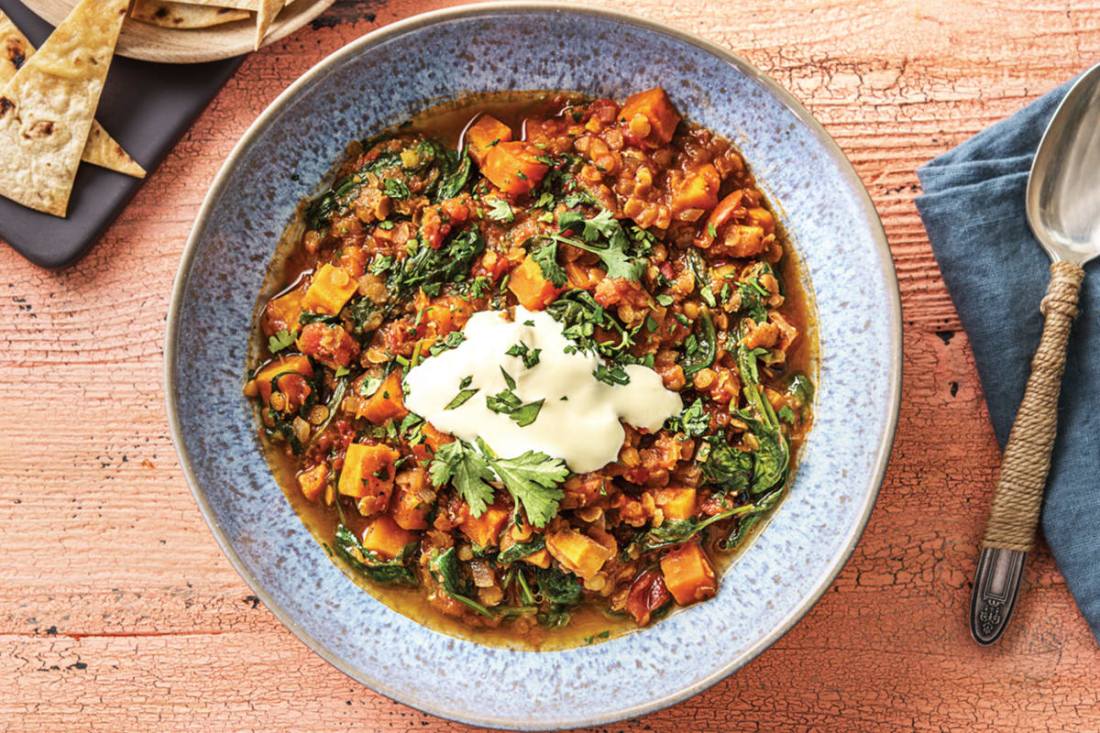
This is a satisfying vegan dhal recipe that won’t make you feel bloated (unless you get carried away eating it!)
Ingredients (serves 4)
2 red onions
1 large sweet potato
500-900g fresh spinach (depending on how much you like spinach)
6-7 cloves of garlic
About a 2 inch thumb of ginger
200g red lentils
600ml of veg stock or water
Salt and pepper to taste
Oil for frying
2 tbsp ground cumin
2 tbsp ground coriander
1 tsp garam masala
1 tsp turmeric
Chilli powder (optional, if you like some heat)
Equipment
Knife
Chopping board
Cooking pot
Hob to cook on
Either a fine cheese grater or an immersion blender (handheld blender). If you don’t have these a knife works fine so long as you can mince with a knife.
Make a curry paste by putting all the dry spices in a small pot with some salt, add a little water at a time, mixing until you gave a nice paste consistency, don’t worry if you add too much water and it’s a bit runny.
If the spinach isn’t already washed then wash it.
Cooking (25-30 minutes)
Heat some oil in a pan on a medium heat, add the onion and cook for about 5 minutes until soft.
Add the sweet potato and cook for another couple of minutes.
Add the curry paste you made from the dry spices. Mix well in the pan and cook for another few minutes.
Add the lentils and mix well, then add the stock/water and turn the heat up, as it begins to boil turn the heat down low and leave to simmer for 10-20 minutes (it depends on how big you cut the sweet potato). Be sure to keep an eye on it so you don’t end up with a pot of oniony curry mash.
When the sweet potato is about 2-3 minutes away from being ready add the spinach and stir through. Add salt/pepper to taste.
Serve with rice, bread, salad etc.
Let me know what you think
And there it is, my first ever vegan curry recipe.
I thought it came out alright, and i’m usually my own worst critic!
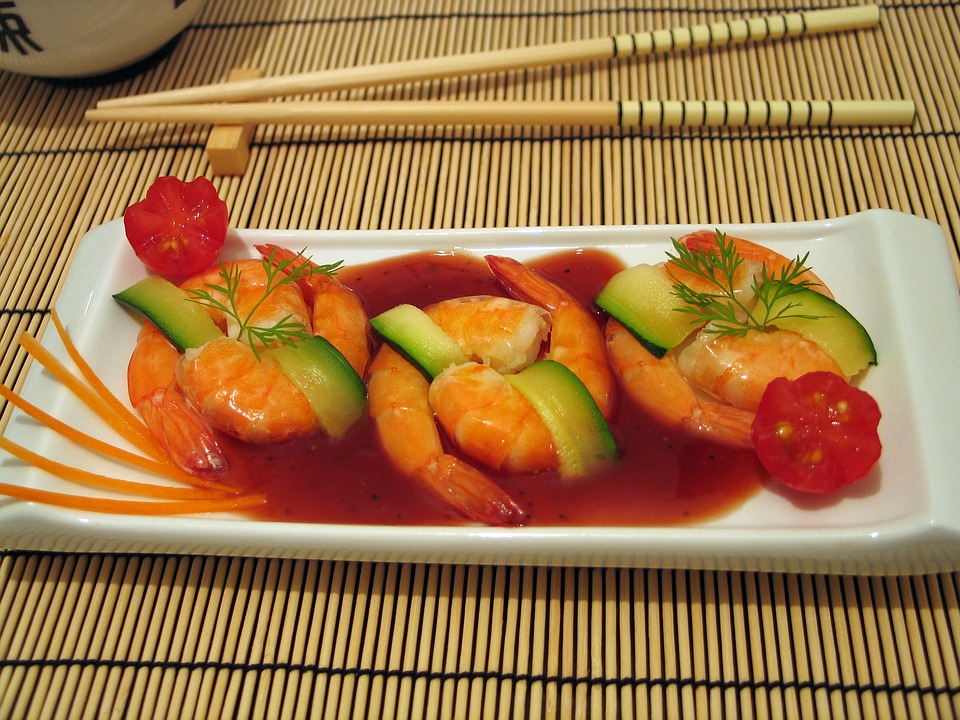
No Chinese is complete without the sweet and sour sauce
A favourite of many over the nation, the Chinese takeaway.
I think the chicken balls and sweet and sour sauce are pretty much mandatory when you order a Chinese takeaway.
generic stock photo of Chinese food
This recipe is quick and easy and packs a punch of taste.
I’ll be completely honest i think the sauce in the above image may actually be chilli/sweet chilli looking at it, but that’s what i get for using stock photos.
Ingredients
Tomato ketchup
Light soy sauce (dark works but it makes a very dark sauce)
White wine vinegar (malt works fine but white wine vinegar tastes a little cleaner)
Sugar, caster or granulated
1 tin of pineapple chunks/rings
Cornflour
Salt/pepper to taste, though it shouldn’t need it
Equipment
Saucepan
Knife (if you have pineapple rings instead of chunks)
Chopping board, if you need a knife
Wooden spoon
Method
Open the tin of pineapple, KEEP THE JUICE!!! If you bought rings instead of chunks then cut them up.
Put the pineapple and juice in a saucepan.
Add ketchup depending on your palette, i usually use 2-3 tbsp.
Add soy sauce again depending on your palette, i usually use 1-2 tbsp.
Do the same with the white wine vinegar (i use 1-2 tbsp)
Repeat with the sugar (around 50g)
Put the pan on full heat until it comes up to the boil then turn the heat down low and let it simmer for 3-5 minutes.
Whilst it’s simmering mix some cornflour with a little water to make a slurry. The more you use the thicker the sauce will be so it’s best to use a little bit at a time.
If you don’t want the pineapple chunks in the sauce the strain though a sieve then return to the low heat.
Add cornflour and mix until the sauce has thickened.
Eat some chinese food.
A nice simple sauce
Badabing badaboom, sauce in 5 minutes great for dipping or drinking.
Did i say drinking, i meant uh…ok i like my sauces.
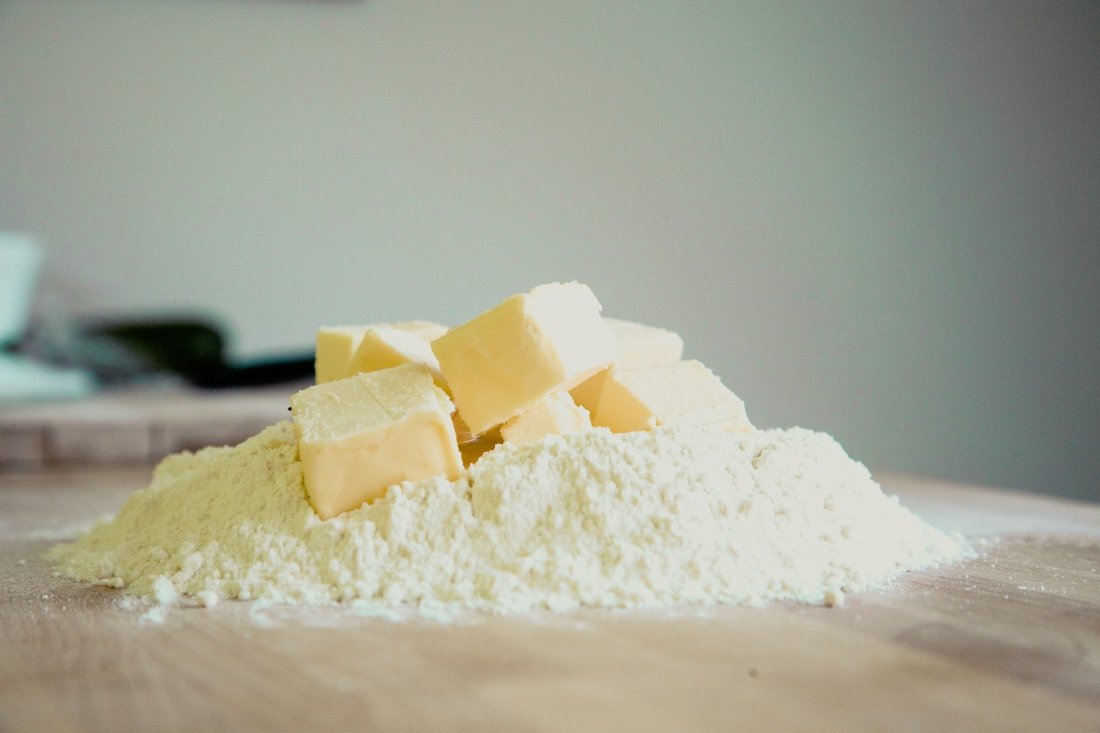
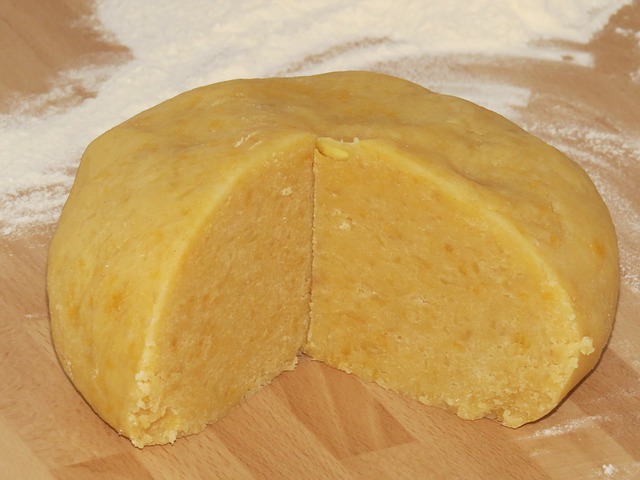
I love pastry, be it shortcrust or puff. I really feel sorry for people who are (genuinely) gluten intolerant, I know these days gluten free food is everywhere but let’s be honest, it’s not the same. Especially when it comes to shortcrust pastry, that said i do have a good recipe for a gluten free shortcrust pastry which i will post at a later date.
This recipe for shortcrust pastry is great for pies and tarts or quiches. And don’t worry! Pastry isn’t scary, (ok making puff pastry can be and not to mention pointless to make, but shortcrust pastry is fine), it really doesn’t take much time at all.
The main thing to remember is DON’T work the pastry too much when mixing, this will tighten the gluten and the shortcrust pastry will go hard and tough as opposed to soft and crumbly, as shortcrust should be.
Ingredients (makes about 800g of shortcrust pastry)
500g plain flour
250g butter or lard
1 egg yolk
Salt
Water
Equipment
Mixing bowl
Scales
Hands
Cling film
Fridge
A sieve (not essential)
Prep (35+ minutes)
Start by sifting the flour into the mixing bowl and add the butter, to make things easier you can cut the butter into cubes or just warm it in the microwave until it’s nice and soft (not liquid).
Rub the flour and butter together with the salt, if you’re not sure what rubbing is it’s pretty self explanatory, it’s basically rubbing 😂 just pinch it all together with your fingertips until it looks sort of like golden breadcrumbs.
Add the egg yolk and mix until the fully incorporated.
Now start to add a bit of water at a time (don’t overdo it). This part is kind of down to intuition but keep adding water and mixing until you get a consistency you’re happy with, the less water you use the more crumbly the pastry will be, but make sure you adad enough to hold it enough to be able to roll out.
When you’ve made the shortcrust dough and you’re happy with the consistency wrap it in cling film so it’s air tight.
Put it in the fridge and leave it in there (chill) for at least 30 minutes to let the butter cool down. Use within 3 days, can be frozen for about 6 months.
Go make some pie, or something that involves shortcrust pastry.
Cut the cost of pastry
While making this pastry works out at nearly equal to the price you’d pay for pre-made shortcrust from the shop, this contains actual butter whereas shop made uses margarine.
So onto costing, this pastry costs £1.10 to make 500g, but if you replace the butter with margarine it cuts the cost to as little as 40-50p/500g!
I personally prefer using real butter, but if you’re looking to save cash it can be handy and it still tastes delicious, just not quite as crumbly as it would be with butter.
The stuff that sounds like some kind ofspot on your face; coleslaw (5 minutes)
A small portion of red cabbage ‘slaw
Coleslaw, it was only about 4/5 years ago I started eating this stuff and I fell in love with it.
Fresh, crunchy with a strong onion flavour, yah ples 😍
Ingredients (serves 4-8)
1/4 of a white or red cabbage
1 medium onion
1 large carrot
Mayonnaise (home made or shop bought, will post a mayonnaise recipe later)
Salt & pepper
Equipment
Large bowl to mix everything
A sharp knife large enough to handle the cabbage or a mandolin slicer
Peeler
Chopping board
A fork comes in handy, or a wooden spoon
A cheese grater
Prep and cooking
Slice the cabbage into thin strips, if you want crunchier coleslaw cut it a bit thicker.
Slice the onion into thin strips, if you want a more prominent onion taste and again a crunchier coleslaw then cut it a bit thicker.
Peel the carrot and grate with the cheese grater.
Put everything in the bowl and add mayonnaise, how much is up to you I usually use about 7-8 tablespoons.
Mix well and season with salt and pepper to taste.
Eat, incorporate to another dish etc.
Cold sores and coleslaw
It turns out the two are (thankfully) in no way related. The term we use today (coleslaw) originated in the Netherlands in the 18th century from the Dutch saying ‘koolsa’ which translates to ‘cabbage salad’. When said with a Dutch accent the word ‘kool’ is pronounced ‘cole’.
Cold sores on the other hand are as it sounds, sores, usually around the mouth and you’ll be delighted to know that it’s a nicer term for oral herpes.
Yes oral herpes, we’ve probably all had it at some point and apparently67% of the worlds population have it at any given time, but don’t worry it’s not the same as genital herpes(!)
Mix up ya ‘slaw
So anyway enough about herpes, back to the food.
As I said I was never a great fan of coleslaw and I find it’s got quite a marmite opinion (love it or hate it) but after actually knocking some up myself and trying it I got completely hooked.
My favourite thing about it is it’s diversity which is something I usually look for in recipes / ingredients.
Keep you’re eyes out for updates to this recipe and I’ll start to document the hundreds (thousands?) of variations of coleslaw I’ve seen over the years or get involved with your own take in the comments.
When you start to diversify a bit you’ll see how it can become an a compliment to almost any dish, for example an apple slaw in pulled pork burgers, a celery slaw for a fish dish, I could go on all day but I’ll leave that part up-to you for now.
Start by making the burgers, just 50g for each pattie (McDonald’s only use 45g!) roll each one into balls, like big meatballs, then fold the baking paper in half and put one of the balls the the centre of one half. Fold the paper back over and push down hard on the ball with the palm of your hand so it pushes down to make a burger Pattie, it should be quite thin. Season well with salt and pepper on both sides then repeat so you have 2.
Get the pan nice and hot on a high heat and lightly toast the brioche bun, just put the flat (inside) parts of the bun in the hot pan and move it around with your fingers for 20-30 seconds, watch out it’s easy to burn it!
When the bun is ready wipe the crumbs out of the pan and put it back on the heat until it start to smoke a little.
If you used 20% fat mince you won’t need any oil in the pan, if you didn’t add a little splash (about 1/2 a tsp). The put the first burger in the pan and let it cook for 20-30 seconds. Then with the fish slice/spatula push down firmly on the top of the burger for about 3 seconds. It’ll sizzle a lot, that’s the fat reacting with the heat, the flip the burger and cook the other side for another 30 seconds or so, give it another like push on the top before taking out and placing on the bottom bun.
Leave the pan on the heat and put a slice of cheese on top of the burger you just cooked, then cook the second burger the same as the first (unless you’re using a pan bug enough for 2 burgers). When it’s ready put it on top of the other burger and put the other slice of cheese on top.
If you’re using gherkins put some slices on top of the top burger. The put an X of ketchup and an X of mustard on the top so they overlap, it should look a bit like a star.
Put the diced onion on top of the sauces and put the top bun on, then put it in the microwave for 10-15 seconds.
Ding! McDonald’s goodness in your own home.
The worlds most popular burger?
Dividing options worldwide, love it or hate it you can’t deny the addictive taste of a McDonald’s burger.
After making these homemade double cheeseburgers you might notice that the main taste you get from an actual McDonald’s burger is the onion, ketchup and mustard.
Do they use real meat? Who knows, I live in England and (currently) our food standards (should) ensure it is, but who fucking knows?
The cost of one of these homemade double cheeseburgers comes in at around 75p so about half the price of one you’d buy from the shop, these ones are actually served hot too!
So there you have it, culinary genius, or planet destroying clown food, the double cheeseburger.
Things you might not know about McDonald’s
They own Krispy Kreme
In America there are about 1.5 times more McDonald’s than hospitals
The yellow M is supposedly more recognised that the cross (religion)
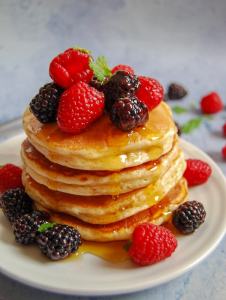
Don’t know about you but I love pancakes in any (edible) shape or form.
Over the years I’ve found all the variations of a pancake I’ve seen essentially boil down to 2 types, fluffy American style pancakes (scotch pancakes) or crepes (thin pancakes).
Fluffy American Pancakes / scotch pancakes (5 minutes)
150-200g self raising flour, the more you use the thicker/stodgier the pancake will be
200ml milk (any kind but I find the higher fat content the better i.e blue milk)
1 or 2 tbsp of sugar, granulated is fine.
1 egg, 2 if you want them more cakey
1 tsp baking powder
1 tsp oil
Oil/butter for frying
(Optional) pinch of salt/pepper
Equipment
Frying pan; if it’s not non stick or a well seasoned iron pan you won’t have a fun time here, you don’t want pancakes cooked to the pan, ideally you want a crepe pan but not everyone has one lying around 🙄
Hob, to heat pan for pancakes
Measuring jug, preferably 2 litre
Scales
A whisk or a fork, whisk is easier
Not essential but a sieve is handy
Prep and Cooking
If you’re using an electric hob set it to 4 or 5 and put the pan on to warm it up while you prepare the pancake batter, if it’s gas it should only take 20-30 seconds to heat before cooking.
Sieve the flour and baking powder into the measuring jug, you don’t have to sift it but the pancake batter will be lumpy; this means to get rid of the dry lumps you will have to mix it a lot more meaning the gluten will tighten up more. It doesn’t really matter but if you want a soft fluffy pancake you want to mix it as little as possible.
Add the sugar and salt/pepper if using then pour in the milk and oil and mix gently until the flour is fully mixed, it shouldn’t take much just check round the edges on the bottom of the jug.
Add the egg(s) and whisk heavily for 5-10 seconds until the egg is fully incorporated into the pancake batter.
Take the pan to a medium low heat (around 3 on an electric hob, small flame on a gas hob)
For each pancake use about 1/2 tsp of oil or 10g of butter, chuck it in the pan and swirl it about then put the pan on the heat and don’t move it again.
Add the desired amount of pancake batter to the pan, just pour it straight from the jug, the more you use the bigger the of the pancake will be but I’d say about 50-80g per pancake is about right.
Don’t disturb the pan and wait until bubbles start to come through most of the pancake batter, flip the pancake and cook the other side for the same sort of time the first side took (each side usually takes about 30-60 seconds each side for a 50-80g pancake)
Eat teh pancakes 👍
Summary
Mix all the ingredients in a measuring jug
Heat a pan to medium low, add butter or oil
Add pancake batter and leave to cook until bubbles start coming through the batter, flip and and cook the other side.
Pancakes are delicious.
Crepes; thin pancakes (5 minutes)
Ingredients (makes 4-6 pancakes)
Chocolate crepe, with a strange houseplant garnish
100g plain flour
200ml milk
1 – 2 tsp sugar
1 egg
1 tsp oil
Oil/butter for frying
(Optional) Salt/pepper
Equipment
Same as above
Prep and cooking
Heat the pan to a medium high heat while you prepare the pancake batter.
Sieve the flour into a measuring jug and and the milk, sugar, oil and salt/pepper (if using), mix gently so the flour is fully incorporated.
Add the egg and whisk heavily for 5-10 seconds.
Heat some oil/butter in the pan and swirl it about.
Take a ladleful of pancake batter, you don’t want loads as crepes are supposed to be paper thin, I find about 50ml (double shot) works well in a 25-28cm pan. This part is quite tricky as the pancake batter cooks so quickly, take the pan off the heat and tilt it at about a 40° angle and pour the pancake batter round the top edge of the pan. You need to try and cover the whole surface with the pancake batter. I still struggle with this sometimes so if you’ve got any tips please say in the comments below!
When you see the edges start to brown a little underneath flip the pancake and cook the other side for a similar amount of time.
Serve, eat, repeat.
Summary
Mix all the ingredients in a measuring jug
Heat a pan to medium high, add butter or oil
Add pancake batter and leave to cook until the bottom edges start to brown a little, flip and and cook the other side.
Pancakes are delicious.
Have your pan and eat it. Uh..cakes.
So there you have it, plenty of precious pancakes, use them wisely!
Personally I think there’s a lot to like about pancakes, for one they’re cheap as anything, with current supermarket prices they only cost about 5p each! Thought this might come in handy with pancake day around the corner.
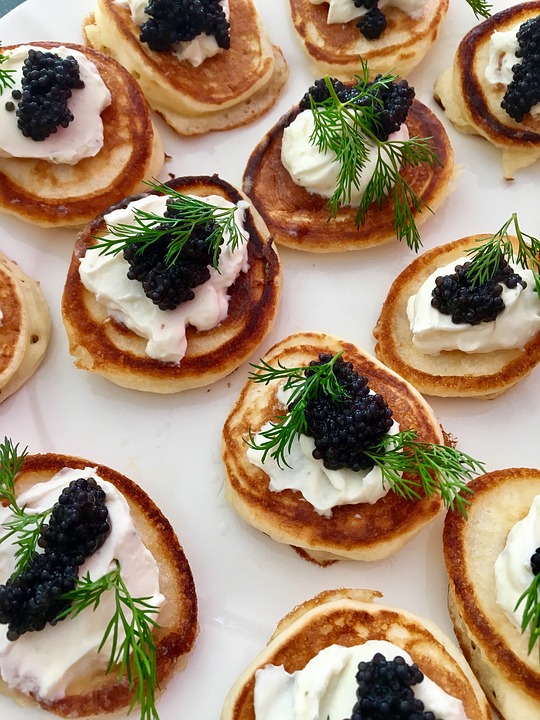
Caviar blinis, proppa posh!
They also work great as a base for canapés, if you want to make blinis then just use the scotch pancake recipe but use a tablespoon of batter per pancake then you can put what you like on them (smoked salmon and cream cheeezzz 👍)
They’re also pretty diverse on the whole (pancakes). You can add any spices or herbs to savoury pancakes (smoked paprika is nice).
When it comes to savoury pancakes the combinations can be endless, cheese is always a firm favourite with me. I find you can use the pancake batter like you would an omelette mix.
And of course, how can anyone forget the possibilities with sweet pancakes? Icecream, fruit, syrup, honey, cream, apple crumble… you name it add a pancake and it’ll be even better (maybe not everything but you get the idea).
Where did pancakes come from?
Everyone love pancakes! ‘The Pancake Bakery’ by Pieter Aertsen. c 1508 Image from https://wikimedia.org
Apparently they were invented by the romans around the 1st century who would make a batter of flour, eggs, milk and spices. Market salesmen would sell them hot (crazy to think it’s been going on that long!) and they would sweeten them with honey rather than syrup.