Pork loin with Black pudding & Stilton

This is another request from the Facebook page.

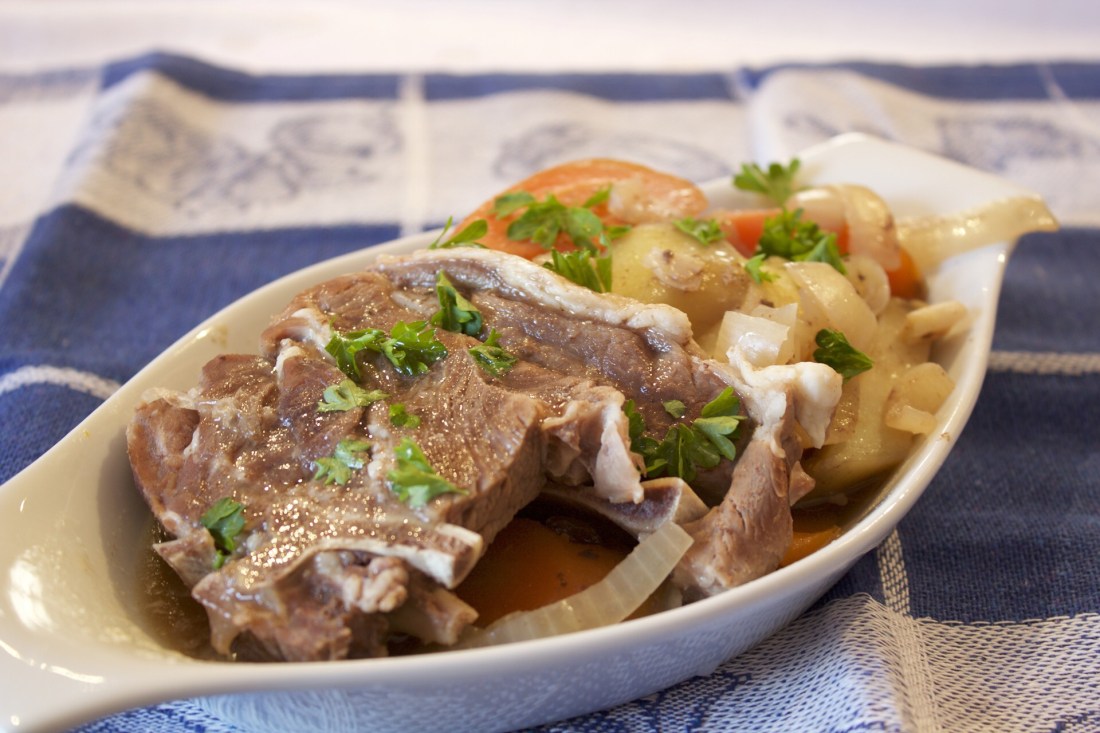
It’s only the 1 component, i would normally serve this with some form of veg and potatoes and a sauce (Cumberland sauce works well, will get a recipe up for it soon).

To the recipe!

Ingredients (serves 1)

  • Pork loin, enough for 1 serving (about 200-250g)
  • 1 slice of black pudding, cut in half (2 semi-circles)
  • 2 slices of Stilton, i usually cut it quite thick

Prep and cooking (10-15 minutes)

  1. First you want to get the oven nice and hot so turn it on to about 190-200°c (fan).
  2. Next heat up a frying pan on a medium-high heat, preferably one with a metal handle so it can go straight into the oven.
  3. Whilst the pans heating up cut the portion of pork loin in 1/3’s with a slightly diagonal cut so you have 3 chunky medallions of pork loin.
  4. When the pans at a good temperature add a dash of oil and cook the pork for about a minute each side, or until it start to get some nice browned bits on.
  5. Take the pan off the heat and arrange the black pudding and stilton slice in between the pieces of pork, i usually put an extra piece of cheese over the top too.
  6. Put it in the oven and cook for 5-10 minutes.
  7. Remove from oven and serve as desired (watch out for the hot pan handle).
  8. Enjoy!

More recipes soon!

White chocolate and Strawberry Cheesecake (no bake)

We all love cheesecake!

This was a request from the Facebook page, you can use dark chocolate but i find the flavour of white chocolate works a bit better with the strawberry and slight sourness from the cheese.

Recipe!

Ingredients (serves 8)

For the base

  • 1 pack of biscuits (i like to use hobnobs)
  • 100-200g butter (depending how buttery you like the biscuit base, using more than 150g can make the base go soggy though)

For the filling

  • 200-400g strawberries, sliced (thickish, about 4 slices per strawberry)
  • 200g White chocolate
  • About 400g soft cream cheese
  • 50-100g icing sugar
  • 200ml double cream
  • Fresh mint or basil leaves (optional, to decorate)

Prep and cooking (30 minutes)

  1. First smash the biscuits up, easiest if you’ve got a food processor just blend them with a blade attachment, if not chuck them in a sealy bag and wrap a towel around it and smash it with a rolling pin.
  2. Put the biscuit dust into a mixing bowl and melt the butter in a saucepan over a medium heat.
  3. Mix the butter with the biscuit until it holds together.
  4. Line a cake tin with baking paper and layer the biscuit over the bottom, push down with a wooden spoon or your hands to compact it into the cheesecake base, cover with cling film and put in the fridge for about 20 minutes.
  5. Whilst it’s cooling down make the filling, melt the chocolate over a bain marie on the stovetop (saucepan with small amount of water in and a bowl over the top, using the steam to heat) or in a microwave, if using a microwave be careful not to burn the chocolate.
  6. In a seperate mixing bowl whisk the cream cheese with the sugar, add 1-2 tbsp of boiling water and whisk until its nice and smooth.
  7. Now pour in the melted chocolate with 2-3 tbsp of the cream and mix well.
  8. Put a layer of strawberry slices over the biscuit base and then cover with the cream cheese mixture and spread out evenly.
  9. Whip the rest of the cream and layer this on top of the chocolate/cheese filling.
  10. Arrange the rest of the strawberries on top, decorate with mint or basil leaves if using.
  11. Eat the damn thing.

More recipes soon!

Cookies; something to make with the kids on lockdown

This recipe is a request from the Facebook page.

Cookies are great to make with kids, they’re easy, quick and delicious (and kids love them!)

To the recipe, this is a sightly simplified version to make it easier for the kids.

Ingredients (Makes 15-20 cookies)

  • 300g plain flour
  • 200g caster sugar
  • 200g butter (melted)
  • 1 tsp baking powder
  • 1 tsp vanilla extract
  • 1 egg
  • 100-200g chocolate chips or broken up chocolate bars

Prep and cooking (30 minutes)

  1. Preheat the oven to 160°C (fan).
  2. Mix the melted butter, vanilla extract and sugar together with a wooden spoon in a mixing bowl.
  3. Sift the flour and baking powder and mix well.
  4. Add the chocolate chips and mix.
  5. Line a baking tray (or trays) with baking paper.
  6. Roll the cookie dough into small balls (you should get 15-20) and flatten them slightly onto the baking tray leaving about 2 inches between them.
  7. Bake for 15-20 minutes (it depends on the size) until the edges start to turn slightly golden.
  8. Enjoy! (I prefer them when they’re still warm).

More recipes soon!

Syrup mug cake recipe

I only discovered these things a while ago and they’re great!

With the use of a microwave these mug cakes take a grand total of about 4-5 minutes to make.

To the recipe!

Ingredients

  • 1 egg
  • 50g butter
  • 30g caster sugar
  • 50g self raising flour
  • 4-8 tbsp golden syrup

Equipment

  • A mug
  • Small mixing bowl
  • Scales
  • Wooden spoon
  • Microwave

Prep and cooking (5 minutes)

  1. Weigh the butter and sugar in a mixing bowl and beat with a wooden spoon until pale and creamy.
  2. Add the egg and beat well until combined with the butter and sugar.
  3. Sift the flour (if you have a sieve) and mix well until you have a nice cake batter, add 2-4tbsp of golden syrup and mix well. If it’s really (too) thick add a little milk.
  4. Rub a little butter or oil around the inside of the mug the put another 2-4 tbsp of golden syrup in the bottom of the mug.
  5. Fill the mug with the cake batter, it should be somewhere around 1/3 full.
  6. This part depends on your microwave because let’s face it, they’re all different. I find it usually takes about a minute and a half on full power (850w) but you’ll have to experiment.
  7. When it’s done go round the edges with a knife or pallet knife and turn it out onto a plate.
  8. Enjoy!

Costing

61p per cake

As you can see the most costly part is the butter, if you substitute this for a plant/oil based spread it can cut the cost to as little as 41p per cake.

Nutrition

Nutritional values per cake, as you can see it packs quite a calorific punch🤛.

Here the nutrition info per cake if you’re using a plant/oil spread instead of butter, not much budge though it’s about 20kcal less than butter, the biggest difference is the amount of fat but that only just over a gram.

More recipes soon!

Bbq cider pulled pork

Something that’s certainly gotten more popular in recent years, I like using cider for the apple flavour with a bit of bbq sauce to finish it off.

This method uses a slow cooker, if you don’t have one just use an ovenproof dish with a lid/tinfoil and the oven on about 110°c.

Ingredients (makes about 2kg of pulled pork)

  • About 2.5kg of pork shoulder
  • 1-2 litres of cider (I just use cheap stuff from Tesco/Asda)
  • 200-300g bbq sauce
  • Salt and pepper

Prep and cooking (8-15 hours)

  1. Cut the pork into smaller chunks, about 200-300g each and put it in the slow cooker.
  2. Cover the pork with salt and pepper (don’t overdo it with the salt)
  3. Pour in the cider until the pork is about 3/4 covered. Put the cooker on low and leave for 8-15 hours.
  4. When it’s ready take it out of the cooker into a large bowl or roasting pan/plastic tub. Let it cool down for 5-10 minutes and remove any liquid from the slow cooker into measuring jug, or, put it in saucepan and put it on a high heat to boil (and reduce).
  5. If reducing the liquid remember to keep an eye on it and remove from the heat when done. Return to the pork and remove all the fat, it should be easy enough to tear with your hands, if it’s still hot some vinyl/food gloves come in handy.
  6. Now get 2 forks, or some meat claws (eBay or amazon), and pull the pork, it should easily come apart into strands, if not it needs more cooking, bear in mind the more meat you use in the same pot the longer it will need to cook.
  7. Now put the pulled meat back into the slow cooker and add the bbq sauce, mix well and add the stock.
  8. Put the slow cooker on high and cook for 15-30 minutes.
  9. Perfect in a bun with a load of fresh coleslaw on top 👌🏻

Costing

The above recipe costs a total of about £6 and makes 7-10 portions, so somewhere between 50-80p per serving, a lot cheap than you’d pay for it premade!

Nutrition

Here’s the nutrition info per 100g

More recipes soon!


Irish stew recipe

Irish stew (Irish: stobhach/Stobhach Gaelach) is a Lamb (or Mutton) and root vegetable stew native to Ireland.

As in all traditional folk dishes, the exact recipe is not consistent from time to time, or place to place.

Basic ingredients include lamb, or mutton (mutton is used as it comes from less tender sheep over a year old, is fattier, and has a stronger flavour, and was generally more common in less-affluent times), as well as potatoes, onions, and parsley.It may sometimes also include carrots.

Irish stew is also made with kid goat. Irish Stew is not made with Beef.

Ingredients (serves 4)

  • Oil, for cooking
  • 150g smoked bacon, I find streaky works best
  • 600g diced lamb shoulder
  • 3 or 4 onions, sliced
  • 3-4 carrots, sliced into halves
  • 2 bay leaves
  • 20-30g fresh thyme
  • 100g pearl barley
  • 700-800ml lamb stock
  • 4-5 potatoes, not too big, cut into chunks

Prep and cooking (2-3+ hours)

  1. First heat the oven to 160°c (fan).
  2. Whilst it’s warming up heat some oil in a frying pan on a medium-high heat. cut the bacon into small strips and cook for 3-5 minutes until slightly crispy. Remove with a slotted spoon and put into a casserole dish.
  3. Now turn the heat up and add the lamb, cook for about 5 minutes until the outside is nicely browned. Remove from the pan into the casserole dish.
  4. Now cook the onion and carrots in the same frying pan for another 5 minutes or so and add to the casserole dish.
  5. Put the pearl barley in the frying pans and add the stock and fresh thyme, as it comes to the boil pour it all in the casserole dish and mix well.
  6. Place the potato on top of everything and put a lid on or cover with tin foil. Cook for about 2 hours or until the potatoes are nice and soft.
  7. Serve, eat, enjoy!

Costing

The whole dish is a bit on the pricey side coming in at about £7.22

The above recipe will serve 4, making it about £1.80 a portion, it could possibly be stretched to 6 Working out at £1.20 a serving.

The main cost is in the lamb (not cheap!) and shoulder is generally the cheapest cut you’ll find.

You could take the bacon out to save another quid but it’s not quite the same.

Nutrition

Per serving (based on 4 servings)

Nutrition info per serving (around 400g)

Jerk glazed ham recipe

I love jerk, this kid a request from the Facebook page and sounds like a good combo to me!

Here’s how I’d go about it,

To the recipe!

Ingredients: makes about 700g of ham

  • 750g unsmoked gammon joint
  • 1 onion
  • 1 carrot
  • 2 sticks of celery
  • 5-7 peppercorns
  • 3-5 cloves
  • 3-5 bay leaves
  • Small bunch of fresh thyme
  • 4-5 allspice berries (pimento)
  • Water

For the glaze/sauce

  • 5 scotch bonnets
  • 1 medium onion
  • About 2 inches of fresh ginger
  • 1-2 tbsp ground allspice
  • 1-2 tbsp ground cinnamon
  • 2 tbsp of garlic paste
  • 5 spring onions
  • 1 tbsp ground black pepper
  • 1 tsp ground cinnamon
  • 2 tbsp dark soft brown sugar
  • 1-2 tbsp dark soy sauce
  • 1 tbsp dried thyme
  • 1-2 chicken stock cubes

Equipment

  • Large saucepan with a lid
  • Baking tray
  • Food processor or immersion blender and measuring jug.
  • Knife
  • Chopping board
  • Ladle

Prep and cooking: 90-120 minutes

  1. First get the ham on, put it in a saucepan big enough to cover it with water and put the lid on, add the other ingredients (not for the glaze/sauce) and fill with water.
  2. Put on a high heat, as it comes to boil skim the foam off the top with a ladle. Turn the heat down low and put the lid on, it will take about 60-80 minutes to cook.
  3. While it’s cooking make the glaze by putting all the ingredients in a food processor or mixing bowl and blitz until pastey, it will probably be a little bit runny.
  4. About 15 minutes before the ham is cooked turn the oven on to 200°c fan.
  5. When the ham is ready take out of the water (now a stock) and put on a baking tray/roasting dish. The stock is handy for another soup or sauce.
  6. cover the ham with as much jerk glaze/sauce as you like. Put in the over for 15-25 minutes. Leave to cool, slice and serve.

Alternative recipe

My favourite way to do jerk ham is to cooking for about and extra hour in the water so when it comes out you can pull it (like pulled pork) and the mix it with the jerk sauce and cook

in the oven (jerk pulled gammon)

Costing

The cost for the above recipe is about £8.25, or about 75p per slice.

Keep in mind as well as the ham you get a wonderful stock to use as well that’s easily worth £2-3.

The main cost comes from all the spices in the jerk sauce and the ham, seeing as you can’t really cut down on the ham you could buy premade jerk sauce which may be cheaper but honestly I’m not sure.

Nutrition

The above recipe should get you about 12-15 slices. Weighing about 70-80g each.

Here’s the nutrition info per slice

Carbohydrates of which sugars: 4.97g

More recipes soon!

Hollandaise sauce recipe

It’s breakfast time!

Perfect with eggs or great on fish, hollandaise sauce sounds like it should be complicated but it’s really not.

This simple sauce has 4 ingredients that are easy to obtain and it’s a lot cheaper than buying it pre made.

Here’s 2 easy ways to make it, let’s get to it!

Ingredients: serves 2

  • 2 egg yolks
  • 50-100g butter
  • 1 tsp white wine vinegar
  • Salt
  • (Optional) lemon juice

Equipment

  • Saucepan, 2 depending which method you use
  • Metal or glass bowl big enough to sit on top of saucepan
  • Whisk
  • Knife

Prep and cooking: 5-10 minutes

  1. Put a small amount of water in the saucepan (about 1/5 full) and heat it up until steaming then turn the heat down low.
  2. Separate the egg yolks by cracking the egg in your hand over a bowl (clean hands!) and let the white run through the gaps in your fingers. Put the yolk(s) in the bowl with the white wine vinegar, salt and about 10ml of water and whisk well for a minute or two.
  3. Put the bowl on top of the saucepan and keep whisking until the yolks start to go pale.
  4. Cut the butter into cubes and add 1 at a time, whisk until its fully incorporated before adding any more butter. Keep adding butter until you have the desired consistency, it will thicken as you add and whisk butter in.
  5. Drink. I mean eat.

Method 2

  1. Follow steps 1-3 above.
  2. Melt the butter in a separate pan. Skim the foam off the top as it heats up and let the milk solids separate to the bottom (white bits). Decant into a jug leaving the mills solids in the pan.
  3. While the butter is still hot pour it into the eggs a little at a time whisking well before adding more until the desired consistency is met.

If the sauce becomes too thick just add a little cold water and whisk in.

I would say the second method makes the sauce noticeably nicer, but not so much that there’s anything wrong with the first method which is slightly quicker.

Costing

Looking on tesco.com a 150g pack of hollandaise costs £1.20.

The above best recipe makes about 136g if you use 100g of butter (egg yolks weigh about 18g) and costs around 87p, a saving of about 30%.

As you can see the butter is where most of the expense comes in, and you can’t cut out too much as the sauce is pretty much just butter and eggs.

Nutrition

Sorry! But it’s not looking good here 😂 that’s what you get for eating butter and egg yolks (!)

More recipes soon!

Liquid glucose recipe

Liquid glucose is pretty much what it says it is, liquid sugar.

It’s used mainly for confectionary, adding liquid glucose to something that already has glucose (sugar) will (or should) stop the sugar from crystallising.

I recently put up a recipe for fudge which calls for liquid glucose, buying it from a shop can be surprisingly expensive, about £2 for 140g whereas making it cuts the cost down to £1 for about 500-700g.

Ingredients (makes about 600g)

  • 500g sugar, granulated has a lower chance of crystallising but I’ve always used granulated
  • 200ml water
  • 5g cream of tartar
  • 2-4g citric acid, or lemon juice

Equipment

  • Saucepan
  • Something to put the glucose in, I use glass jars
  • Wooden spoon

Prep and cooking (10+ minutes)

  1. Put all the ingredients in a pan on a low heat and stir gently until everything has dissolved.
  2. Leave the heat low and cook for anywhere between 5-35 minutes, I like to use as low a heat as possible. It should thicken up when it’s ready. Remember to stir occasionally.
  3. Transfer to jars or whatever you’re using to store it in.
  4. Use when needed.

More recipes soon!

Cold Wrap fillings

Following up from how to make your own tortilla wraps, here’s some good things to put in them!

I’ll get round to doing some hot fillings when I get the time but here’s 10 cold ones to be getting on with.

Beef and horseradish

Spread the horseradish over the whole wrap, layer sliced beef on top and roll up, nice and hot.

Dairy lea and ham

I’m a sucker for this 😂 I make it for my daughter, like above just spread the dairy lea over the open wrap and layer the ham on top, then roll up and cut in half/in to bites etc.

Chocolate spread

Quick and easy, better on pancakes but nice if you want a quick sweet treat, just spread it over the wrap and fold/roll up. Nosh.

Smoked salmon and cream cheese

Spread cream cheese over the open wrap and layer smoked salmon over the top. You can roll this up and cut it into 1cm pieces to use as canopes or as little snack bites.

Ham and mustard

Another classic combination, spread the mustard over the wrap and put the ham over the top. Fold/roll and enjoy.

Mango chutney and cheddar

I love this, spread the mango chutney over the open wrap and the grate cheese over the top. Fold/roll it up as you would and munch. Pop it in the microwave for 20 seconds if you want melted cheese, the wrap might go a bit floppy though.

Coleslaw

As simple as it sounds, fill, wrap, eat, repeat.

Mozzarella and beef tomato.

Slice a beef tomato and ball of mozzarella as finely as you can lay the tomato over the open wrap, dash a little balsamic over the tomato and sprinkle with salt, the put the mozzarella on top. Roll up and eat.

Cheese basil and tomato.

Get some fresh basil and your favourite cheese. Slice the tomato as fine as you can. Spread some pesto over the open wrap and grate some cheese over the top. Put in whole leave of basil or chop it up and sprinkle over the top. Top with the tomato and fold/roll up.

Tartare sauce and tuna

Spread the tartare over the open wrap, open and drain the tuna and sprinkle over the top. Fold/roll up and enjoy.