Vanilla cheesecake recipe

The cake that’s not a sponge, but more of a big cheesy biscuit.

I’ve got a ton of cheesecake recipes which I will eventually get round to writing up, but for now I thought it best to start with a classic,
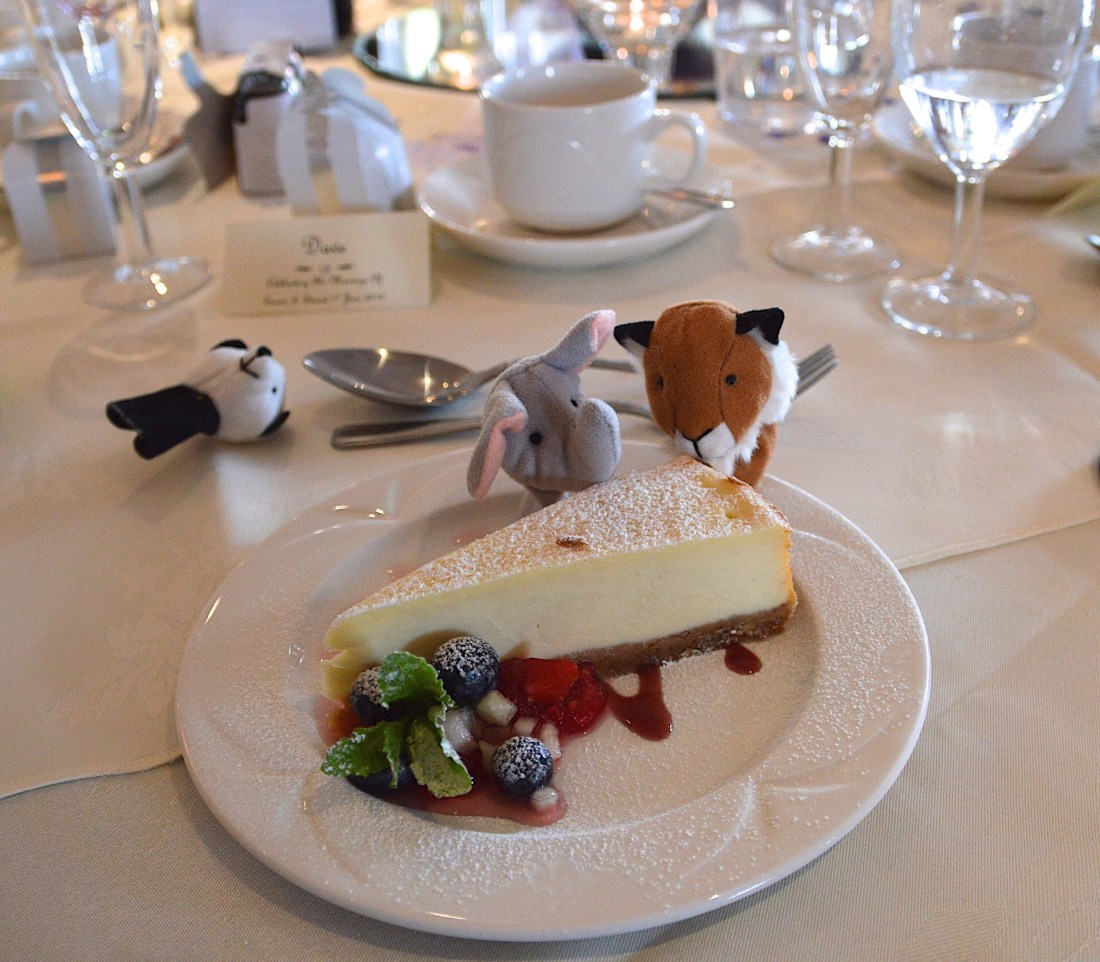
Vanilla cheesecake!

To the recipe,

Ingredients (makes 1 cheesecake)

For the base

  • 250-300g digestive biscuits
  • 100-200g butter

For the filling

  • 600g cream cheese
  • 100g icing sugar
  • 300ml double cream
  • Either; vanilla flavouring, essence, extract or a vanilla pod, a pod tastes best

Equipment

  • Cake tin (23-26cm)
  • Either a food processor, or a ziplock bag, tea towel and rolling pin.
  • Mixing bowl
  • Wooden spoon
  • Palette knife
  • Whisk or electric whisk
  • Microwave or saucepan
  • Cling film

Prep (25-30 minutes)

  1. Start by greasing the cake tin with butter.
  2. Either blitz the biscuits in a food processor, or put them in a ziplock bag, wrap it with a tea towel and smash it with a rolling pin until you have fine crumbs, if doing the second method be careful as it can get quite messy.
  3. Melt the butter in a saucepan/microwave and add it to the biscuit. Mix with a wooden spoon, the more butter you use the better the base will set but don’t overdo it or it will go soggy. On the other hand don’t use too little or it won’t bind together.
  4. Pour the biscuit mix into the cake tin and pat down into a base with a wooden spoon or your hands.
  5. Cover with cling film and put on the fridge for 15-20 minutes to set.
  6. Now onto the filling, put the cream cheese in a bowl with the icing sugar and whisk together until smooth.
  7. Add the flavour, (scrape out the inside if using a pod) add to the bowl and mix well.
  8. There’s 2 ways to add the cream, you can either add it straight to the mix and whisk until fully mixed, or you can whip it the fold it into the mix with a spatula. The second give a lighter cheesecake.
  9. Take the base out of the fridge, remove the clingfilm and spoon in the filling, level and smooth with a pallet knife.
  10. Recover with cling film and return to the fridge for 30+ minutes.
  11. Try not to eat it all at once.

Just Brie mine

Not really the right kind of cheese but it might appeal to some.

For all you cheesecake lovers, I’ll be adding more cheesecake recipes over time so keep your peepers peeled.

I’ll also be adding s recipe soon for London cheesecake, which isn’t a cheesecake (or cake) at all, it’s a pastry.

Until next time!

Thai green chicken curry recipe

This is a follow up from the last post (Thai green curry paste)

I love the distinct flavour of a Thai curry, get one up on the takeaways with this fairly simple recipe, let’s get to it!

Ingredients (serves 6-8)

  • 500-800g of diced chicken, white or brown meat is fine
  • 1 tin of coconut milk (about 400g)
  • 1 large onion or 2 medium finely diced
  • 2 limes
  • 200-300g mangetout, or sliced green beans
  • 2-4 tbsp thai fish sauce
  • 1-2 tbsp light soy sauce
  • 2-4 tbsp green Thai curry paste
  • 1-2 tsp sugar
  • 100-200g new potatoes
  • 1-2 chicken stock cubes
  • A good handful of Thai basil, or basil
  • Oil for cooking, I use sunflower or groundnut
  • Salt and pepper

Equipment

  • Knife
  • Chopping board
  • A wok, or frying pan
  • Saucepan
  • Slotted spoon
  • Measuring jug

Prep and cooking (30-40 minutes)

  1. Start by boiling a pan of water with some salt, when it’s at a rolling boil add the beans and cook for about 3 minutes, remove with a slotted spoon and put in a measuring jug, run under a cold tap until the beans are cold and drain the excess water, put to one side.
  2. Slice the potatoes in half/equal sized pieces and cook in the same water as the beans for 7-10 minutes until soft but not overdone. Run under cold water until cold, drain and put to one side.
  3. You can either do this after the first 2 steps or at the same time (just keep track of what you’re doing), heat some oil to a medium high heat in the wok/pan, when it’s nice and hot add the onion and stir/toss constantly for 1-2 minutes until starting to colour.
  4. add the Thai curry paste and cook for another 1-2 minutes while stirring.
  5. As the coconut milk and keep the heat high until it starts to bubble.
  6. Add the sugar, soy, fish sauce, stock cube and diced chicken. Turn the heat down low and simmer with a lid on for about 10 minutes (until the chicken is cooked).
  7. Zest the lime into the pot, add juice if desired (taste first).
  8. Before serving stir in some basil leaves while it’s hot but not on the heat about a minute before serving.
  9. Enjoy some Thai!

Ain’t nobody got Thai for that“

So there you have it, pretty simple and always a joy to eat.

Been busy with work the past few days but got some days off coming up so will hopefully get a few new recipes/guides up soon!

Thai green curry paste recipe

I’ve had a few requests for a Thai green curry, specifically one that uses ingredients that are easily obtainable in the UK.

I would advise making your own Thai curry paste as it packs more of a flavour punch, it’s cheaper than that from the shop and it’s more fun doing it yourself.

I thought I’d start with a Thai curry paste recipe, as a good curry paste (should) make a good curry!

To the recipe!

Ingredients (makes about 500ml)

  • 2-3 medium onions
  • 10-15 green chillis
  • Ginger paste (2-3 tbsp)
  • Garlic paste (2-3 tbsp)
  • 1-2 lemons
  • 2-4 limes
  • 2 tbsp coriander seeds
  • 1 tbsp ground cumin
  • 50ml Thai fish sauce
  • 20ml light soy sauce
  • 30-50g fresh coriander
  • 100ml olive oil

Equipment

  • A food processor, or,
  • A mixing bowl/measuring jug and an immersion blender

Prep (5 minutes)

  1. Zest and juice the lemons and lime into bowl.
  2. Dice the onion and add to bowl.
  3. Slice chillis, remove seeds if you don’t want it so hot and add to bowl.
  4. Lightly crush the coriander seed, add to the bowl with the rest of the ingredients.
  5. Blitz until smooth and keep in the fridge for upto 3-4 weeks.

Lemon squeezy

Nice and easy.

You can vary the amounts of ingredients depending on personal taste.

I’ll be doing a Thai green chicken curry recipe next so keep an eye out for it.

Looking at costing, the above recipe works out about £1.45 cheaper if you were to buy the same quantity from a supermarket, not too shabby!

Classic lemon tart recipe

Sharp and citrus! With delicious pastry.

Lemon tart (should) go down well pretty much anywhere, anytime.

This is a request from @michaelsmeatham on the Facebook page, so on to the recipe.

Ingredients (makes 1 large tart, 16 portions, or 8 large)

  • 500g shortcrust pastry
  • 8-10 eggs
  • 5-8 lemons (8 is pretty intense)
  • 250-350g caster sugar depending on your sweet tooth
  • 200-300ml double cream
  • Flour to roll pastry

Equipmemt

  • Rolling pin
  • A quiche/tart dish, around 23-28cm
  • Tin foil
  • Baking beans, or rice etc. (Dry and weighty)
  • Mixing bowl
  • Whisk

Prep and cooking (45-90 minutes)

  1. If you haven’t already, masker some shortcrust pastry.
  2. Heat oven to about 160°c fan (gas 4)
  3. Roll it out to about 1-1.3cm thickness, put in pastry case and blind bake for 15-20 minutes, I’ll upload a guide on blind baking on my next day off.
  4. While the case is in the oven get the filling ready by putting the eggs, sugar and cream in a mixing bowl and mix well, you can add a few extra egg yolks if you want it to make it a bit richer.
  5. Now zest the lemons into the mix, how many is up to you, when zesting try not to get the piff (white part under the skin and before the fruit) as it makes it more bitter, we want sweetness.
  6. Juice the desired amount of lemon juice, add and mix well. Lemon juice really adds sharpness, so you want enough to counteract the sugar but not incapacitate your mouth. At the end of it it’s all down to personal taste.
  7. When the case is ready turn the oven down to 140-150°c fan (gas 3). Pour the mixture in and bake for about 49 minutes, I set a timer every 10 minutes to check to adjust heat/turn it round if needed.
  8. Voila! Ideally you want to chill it before eating, but some things can’t be helped.

You saucy tart

Maybe not so saucy, or at least until you cook it, but a joy to eat nonetheless.

You can cut the recipe in half for a smaller tart, or you could use a cupcake/muffin tray to make mini tarts.

Having a look at the supermarkets, the price seems to range from about £2.50-£4, that’s for a regular (8 slice) tart, about 400-450g which is close enough to half the size of the above recipe.

Costing the recipe (I used tesco online for prices) the above recipe will set you back about £4.25 or about 26p a serving, giving you twice as much for the same (similar) price, and its homemade(!)

Any problems give me a shout!

Addictive apple crumble recipe


Crumbo!

Call it what you want, apple crumble always reminds me of Sunday’s when I was a kid, for me it’s with a big dollop of ice cream but custards always good.

Quick and easy (and delicious). This can be knocked up in about 30-40 minutes.

I will post a recipe with fresh apples soon, but I’ll be honest it tastes just as good with tinned apples.

Ingredients (serves 6-8)

  • 2 tins of sliced apples (about 600g, drained)
  • 500g self raising flour
  • 250g butter
  • 250g sugar (I usually use half caster, half demerara

Equipment

  • Mixing bowl
  • Knife
  • Oven dish big enough to hold everything.

Prep and cooking (30-40 minutes)

  1. Heat the oven to about 170°c (fan)
  2. Make the crumble, put the sugar and flour it a bowl. Cut the butter into cubes and add to the bowl, rub it all together with your fingertips until it looks like crumble, it should take 3-5 minutes.
  3. Empty the apples into the dish.
  4. Lightly cover with all the crumble (don’t push it down as it will all push together and cook as a big lump instead of crumble.
  5. Cook for 30-40 minutesnuntil golden brown
  6. Enjoy!

Tooty frooty; an apple that plays the trumpet.

Fiendishly simple, and just as tasty.

Apple crumble has been a classic since around world war 2, where rations meant it more economical than pies, to cut costs even more sometimes half the flour would be replaced with oats, which can add a nice texture.

Although it’s common to be sweet, crumble can also be savoury, such as a fish or vegetable crumble.

Hope you enjoy!

More recipes soon

Chip shop curry sauce recipe


Perfect with some nice chunky chips.

For me this is another big comfort food!

Love it or hate it, it’s a staple when it comes to fish and chips, or more importantly chips.

This recipe is somewhat similar to Chinese curry sauce, but with a slight variation on flavour and a few raisins thrown in.

Ingredients (makes enough for about 6 people)

  • 60g butter for cooking
  • 1 large onion or 2 medium
  • Garlic paste (about 1tbsp)
  • Ginger paste (about 1 tbsp)
  • 3-4 tbsp mild curry powder
  • 1-2 tsp ground turmeric
  • About 50g of raisins
  • 1 star anise
  • 1-2 tbsp of malt/white wine vinegar
  • 500ml chicken or vegetable stock
  • Salt and pepper

Equipment

  • Saucepan
  • Knife
  • Chopping board
  • Wooden spoon
  • Measuring jug

Prep and cooking (60-90 minutes)

  1. Heat the butter in a pan, dice the onion and cook for about 5 minutes on a medium heat.
  2. Add the garlic and ginger paste and cook for another 5 minutes. You want to get the mixture nice and soft, but not too much colour developing.
  3. Mix the curry powder and turmeric together with a little bit of water and add to the pan with the star anise, raisins and vinegar. Cook for another 1-2 minutes, be sure to keep stirring so nothing burns to the bottom of the pan.
  4. Add the stock and turn the heat up full to bring to the boil.
  5. When it starts boiling turn the heat down low and simmer for about half an hour, again be sure to stir occasionally to ensure nothing sticks to the bottom of the pan and burns.
  6. Take out the star anise and mix 3-5 tbsp of cornflour with some water to make a slurry, add it bit by bit to the sauce, cook for a minute or so before adding any more until you reach the desired thickness.
  7. I like to serve the sauce how it is, but if you want it smoother just put it in a food processor or blend it with an immersion blender.

Costing

Looking at price, I was in the chip shop a couple of days ago and got some curry sauce, it came in the usual polystyrene cup which is guess is about 100ml and it set me back £1.40

The above recipe will cost about £1.80-£2, Working out around 30p a serving!

So quite a saving, but it was a long day, we were all tired, and that’s kind of the point of paying someone else to make food for you(!)

The most expensive components here are the curry powder, butter and stock cubes (for chicken stock, unless you have fresh) do you can cut the cost further by replacing butter with oil, using a bit less curry powder and use 1 less stock cube (I usually use 2-3 for 500ml).

Just remember this will compromise in flavour a slightly on texture, but it can cut the cost to about 20p a serving.

Enjoy!

More recipes soon.

Champion chips recipe


Chippy chips chips, everyone loves chips!

If you don’t, then you probably should but I’m not one to judge.

What with storms taking over the past few weekends, why not have a go at these chunk-a-dunk homemade chips.

This is my favourite recipe for mouth watering moreish chips.

CHIPS!

Ingredients (serves 1-2)

  • 4 large potatoes, russets come out well
  • 2 medium onions
  • 1 bulb of garlic
  • Handful of fresh thyme on the stalk
  • Handful of fresh rosemary on the stalk.
  • Oil, I usually use rapeseed or sunflower (enough to deep fry)
  • Salt and pepper (preferably sea salt)
  • Water

Equipmmet

  • Medium/large saucepan, if you have 2 it speeds things up a bit
  • Roasting tray/oven dish
  • Knife
  • Chopping board
  • Collider or slotted spoon
  • Plate
  • Kitchen towel
  • If you have a deep fat fryer it helps, if not we just use a saucepan on the hob

Prep and cooking (25-30 minutes)

  1. Start by peeling the potato and cutting the chips, I haven’t done a guide for this yet I’ll try and get one up tonight, but it’s similar to a julienne slice. I cut them quite thick, about 1 inch squares and usually get 4-6 chips from 1 potato.
  2. Put the chips the a saucepan, slice the onions into quarter and add to the pan (skin still on).
  3. Separate the cloves from the bulb on garlic and roughly crush them, add to the pan (skin still on).
  4. Add the rosemary, thyme and a fair amount of salt.
  5. Fill with water until everything is covered and put on a high heat to boil.
  6. Either turn on your deep fat fryer (180°c) or fill another saucepan with oil and put on a high heat.
  7. As the potatoes come up to boil turn the heat down but only slightly. Keep an eye on them but they should need about 5-10 minutes depending how thick you’ve cut them (thinner will cook quicker). You want them to be at the point of nearly being ready to mash, but still hold their shape enough to manoeuvre.
  8. When they are ready either drain with a colander and put the chips on a wire rack/chopping board or remove from the pan with a slotted spoon.
  9. Let them cool for a minute or two then deep fry for 3-5 minutes until golden brown, if using a saucepan turn the heat down slightly when you add the chips, and before adding test the oil is hot enough by holding a chip and dipping it in.
  10. Remove when ready and put on a plate/bowl with kitchen towel. You can get them warm in the oven but they will lost their crispness overtime, but they will become nice and soft.
  11. If you want to make these to freeze, only half cook them when deep frying, clean of oil and freeze. To finish them off just add to hot oil straight from the freezer or defrost first.

Chip chip horay!

Now you can enjoy top notch chips all day long.

It seems that chips, or fries first started showing up in Latin America around the 17th century.

Here in England the first chips that were commercially available were reportedly made by a mrs.’Granny’ Dulce in 1854, more than 100 years after Latin America.

This started the English fast-food tradition of what we know and love today as fish and chips.

More recipes to come!

Chicken tikka masala recipe


The dish of a thousand recipes and probably most well know as being an ‘English’ curry.

Over the years I’ve seen and cooked so many variations of this. This is the recipe that I’m currently using.

I’ll do a post soon on how to butcher a whole chicken (saves a lot of cash!) but you can use any kind of chicken meat you like, alternatively the sauce (which is made separately) can just be a base for a vegetable curry.

Ingredients (serves 4-6)

For the sauce

  • 2 large onions, or 3-4 medium
  • 2 red peppers
  • 2 tins of chopped tomatoes
  • 2-4 tbsp garlic paste
  • 2-4 tbsp ginger paste
  • 2 tbsp tomato paste
  • 2-3 tbsp cumin seeds
  • 5-10g dried curry leaves
  • 1 tbsp paprika (not smoked)
  • 2-3 tbsp garam masala
  • 2-5tbsp double cream
  • Salt and pepper
  • Chilli powder (optional)

For the chicken

  • 1 whole chicken, cut into parts and thickly diced, or 500-900g of thickly diced chicken meat
  • 250-300g natural yoghurt
  • 1 tbsp garlic paste
  • 1 tbsp ginger paste
  • 2-4 tbsp mint sauce (shop bought or homemade)

Equipment

  • Mixing bowl
  • Knife
  • Chopping board
  • Immersion blender/ food processor
  • Roasting tray or oven dish
  • Saucepan
  • Wooden spoon
  • Cling film
  • Tin foil
  • Slotted spoon

Prep and cooking (optional 1.5-2+ hours)

  1. First to marinade the chicken, put the largely diced meat into a mixing bowl with the yoghurt, garlic, ginger, salt, pepper and mint sauce. Mix well, cover and put in the fridge (preferably overnight).
  2. Finely dice the onion. Heat some oil on a medium heat in a pan, when warm add the onion, cumin seeds and curry leaves. Cook for 3-5 minutes stirring occasionally until the onion is soft.
  3. Slice the red pepper, doesn’t have to be neat but not too thick, add to the pan and cook for another 3-5 minutes.
  4. Add the garlic and ginger paste and cook for another 2-4 minutes.
  5. Mix the dry spices with a little water to make a paste, then mix with the tomato paste, add to the pan and cook for another 3-5 minutes.
  6. Add the tinned tomatoes, reduce the heat and simmer for 15-20 minutes.
  7. Remove from the heat to cool. Heat the oven to 180°c (fan) and put the chicken in a roasting tray or oven dish and cover with tin foil, cook for 30-40 minutes until the chicken is cooked.
  8. Remove the chicken from the oven. Now blend the sauce with your immersion blender/food processor until smooth and return to a low heat.
  9. Remove the chicken from the baking dish with a slotted spoon into the sauce. Pour any remaining liquid in the baking tray into the sauce, cover with a lid and cook for 20+ minutes.
  10. Tikka break and have some curry.

Chicken tikka, tell me what’s wrong..

Another chicken tikka recipe to add the the masses.

It seems there’s a ton of claims as to where it originated, mainly either India, or the UK but it seems pretty conclusive whoever came up with it was of Indian decent.

The masala refers to the sauce, chicken tikka refers to the marinating and roasting of the chicken.

Supposedly here in England it’s one of our nations favourite dishes!

More recipes soon, feel free to message me with any recipe requests.

Join 1,121 other subscribers

Discover the Diversity of Basic ‘Slaw


The stuff that sounds like some kind of spot on your face; coleslaw (5 minutes)

A small pot of red cabbage coleslaw
A small portion of red cabbage ‘slaw

Coleslaw, it was only about 4/5 years ago I started eating this stuff and I fell in love with it.

Fresh, crunchy with a strong onion flavour, yah ples 😍

Ingredients (serves 4-8)

  • 1/4 of a white or red cabbage
  • 1 medium onion
  • 1 large carrot
  • Mayonnaise (home made or shop bought, will post a mayonnaise recipe later)
  • Salt & pepper

Equipment

  • Large bowl to mix everything
  • A sharp knife large enough to handle the cabbage or a mandolin slicer
  • Peeler
  • Chopping board
  • A fork comes in handy, or a wooden spoon
  • A cheese grater

Prep and cooking

  1. Slice the cabbage into thin strips, if you want crunchier coleslaw cut it a bit thicker.
  2. Slice the onion into thin strips, if you want a more prominent onion taste and again a crunchier coleslaw then cut it a bit thicker.
  3. Peel the carrot and grate with the cheese grater.
  4. Put everything in the bowl and add mayonnaise, how much is up to you I usually use about 7-8 tablespoons.
  5. Mix well and season with salt and pepper to taste.
  6. Eat, incorporate to another dish etc.

Cold sores and coleslaw

It turns out the two are (thankfully) in no way related. The term we use today (coleslaw) originated in the Netherlands in the 18th century from the Dutch saying ‘koolsa’ which translates to ‘cabbage salad’. When said with a Dutch accent the word ‘kool’ is pronounced ‘cole’.

Cold sores on the other hand are as it sounds, sores, usually around the mouth and you’ll be delighted to know that it’s a nicer term for oral herpes.

Yes oral herpes, we’ve probably all had it at some point and apparently67% of the worlds population have it at any given time, but don’t worry it’s not the same as genital herpes(!)

Mix up ya ‘slaw

So anyway enough about herpes, back to the food.

As I said I was never a great fan of coleslaw and I find it’s got quite a marmite opinion (love it or hate it) but after actually knocking some up myself and trying it I got completely hooked.

My favourite thing about it is it’s diversity which is something I usually look for in recipes / ingredients.

Keep you’re eyes out for updates to this recipe and I’ll start to document the hundreds (thousands?) of variations of coleslaw I’ve seen over the years or get involved with your own take in the comments.

When you start to diversify a bit you’ll see how it can become an a compliment to almost any dish, for example an apple slaw in pulled pork burgers, a celery slaw for a fish dish, I could go on all day but I’ll leave that part up-to you for now.

Join 1,121 other subscribers

How to make a McDonalds double cheeseburger even better than McDonald’s


McDonald’s double cheeseburger (5-10 minutes)

Ingredients (makes 1 double cheeseburger)

  • 100g mince beef (preferably 20% fat)
  • 1 burger bun (brioche is nicest)
  • 2 slices of burger cheese
  • 1/4 of a medium onion, finely diced
  • Pickled gherkin, sliced (optional)
  • Ketchup
  • American mustard
  • Salt and pepper (preferably sea salt)

Equipment

  • Non-stick or seasoned iron pan
  • Baking paper, about an a4 sheet
  • Fish slice / spatula
  • Hob to cook on
  • Microwave (not essential)

Prep and cooking

  1. Start by making the burgers, just 50g for each pattie (McDonald’s only use 45g!) roll each one into balls, like big meatballs, then fold the baking paper in half and put one of the balls the the centre of one half. Fold the paper back over and push down hard on the ball with the palm of your hand so it pushes down to make a burger Pattie, it should be quite thin. Season well with salt and pepper on both sides then repeat so you have 2.
  2. Get the pan nice and hot on a high heat and lightly toast the brioche bun, just put the flat (inside) parts of the bun in the hot pan and move it around with your fingers for 20-30 seconds, watch out it’s easy to burn it!
  3. When the bun is ready wipe the crumbs out of the pan and put it back on the heat until it start to smoke a little.
  4. If you used 20% fat mince you won’t need any oil in the pan, if you didn’t add a little splash (about 1/2 a tsp). The put the first burger in the pan and let it cook for 20-30 seconds. Then with the fish slice/spatula push down firmly on the top of the burger for about 3 seconds. It’ll sizzle a lot, that’s the fat reacting with the heat, the flip the burger and cook the other side for another 30 seconds or so, give it another like push on the top before taking out and placing on the bottom bun.
  5. Leave the pan on the heat and put a slice of cheese on top of the burger you just cooked, then cook the second burger the same as the first (unless you’re using a pan bug enough for 2 burgers). When it’s ready put it on top of the other burger and put the other slice of cheese on top.
  6. If you’re using gherkins put some slices on top of the top burger. The put an X of ketchup and an X of mustard on the top so they overlap, it should look a bit like a star.
  7. Put the diced onion on top of the sauces and put the top bun on, then put it in the microwave for 10-15 seconds.
  8. Ding! McDonald’s goodness in your own home.

The worlds most popular burger?

Dividing options worldwide, love it or hate it you can’t deny the addictive taste of a McDonald’s burger.

After making these homemade double cheeseburgers you might notice that the main taste you get from an actual McDonald’s burger is the onion, ketchup and mustard.

Do they use real meat? Who knows, I live in England and (currently) our food standards (should) ensure it is, but who fucking knows?

The cost of one of these homemade double cheeseburgers comes in at around 75p so about half the price of one you’d buy from the shop, these ones are actually served hot too!

So there you have it, culinary genius, or planet destroying clown food, the double cheeseburger.

Things you might not know about McDonald’s

  • They own Krispy Kreme
  • In America there are about 1.5 times more McDonald’s than hospitals
  • The yellow M is supposedly more recognised that the cross (religion)
  • In Sweden there is a ski through McDonald’s

Money grabbing bastards!