Thai green chicken curry recipe

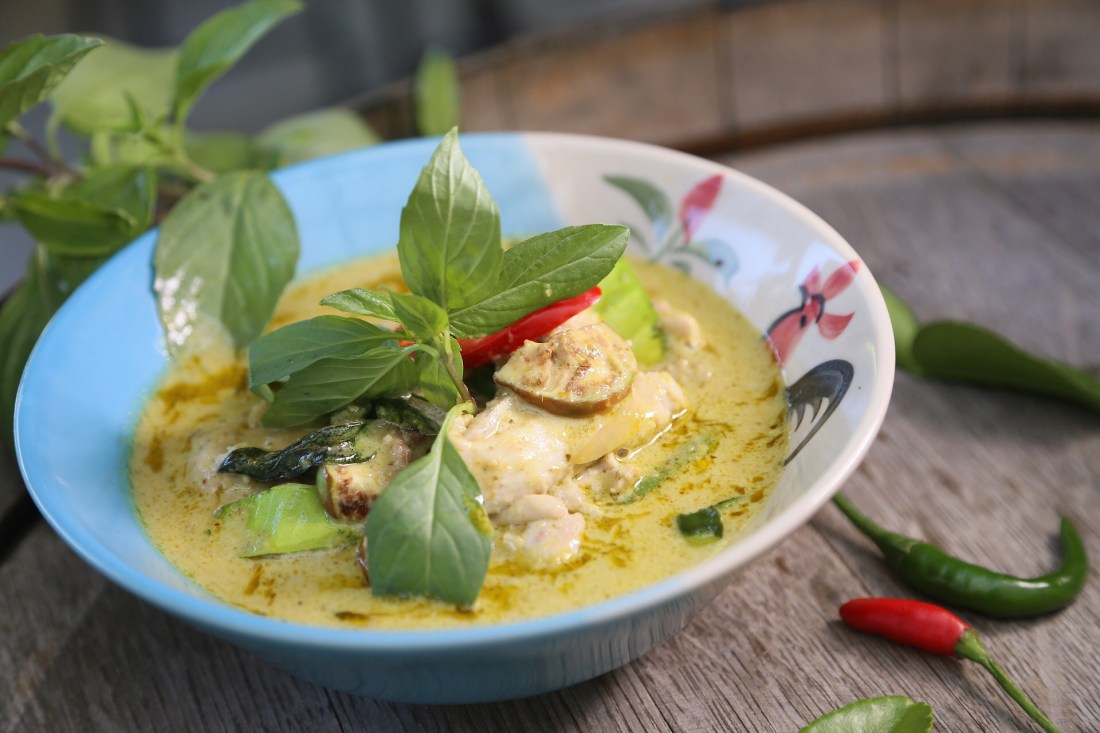
This is a follow up from the last post (Thai green curry paste)

I love the distinct flavour of a Thai curry, get one up on the takeaways with this fairly simple recipe, let’s get to it!

Ingredients (serves 6-8)

  • 500-800g of diced chicken, white or brown meat is fine
  • 1 tin of coconut milk (about 400g)
  • 1 large onion or 2 medium finely diced
  • 2 limes
  • 200-300g mangetout, or sliced green beans
  • 2-4 tbsp thai fish sauce
  • 1-2 tbsp light soy sauce
  • 2-4 tbsp green Thai curry paste
  • 1-2 tsp sugar
  • 100-200g new potatoes
  • 1-2 chicken stock cubes
  • A good handful of Thai basil, or basil
  • Oil for cooking, I use sunflower or groundnut
  • Salt and pepper

Equipment

  • Knife
  • Chopping board
  • A wok, or frying pan
  • Saucepan
  • Slotted spoon
  • Measuring jug

Prep and cooking (30-40 minutes)

  1. Start by boiling a pan of water with some salt, when it’s at a rolling boil add the beans and cook for about 3 minutes, remove with a slotted spoon and put in a measuring jug, run under a cold tap until the beans are cold and drain the excess water, put to one side.
  2. Slice the potatoes in half/equal sized pieces and cook in the same water as the beans for 7-10 minutes until soft but not overdone. Run under cold water until cold, drain and put to one side.
  3. You can either do this after the first 2 steps or at the same time (just keep track of what you’re doing), heat some oil to a medium high heat in the wok/pan, when it’s nice and hot add the onion and stir/toss constantly for 1-2 minutes until starting to colour.
  4. add the Thai curry paste and cook for another 1-2 minutes while stirring.
  5. As the coconut milk and keep the heat high until it starts to bubble.
  6. Add the sugar, soy, fish sauce, stock cube and diced chicken. Turn the heat down low and simmer with a lid on for about 10 minutes (until the chicken is cooked).
  7. Zest the lime into the pot, add juice if desired (taste first).
  8. Before serving stir in some basil leaves while it’s hot but not on the heat about a minute before serving.
  9. Enjoy some Thai!

Ain’t nobody got Thai for that“

So there you have it, pretty simple and always a joy to eat.

Been busy with work the past few days but got some days off coming up so will hopefully get a few new recipes/guides up soon!

Thai green curry paste recipe

I’ve had a few requests for a Thai green curry, specifically one that uses ingredients that are easily obtainable in the UK.

I would advise making your own Thai curry paste as it packs more of a flavour punch, it’s cheaper than that from the shop and it’s more fun doing it yourself.

I thought I’d start with a Thai curry paste recipe, as a good curry paste (should) make a good curry!

To the recipe!

Ingredients (makes about 500ml)

  • 2-3 medium onions
  • 10-15 green chillis
  • Ginger paste (2-3 tbsp)
  • Garlic paste (2-3 tbsp)
  • 1-2 lemons
  • 2-4 limes
  • 2 tbsp coriander seeds
  • 1 tbsp ground cumin
  • 50ml Thai fish sauce
  • 20ml light soy sauce
  • 30-50g fresh coriander
  • 100ml olive oil

Equipment

  • A food processor, or,
  • A mixing bowl/measuring jug and an immersion blender

Prep (5 minutes)

  1. Zest and juice the lemons and lime into bowl.
  2. Dice the onion and add to bowl.
  3. Slice chillis, remove seeds if you don’t want it so hot and add to bowl.
  4. Lightly crush the coriander seed, add to the bowl with the rest of the ingredients.
  5. Blitz until smooth and keep in the fridge for upto 3-4 weeks.

Lemon squeezy

Nice and easy.

You can vary the amounts of ingredients depending on personal taste.

I’ll be doing a Thai green chicken curry recipe next so keep an eye out for it.

Looking at costing, the above recipe works out about £1.45 cheaper if you were to buy the same quantity from a supermarket, not too shabby!

Addictive apple crumble recipe


Crumbo!

Call it what you want, apple crumble always reminds me of Sunday’s when I was a kid, for me it’s with a big dollop of ice cream but custards always good.

Quick and easy (and delicious). This can be knocked up in about 30-40 minutes.

I will post a recipe with fresh apples soon, but I’ll be honest it tastes just as good with tinned apples.

Ingredients (serves 6-8)

  • 2 tins of sliced apples (about 600g, drained)
  • 500g self raising flour
  • 250g butter
  • 250g sugar (I usually use half caster, half demerara

Equipment

  • Mixing bowl
  • Knife
  • Oven dish big enough to hold everything.

Prep and cooking (30-40 minutes)

  1. Heat the oven to about 170°c (fan)
  2. Make the crumble, put the sugar and flour it a bowl. Cut the butter into cubes and add to the bowl, rub it all together with your fingertips until it looks like crumble, it should take 3-5 minutes.
  3. Empty the apples into the dish.
  4. Lightly cover with all the crumble (don’t push it down as it will all push together and cook as a big lump instead of crumble.
  5. Cook for 30-40 minutesnuntil golden brown
  6. Enjoy!

Tooty frooty; an apple that plays the trumpet.

Fiendishly simple, and just as tasty.

Apple crumble has been a classic since around world war 2, where rations meant it more economical than pies, to cut costs even more sometimes half the flour would be replaced with oats, which can add a nice texture.

Although it’s common to be sweet, crumble can also be savoury, such as a fish or vegetable crumble.

Hope you enjoy!

More recipes soon

Champion chips recipe


Chippy chips chips, everyone loves chips!

If you don’t, then you probably should but I’m not one to judge.

What with storms taking over the past few weekends, why not have a go at these chunk-a-dunk homemade chips.

This is my favourite recipe for mouth watering moreish chips.

CHIPS!

Ingredients (serves 1-2)

  • 4 large potatoes, russets come out well
  • 2 medium onions
  • 1 bulb of garlic
  • Handful of fresh thyme on the stalk
  • Handful of fresh rosemary on the stalk.
  • Oil, I usually use rapeseed or sunflower (enough to deep fry)
  • Salt and pepper (preferably sea salt)
  • Water

Equipmmet

  • Medium/large saucepan, if you have 2 it speeds things up a bit
  • Roasting tray/oven dish
  • Knife
  • Chopping board
  • Collider or slotted spoon
  • Plate
  • Kitchen towel
  • If you have a deep fat fryer it helps, if not we just use a saucepan on the hob

Prep and cooking (25-30 minutes)

  1. Start by peeling the potato and cutting the chips, I haven’t done a guide for this yet I’ll try and get one up tonight, but it’s similar to a julienne slice. I cut them quite thick, about 1 inch squares and usually get 4-6 chips from 1 potato.
  2. Put the chips the a saucepan, slice the onions into quarter and add to the pan (skin still on).
  3. Separate the cloves from the bulb on garlic and roughly crush them, add to the pan (skin still on).
  4. Add the rosemary, thyme and a fair amount of salt.
  5. Fill with water until everything is covered and put on a high heat to boil.
  6. Either turn on your deep fat fryer (180°c) or fill another saucepan with oil and put on a high heat.
  7. As the potatoes come up to boil turn the heat down but only slightly. Keep an eye on them but they should need about 5-10 minutes depending how thick you’ve cut them (thinner will cook quicker). You want them to be at the point of nearly being ready to mash, but still hold their shape enough to manoeuvre.
  8. When they are ready either drain with a colander and put the chips on a wire rack/chopping board or remove from the pan with a slotted spoon.
  9. Let them cool for a minute or two then deep fry for 3-5 minutes until golden brown, if using a saucepan turn the heat down slightly when you add the chips, and before adding test the oil is hot enough by holding a chip and dipping it in.
  10. Remove when ready and put on a plate/bowl with kitchen towel. You can get them warm in the oven but they will lost their crispness overtime, but they will become nice and soft.
  11. If you want to make these to freeze, only half cook them when deep frying, clean of oil and freeze. To finish them off just add to hot oil straight from the freezer or defrost first.

Chip chip horay!

Now you can enjoy top notch chips all day long.

It seems that chips, or fries first started showing up in Latin America around the 17th century.

Here in England the first chips that were commercially available were reportedly made by a mrs.’Granny’ Dulce in 1854, more than 100 years after Latin America.

This started the English fast-food tradition of what we know and love today as fish and chips.

More recipes to come!

Takeaway style garlic and herb dip recipe


I would class this as a major comfort food but I do love garlic.

Shockingly easy to make, garlic and herb dip goes well with nearly anything, especially any form of potato or a kebab.

Let’s get to it!

Ingredients

  • Mayonnaise (homemade or shop bought)
  • Garlic paste
  • Mixed dried herbs
  • Salt and pepper (optional, I wouldn’t say it needs it)

Equipment

  • Mixing bowl
  • Whisk or wooden spoon
  • Desert spoon

Putting it together (2 minutes)

  1. Put the desired amount of mayonnaise in the mixing bowl.
  2. Put the desired amount of garlic paste in the mixing bowl, I usually go quite heavy on it.
  3. Add dried herbs, it’s easy to overdo as the herb taste can completely overpower everything so it’s best to just add a little at a time.
  4. Mix!
  5. Add salt and pepper if you think it needs it.
  6. Eat a gallon of the stuff.

Where does garlic go for a drink?

The salad bar.

Nope, I don’t get it either, but apparently it’s a garlic joke that I found online.

But there you have it! 4 (or 5(or 6)) simple steps to garlic and herb dip.

Just don’t overdo the herbs, if you want to make your own I’ll be posting a mayonnaise recipe next so keep an eye out.