The segments of pepper should quite easily come off as you pull them back, if not just use a knife to slice them away from the pith.
Trim the Pith
Tear off the inner parts with pith attached, lay them on their sides and cut the pith out.
And there you have it, a bell pepper prepped and ready to use, i like to roast them and store them in a jar in the fridge (will post a recipe for this soon).
Probably one of my favourite vegetables (i know technically a fruit but oh well).
A very versatile ingredient, so i thought i’d do a little guide on how i usually prepare them.
1.Take it’s hat off
Start by slicing off the top, try to cut through the bottom part of the stem.
2.Take out the insides
Next remove the seeds and any pith (white bits) that you can grab with your fingers.
You don’t have to take out the pith, it’s perfectly edible unlike citrus fruits where it’s very bitter. A common misconception is that you can’t eat the pith on bell peppers, removing it is just down to personal preference.
Cut the Pith out
With a knife slice along the edges of the pith on the inside of the pepper.
Following up on how to butcher a whole chicken (and save £££) when you butterfly a chicken breast it will cook twice as fast because of the larger surface area and it’s not as thick.
It’s a good skill to know if you ever want to stuff a chicken breast and it generally looks nicer on a plate.
It’s pretty simple and gets a lot easier with practise.
Where to make the incision
Firstly where to actually cut the breast, the incision will be made on the outside of the breast, if you’re unsure which is the outer side look at the underside of the breast, where in inner fillet is (or was if you’ve removed it) is the inner side, so the opposite side to that one.
Making the Cut
Slice into the side of the breast about 3/5’s of the way in, then open the breast up and slice down the centre to open it out fully.
Stuff, cook, marinade etc
As you can see this gives a lot more surface area so marinades get more absorption, it’s also good for stuffing as it creates a pocket.
Liquid glucose is pretty much what it says it is, liquid sugar.
It’s used mainly for confectionary, adding liquid glucose to something that already has glucose (sugar) will (or should) stop the sugar from crystallising.
I recently put up a recipe for fudge which calls for liquid glucose, buying it from a shop can be surprisingly expensive, about £2 for 140g whereas making it cuts the cost down to £1 for about 500-700g.
Ingredients (makes about 600g)
500g sugar, granulated has a lower chance of crystallising but I’ve always used granulated
200ml water
5g cream of tartar
2-4g citric acid, or lemon juice
Equipment
Saucepan
Something to put the glucose in, I use glass jars
Wooden spoon
Prep and cooking (10+ minutes)
Put all the ingredients in a pan on a low heat and stir gently until everything has dissolved.
Leave the heat low and cook for anywhere between 5-35 minutes, I like to use as low a heat as possible. It should thicken up when it’s ready. Remember to stir occasionally.
Transfer to jars or whatever you’re using to store it in.
It depends on how you define perfect, but when I say it I mean rice that is fluffy and doesn’t stick together or go all claggy.
The solution is shockingly simple, you just need to steam it through after cooking.
This requires no extra or special equipment, other than a bit of tinfoil (enough to cover the pan)
Let’s get to it!
What you need
Rice
Saucepan
Water
Tinfoil
How to get perfect rice every time
As you probably know all types of rice cook differently.
When it comes to the amount of water to use a ratio of 1:2.5 is usually a good starting point, so for every 1g of rice use 2.5x more water, e.g. for 100g rice use 250ml of water. For 237g of rice use 593ml of water etc.
Nearly all rice has a recommended cooking time on the packet, which is a handy guideline.
Bring the rice to the boil in 2.5x the amount of water, as it starts to boil turn the heat down low, put a lid on the pan (that fits) and simmer for the ‘recommended cooking time’ on the packet minus 1 or 2 minutes.
Before you turn the rice down to simmer make sure you stir the bottom with a wooden spoon to make sure nothing sticks and burns to the pan.
Once cooked simply turn the heat off and leave the pan there for 30 minutes with the lid still on.
I prefer to remove the lid 1-2 minutes before it’s cooked and wrap some tinfoil tightly round the top.
Leaving the rice covered and on the gradually lowering heat steams it through, when you uncover it 95% of the time you should have perfectly cooked rice 👌
A somewhat unnecessary skill, that said if you’ve got 200 eggs to crack and you can do 2 at a time (1 in each hand) it’s definitely speeds things up.
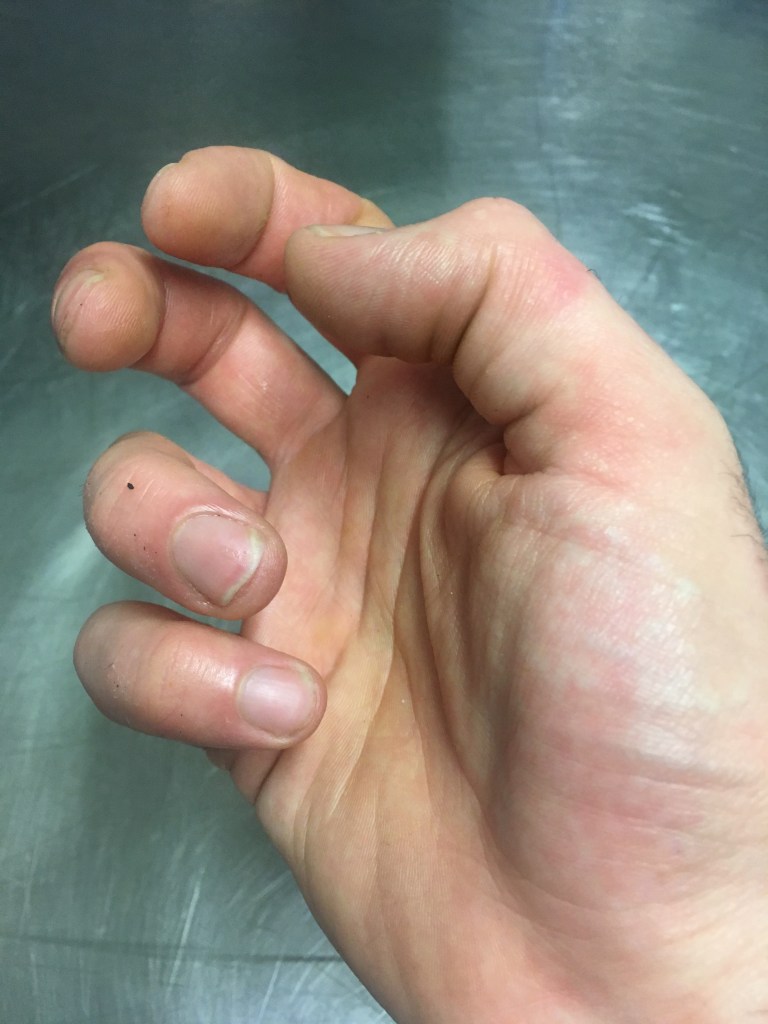
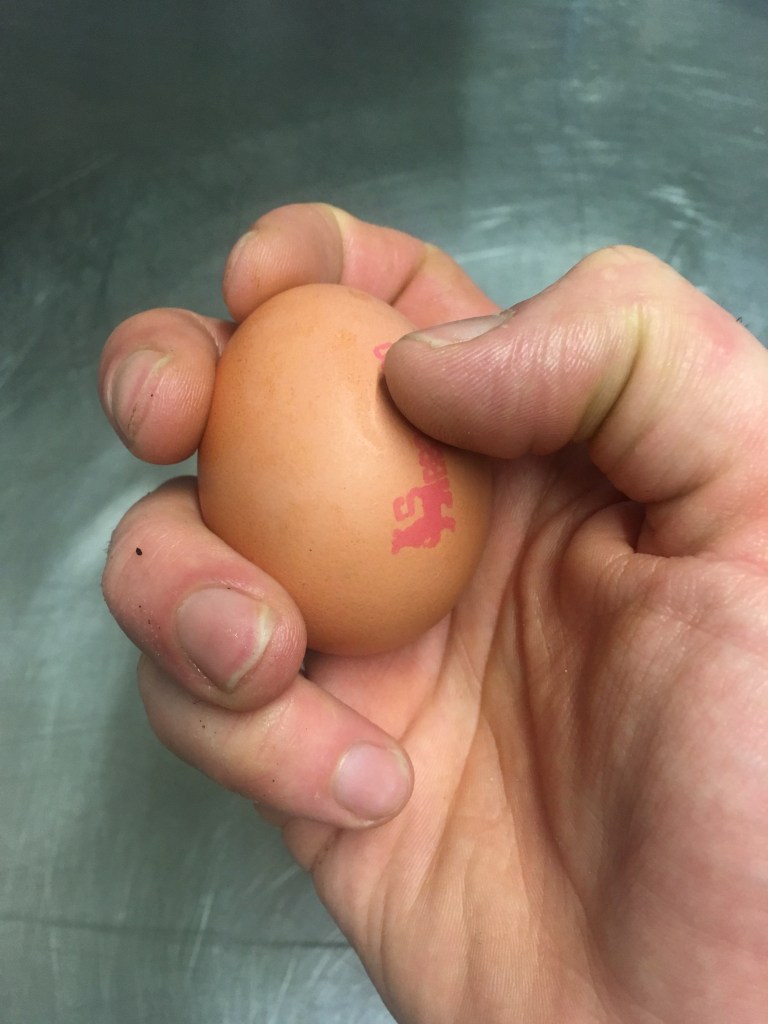
How to hold the egg
First how to hold it, here’s a few pictures with and without the egg. you want to grip the bottom half of the egg with your 3rd finger and the top half with you thumb, index and middle finger.
Cracking the egg
up with thumb, down with last 2 fingers
Before actually cracking the egg its good to get the hang on the hand motion you need to do.
First practise pulling inward with your 3rd and little finger whilst (trying) to keep the rest of your hand stationary.
Then at the same time move your thumb upwards. When doing this with the egg the thumb pulls the top of the egg open whilst the last 2 fingers pull the bottom half open.
Now to put it into action, hold the egg and make a crack halfway through it, pull it open with your fingers and throw away the shell.
crack the egg!
Any problems give me a message, but keep in mind it takes a little bit of practise, i probably use anywhere from 10-100 eggs a day(!)
When a recipe calls for you to ‘rub in’ the flour and butter, it’s a simple task but if you don’t know how to do it then this short guide should help.
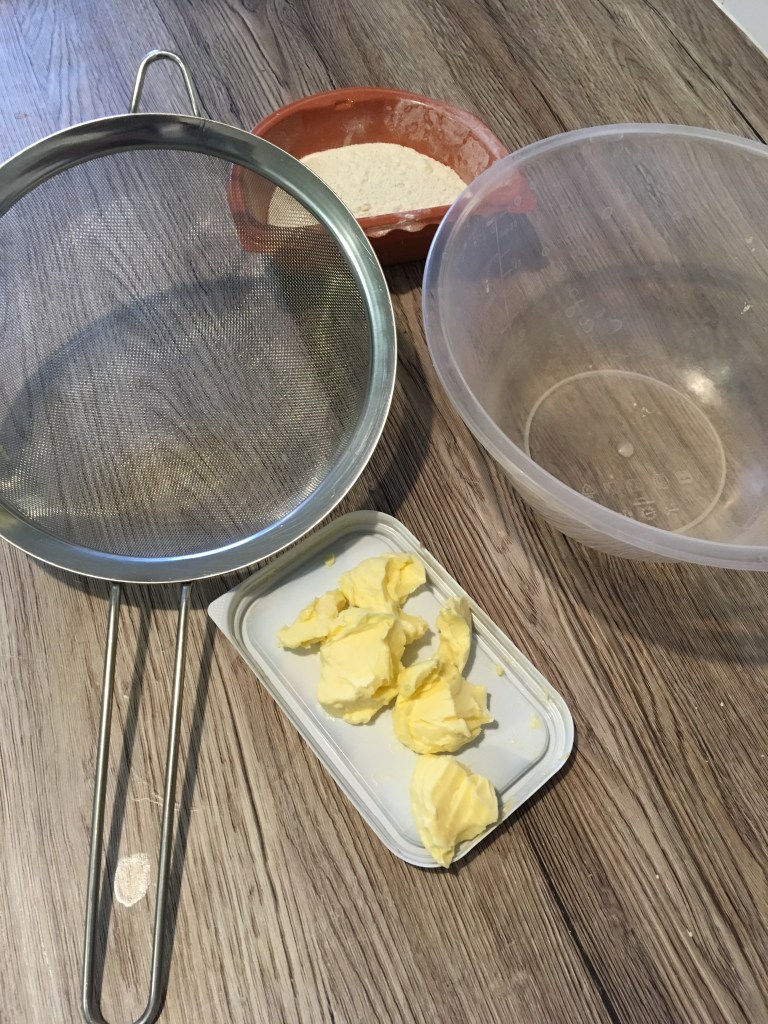
What you need
Mixing Bowl
Sieve
Flour
Butter
In this example i’m using 100g of flour and 50g of butter (half fat to flour) which will result in a crumble mix with no flavour/sweetness, but its just for explanation purposes.
What to do
First, the actual motion of rubbing in, i make a circular motion with my thumb into the other 3 fingers like this
rubbing in hand movement
You don’t have to sift the flour, but i like to as it removes any lumps.
Sift flour
Add the butter and coat it with the flour.
coat the butter with flour
Now start to pinch and rub the butter, like with the motion we learnt at the start.
As it all comes together start to rub it against your hands, it should be a pale golden/yellow colour and looks a bit like breadcrumbs.
Both from the same species, apparently it’s a kind of wild cabbage. (Brassica oleracea)
Cutting them up is easy enough, it’s just knowing the best point of attack, over 100s/1000s of cauliflowers this seems to be the fastest and most efficient method I’ve come up with.
First remove the leaves
Put the cauliflower on a chopping board root factor jug down and from the top use your hands to get underneath the leaves, work to the bottom, squeeze the leaves together at the root and pull, they can be quite too thick so try giving the cauliflower a twist if the don’t come loose.
remove the leaves
Cut around the root
I’ve not done the best job with the camera angle here but it should make sense. Take a knife and insert into one edge of the root, then cut round in a circular motion whilst moving the knife up and down, this should result florets with the top still in tact.
cut around the root
Trim the top
Cut the remaining florets off from the top.
trim the top
Tidy up
So the cauliflower all cook evenly you want the florets to be similar sizes, so take the larger florets and cut them in half.
similar size=even cooking
“I keep randomly shouting out ‘Broccoli’ and ‘Cauliflower'”
The doctor said it might be florets.
Make sure you’ve got a nice sharp knife for this, the toughest part is piercing and cutting around the root but it doesn’t take long to get the hang of, once mastered this method can prep a whole cauliflower in about 30 seconds.
More prep guides coming soon, if you have a request for a particular prep guide give me a message on Facebook.
The holy cabbage, maybe not so holy but more leafy.
The savoy is a lovely, leafy winter vegetable named after the Savoy region in France, though apparently it originated in England and/or The Netherlands.
When cooked (which is generally needs) it holds its texture much better than regular white or red cabbage, which are better to eat raw (I.e. coleslaw, savoy can still be used for coleslaw).
It keeps in the fridge for a good few weeks, not quite as long as the normal red/white cabbage.
Try to keep it dry when storing, any moisture will make the cabbage deteriorate quicker.
It pairs up well with so many flavours, so let’s crack on with how to slice these leafy beasts up, all in all when you get the hang of it it should take about 3-5 minutes to slice a whole Savoy cabbage.
Remove the loose leaves
These are the outer leaves that are a darker green than the inner cabbage. You want to peel back until you have a tight head of leaves.
remove the loose outer leaves
Cut the stems from the middle of the outer leaves
Take the outer leaves you have just removed and 1 by 1, cut out and remove the centre stem of the leaves. You don’t have to do this but it’s perfectly edible.
Remove the centre stem from the outer leaves
Slice the outer leaves
Pile these on top of each other and with a sharp knife slice/shred and put to one side.
slice the savoy
Trim the root
Return to the head of cabbage and put it on its side, cut the extended bit of root off.
trim the root
Cut into quarters
Place the cabbage top down so the trimmer root is now face no upwards. Cut the cabbage directly in half, then cut each half in half, so each quarter has a quarter of the root at the bottom.
cut into quarters
Remove theroot
Now, at about a 45° angle, cut the root out of each quarter so you’re left with 4 wedges of Savoy cabbage.
Remove those roots
Finish up, choppy chop chop
Now, 1 by 1 take each wedge and slice as thick or as thin as you wish. Add to a pot of boiling water for about 10 minutes for simple cooking, I’ve got some great recipes involving a nice bit of savoy, will get round to uploading eventually!
A Julienne slice is essentially match sticks, but it’s a handy cut to know.
It comes in handy for a number of uses including chips and dicing,
While cutting chips is the same principle, a julienne slice tends to be much thinner but I’ve just done a fairly rough cut in the examples.
Trim the edges
Something you should never ask a cockney Gardner to do, unless you want to come back to no hedges, first we need to trim the edges so we have flat surfaces to work with.
Depending on the size of the carrot, cut it in half and the down 1 of the long sides cut about 5-10mm in, so you end up with a flat edge along one side. Then turn the carrot flat side down and repeat with the other 3 sides, so you’re left with a rectangle of carrot.
1.cut a manageable size then trim the edges
Slice into sticks
Now for the julienne slice, you can make them as thin as you like, but 2 slices on the top and 2 on the side is usually a good place to start.
Put the carrot flat on the chopping board and make 2 cuts lengthwise, then turn these 90° and stack them up again and make 2 more lengthway cuts. (In the example I only made 1 slice on the second cuts because it’s a small carrot)
3.lengthway slices to make sticks, or a julienne slice
What about the leftovers?
With the 4 slices the remain from the edge of the carrot you can either add them to a stock/soup, use them for a carrot purée/mash or cut them into more julienne slices for cooking, eating or dicing.